Nikon COOLPIX W300 Quick Start Guide - English for customers in the Americas - Page 19
Camera Setup
 |
View all Nikon COOLPIX W300 manuals
Add to My Manuals
Save this manual to your list of manuals |
Page 19 highlights
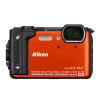
Camera Setup 1 Press the power switch to turn on the camera. • Use the multi selector to select and adjust settings. Power switch Multi selector Up Left k button (apply selection) d button • A language selection screen will be displayed. Use the multi selector HI to highlight a language and press the k button to select. • The language can be changed at any time in the setup menu (A19) M Language. Down Language Right Cancel 2 When the dialog on the right is displayed, follow the instructions below and press the d button or the k button. • If you will not establish a wireless connection with a smart device: Press the d button and proceed to step 3. Use SnapBridge to send photos to your smart device and share them online. To skip this screen and set SnapBridge later from the Network menu, press MENU. Later Set • If you will establish a wireless connection with a smart device: Press the k button. See the included "SnapBridge Connection Guide" for the setup procedure. When you establish a wireless connection using the SnapBridge app, you can upload images captured with the camera to a smart device or perform remote photography. 3 Use HI to select Yes when prompted to set the camera clock, and then press the k button. Getting Started 7
-
 1
1 -
2
-
3
-
4
-
5
-
6
-
7
-
8
-
9
-
10
-
11
-
12
-
13
-
 14
14 -
 15
15 -
 16
16 -
 17
17 -
 18
18 -
 19
19 -
 20
20 -
 21
21 -
 22
22 -
 23
23 -
 24
24 -
25
-
26
-
27
-
28
-
29
-
30
-
31
-
32
-
33
-
34
-
35
-
36
-
37
-
38
-
39
-
40
-
41
-
42
-
43
-
44
-
45
-
46
-
47
-
48
-
49
-
50
-
51
-
52
 |
 |
