Nikon WT-1A User Manual - Page 38
Status, Wireless LAN, Uploading Pictures, Transceiver, Server, Proxy, PASV mode
 |
UPC - 018208252923
View all Nikon WT-1A manuals
Add to My Manuals
Save this manual to your list of manuals |
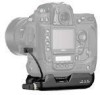
Page 38 highlights
FTP Server Address: 192.168.1.3 1 Folder: / 2 User User ID: anonymous Password: Proxy Disabled PASV mode Disabled 1 Enter address assigned ftp server ( 27). 2 Choose "/" to upload to root directory on ftp server ( 28). Uploading Pictures This section describes how to upload pictures as they are taken. For best results, the WT-1 and wireless LAN adapter should be within a few meters with no obstacles between them. 1 Select On for the Wireless LAN > Transceiver option in the camera setup menu. SET UP Wireless LAN Transceiver OFF Off ON On OK 2 Confirm that a connection has been established. To check the connection from the camera, select Status from the Wireless LAN menu and confirm that "Connected" is displayed next to "Status." For information on what to do if the camera shows "Not connected" or "Failure," see "Troubleshooting" ( 34). SET UP Wireless LAN Status Link quality Signal level Now sending Remaining Time left Connected 0 Frames 0 s 31
-
 1
1 -
2
-
3
-
4
-
5
-
6
-
7
-
8
-
9
-
10
-
11
-
12
-
13
-
14
-
15
-
16
-
17
-
18
-
19
-
20
-
21
-
22
-
23
-
24
-
25
-
26
-
27
-
28
-
29
-
30
-
31
-
32
-
 33
33 -
 34
34 -
 35
35 -
 36
36 -
 37
37 -
 38
38 -
 39
39 -
 40
40 -
 41
41 -
 42
42 -
 43
43 -
44
-
45
-
46
-
47
-
48
-
49
-
50
-
51
-
52
-
53
-
54
-
55
-
56
-
57
-
58
-
59
-
60
-
61
-
62
-
63
-
64
-
65
-
66
-
67
-
68
-
69
-
70
-
71
-
72
-
73
-
74
-
75
-
76
-
77
-
78
-
79
-
80
-
81
-
82
-
83
-
84
-
85
-
86
-
87
-
88
-
89
-
90
-
91
-
92
-
93
-
94
-
95
-
96
-
97
-
98
-
99
-
100
-
101
-
102
-
103
-
104
-
105
-
106
-
107
-
108
-
109
-
110
-
111
-
112
-
113
-
114
-
115
-
116
-
117
-
118
-
119
-
120
-
121
-
122
-
123
-
124
-
125
-
126
-
127
-
128
-
129
-
130
-
131
-
132
-
133
-
134
-
135
-
136
-
137
 |
 |
