Nintendo WII REMOTE Operation Manual - Page 3
Synchronizing your, Wii Remote Plus with the Wii console, Installing Batteries, Setup of the Wii - jacket
 |
UPC - 045496890162
View all Nintendo WII REMOTE manuals
Add to My Manuals
Save this manual to your list of manuals |
Page 3 highlights
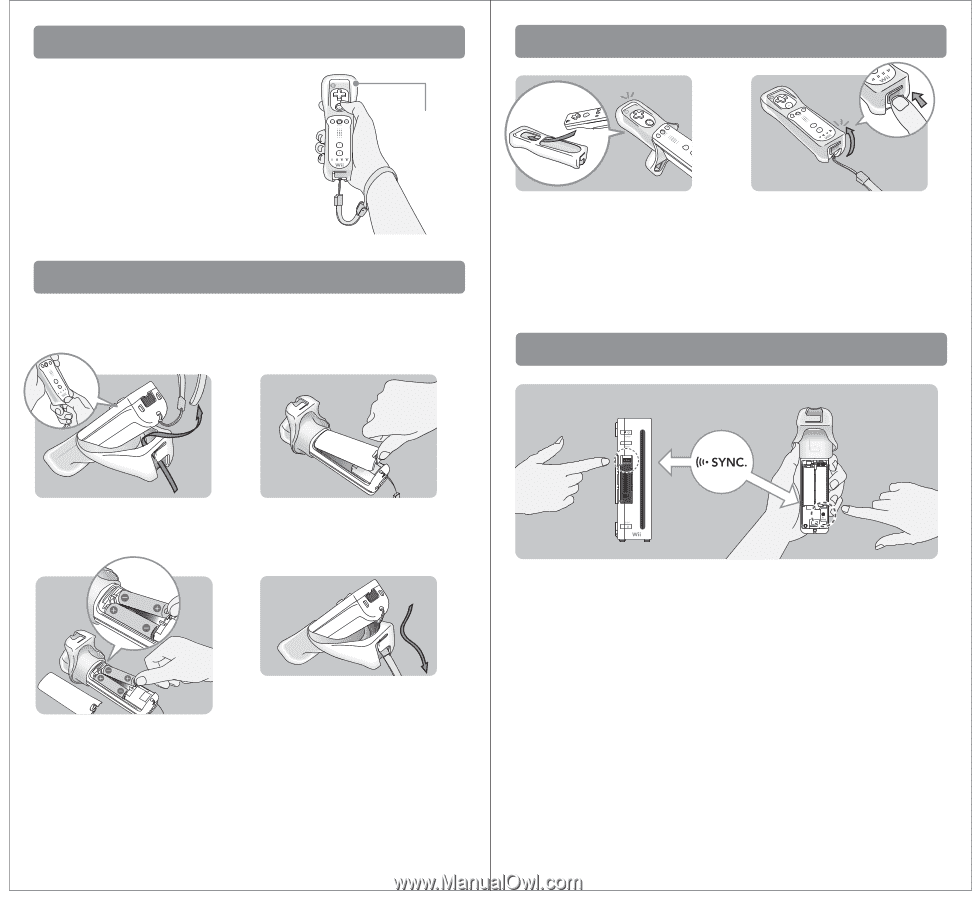
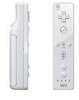
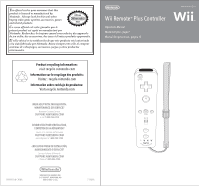
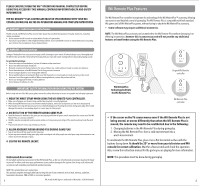
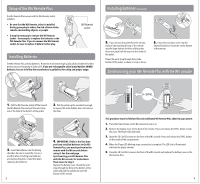
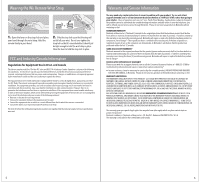
Setup of the Wii Remote Plus The Wii Remote Plus comes with the Wii Remote Jacket installed. • Be sure that the Wii Remote Jacket is installed during gameplay to reduce the risk of harm to the remote, surrounding objects, or people. • It may be necessary to remove the Wii Remote Jacket - for example, to replace the batteries in the Wii Remote Plus. If you do remove the Wii Remote Jacket, be sure to replace it before further play. Wii Remote Jacket Installing Batteries The Wii Remote Plus uses AA batteries. Nintendo recommends high quality alkaline batteries for best performance and longevity of battery life. If you use rechargeable nickel metal hydride (NiMH) batteries, be sure to follow the manufacturer's guidelines for safety and proper usage. Installing Batteries (continued) 5. If you remove the jacket from the remote, replace it by inserting the top of the remote into the large hole on the front of the jacket. Be sure to push it all the way into the inside of the jacket. Thread the wrist strap through hole in the bottom of the jacket, as shown in step 4, above. 6. Insert the connector cover into the External Extension Connector on the bottom of the remote. Synchronizing your Wii Remote Plus with the Wii console 1. Pull the Wii Remote Jacket off the base of the Wii Remote Plus and pull the wrist strap out of the hole in the bottom of the jacket. 2. Pull the jacket up the remote far enough to expose the entire battery door and remove the door. 3. Insert the batteries into the battery chamber. Be sure to insert the minus (-) end first when inserting new batteries, and remove the plus (+) end first when replacing the batteries. 3 4. IMPORTANT: If this is the first time you have installed batteries in the Wii Remote Plus, you must synchronize the remote with the Wii console before using it. See the next page, Synchronizing your Wii Remote Plus with the Wii console, for instructions. Then return to Step 4. Replace the battery cover, thread the wrist strap through the hole in the bottom of the jacket and pull the jacket back over the bottom of the remote. This procedure must be followed for each additional Wii Remote Plus added to your system. 1. Press the Power button on the Wii console to turn it on. 2. Remove the battery cover on the back of the remote. Press and release the SYNC. button inside the cover. The Player LEDs will blink. 3. Open the SD Card Slot cover on the front of the Wii console. Press and release the SYNC. button on the inside of the compartment. 4. When the Player LED blinking stops, connection is complete. The LED that is illuminated indicates the player number. 5. Close the SD Card Slot cover on the front of the Wii console and replace the battery cover on the Wii Remote Plus. 4
-
 1
1 -
 2
2 -
 3
3 -
 4
4
 |
 |