Nokia 1661 Download Nokia 1661 User Guide in US English / Spanish - Page 4
Get started - charger
 |
UPC - 758478016619
View all Nokia 1661 manuals
Add to My Manuals
Save this manual to your list of manuals |
Page 4 highlights
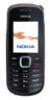
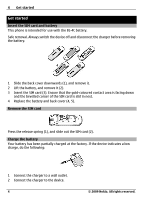
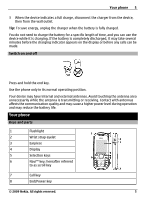
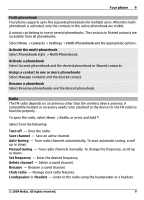
4 Get started Get started Insert the SIM card and battery This phone is intended for use with the BL-4C battery. Safe removal. Always switch the device off and disconnect the charger before removing the battery. 1 Slide the back cover downwards (1), and remove it. 2 Lift the battery, and remove it (2). 3 Insert the SIM card (3). Ensure that the gold-coloured contact area is facing down and the bevelled corner of the SIM card is slid in next. 4 Replace the battery and back cover (4, 5). Remove the SIM card Press the release spring (1), and slide out the SIM card (2). Charge the battery Your battery has been partially charged at the factory. If the device indicates a low charge, do the following: 1 Connect the charger to a wall outlet. 2 Connect the charger to the device. 4 © 2009 Nokia. All rights reserved.
-
 1
1 -
 2
2 -
 3
3 -
 4
4 -
 5
5 -
 6
6 -
 7
7 -
 8
8 -
 9
9 -
 10
10 -
11
-
12
-
13
-
14
-
15
-
16
-
17
-
18
-
19
-
20
-
21
-
22
-
23
-
24
-
25
-
26
-
27
-
28
-
29
-
30
-
31
 |
 |
