Nokia 7160 Nokia 7160 User Guide in English - Page 16
Before you begin, • Attach your battery, • Charge your battery
 |
View all Nokia 7160 manuals
Add to My Manuals
Save this manual to your list of manuals |
Page 16 highlights
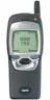
Before you begin 2. Before you begin • Attach your battery Prior to using your phone, the battery must be installed and charged. Grasp the phone near the display (rather than on the slide mechanism). Place the battery in the grooves on the back of your phone. Then slide the battery upward until it clicks. Note: Use only those batteries approved by the phone manufacturer. See "Using batteries and chargers" on page 112. • Charge your battery 1. With your phone on or off, connect the lead from the charger to the bottom of the phone. 2. Connect the charger to an AC wall outlet. The battery indicator bar starts to scroll after a few seconds. 3. Disconnect the charger from the phone and AC outlet when the battery is fully charged. Note: When the indicator bar stops scrolling, the battery will accept a "trickle charge" for an additional 2 hours until it is 100% fully charged (except BMS-2V). See "Charging Times" on page 96 for more information. Important battery information: • Recharge your battery only with the chargers approved by the manufacturer. • The phone can be used while charging if the phone is switched on. [ 5 ]
-
 1
1 -
2
-
3
-
4
-
5
-
6
-
7
-
8
-
9
-
10
-
 11
11 -
 12
12 -
 13
13 -
 14
14 -
 15
15 -
 16
16 -
 17
17 -
 18
18 -
 19
19 -
 20
20 -
 21
21 -
22
-
23
-
24
-
25
-
26
-
27
-
28
-
29
-
30
-
31
-
32
-
33
-
34
-
35
-
36
-
37
-
38
-
39
-
40
-
41
-
42
-
43
-
44
-
45
-
46
-
47
-
48
-
49
-
50
-
51
-
52
-
53
-
54
-
55
-
56
-
57
-
58
-
59
-
60
-
61
-
62
-
63
-
64
-
65
-
66
-
67
-
68
-
69
-
70
-
71
-
72
-
73
-
74
-
75
-
76
-
77
-
78
-
79
-
80
-
81
-
82
-
83
-
84
-
85
-
86
-
87
-
88
-
89
-
90
-
91
-
92
-
93
-
94
-
95
-
96
-
97
-
98
-
99
-
100
-
101
-
102
-
103
-
104
-
105
-
106
-
107
-
108
-
109
-
110
-
111
-
112
-
113
-
114
-
115
-
116
-
117
-
118
-
119
-
120
-
121
-
122
-
123
-
124
-
125
-
126
-
127
-
128
-
129
-
130
-
131
-
132
-
133
-
134
-
135
-
136
-
137
-
138
-
139
-
140
-
141
 |
 |
