Nokia NOKIA N76 User Manual - Page 30
Still image camera indicators, Video mode, Options, Image, Go to free memory, secondary camera, Print - pc suite
 |
View all Nokia NOKIA N76 manuals
Add to My Manuals
Save this manual to your list of manuals |
Page 30 highlights
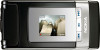
Camera 2 To activate the main camera, press . If the camera is in Video mode, select Options > Image mode. 3 To take a picture, press . Do not move the device before the image is saved. To zoom in or out, use the volume keys in your device. To make lighting and color adjustments before taking a picture, in the main display, press or to scroll to items on the active toolbar. In the cover display, press to activate the toolbar, and volume keys to scroll to items. See 'Setup settings-color and lighting', p. 33 and 'Scenes', p. 33. To free memory before taking a picture, select Options > Go to free memory in the main display (only available if you have copied images or video clips to another location using Nokia Nseries PC Suite). See 'Free memory', p. 40. To activate the front camera, select Options > Use secondary camera. To zoom in or out, press or . To take a picture, press the scroll key. To leave the camera open in the background, and use other applications, press . To return to the camera, press and hold the capture key. Still image camera indicators The still image camera viewfinder (main display) displays the following: 1 The current capture mode indicator. 2 The active toolbar, which you can scroll through before capturing the image to select different items and settings (the active toolbar is not displayed during image capture). See 'Active toolbar', p. 31. 3 The image resolution indicator indicates whether the quality of the image is Print 2M - Large, Print 1M Medium, or MMS 0.3M - Small. 4 The image counter displays the estimated number of images you can capture using the current image quality setting and memory in use (the counter is not displayed during image capture). 5 The device memory ( ) and memory card ( ) indicators show where images are saved. 30
-
 1
1 -
2
-
3
-
4
-
5
-
6
-
7
-
8
-
9
-
10
-
11
-
12
-
13
-
14
-
15
-
16
-
17
-
18
-
19
-
20
-
21
-
22
-
23
-
24
-
 25
25 -
 26
26 -
 27
27 -
 28
28 -
 29
29 -
 30
30 -
 31
31 -
 32
32 -
 33
33 -
 34
34 -
 35
35 -
36
-
37
-
38
-
39
-
40
-
41
-
42
-
43
-
44
-
45
-
46
-
47
-
48
-
49
-
50
-
51
-
52
-
53
-
54
-
55
-
56
-
57
-
58
-
59
-
60
-
61
-
62
-
63
-
64
-
65
-
66
-
67
-
68
-
69
-
70
-
71
-
72
-
73
-
74
-
75
-
76
-
77
-
78
-
79
-
80
-
81
-
82
-
83
-
84
-
85
-
86
-
87
-
88
-
89
-
90
-
91
-
92
-
93
-
94
-
95
-
96
-
97
-
98
-
99
-
100
-
101
-
102
-
103
-
104
-
105
-
106
-
107
-
108
-
109
-
110
-
111
-
112
-
113
-
114
-
115
-
116
-
117
-
118
-
119
-
120
-
121
-
122
-
123
-
124
-
125
-
126
-
127
 |
 |
