Oki B401dn User Guide - Page 36
Paper feed selection, Paper size
 |
View all Oki B401dn manuals
Add to My Manuals
Save this manual to your list of manuals |
Page 36 highlights
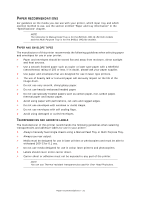
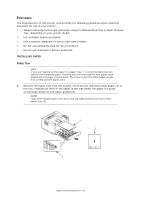
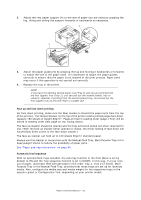
B431D, B431DN Using the control panel on your printer, you can choose: > which paper to use > the size of the paper you wish to use > the weight of the paper (thickness) > the type of paper NOTE > If the settings in the printer differ from those selected on your computer, the printer will not print and the LCD will display an error message. > The following printer settings are given as a guide only. Some software applications require the paper feed, size and media settings to be selected from within the application (page setup). > Although media properties can be set in the printer driver for particular jobs, it is recommended that when filling a tray with media you manually set the printer to match the media as described here. Paper feed selection The paper feed, paper size, paper weight and media type can be set manually on the printer using the control panel as follows. 1. Press the Menu UP arrow or DOWN arrow button repeatedly until PRINT MENU is displayed, then press the OK button. 2. Press the UP arrow or DOWN arrow button until PAPER FEED is displayed, then press the OK button. 3. Press the UP arrow or DOWN arrow button until the required paper feed is displayed. 4. Press the OK button. An asterisk (*) appears next to the selected paper feed. 5. Press the Cancel or Online or the BACK button repeatedly to exit the MENU mode. NOTE When the AUTO TRAY SWITCH is set to ON and more than one paper tray is fitted, paper feed automatically switches to the next available paper tray, providing non-stop printing. Paper size Set the paper size as follows. NOTE > When using paper trays, standard paper sizes are recognised automatically with CASSETTE SIZE (default setting) selected. Paper size need only be set for custom paper sizes. > When using the Multi Purpose Tray, the paper size has to be selected. 1. Press the Menu UP arrow or DOWN arrow button until PRINT MENU is displayed, then press OK button. 2. Press either UP arrow or DOWN arrow button repeatedly until EDIT SIZE is displayed, then press OK button. 3. Press either UP arrow or DOWN arrow button until the required paper size is displayed, then press the OK button. An asterisk (*) appears next to the selected paper size. Paper recommendations > 36
-
 1
1 -
2
-
3
-
4
-
5
-
6
-
7
-
8
-
9
-
10
-
11
-
12
-
13
-
14
-
15
-
16
-
17
-
18
-
19
-
20
-
21
-
22
-
23
-
24
-
25
-
26
-
27
-
28
-
29
-
30
-
 31
31 -
 32
32 -
 33
33 -
 34
34 -
 35
35 -
 36
36 -
 37
37 -
 38
38 -
 39
39 -
 40
40 -
 41
41 -
42
-
43
-
44
-
45
-
46
-
47
-
48
-
49
-
50
-
51
-
52
-
53
-
54
-
55
-
56
-
57
-
58
-
59
-
60
-
61
-
62
-
63
-
64
-
65
-
66
-
67
-
68
-
69
-
70
-
71
-
72
-
73
-
74
-
75
-
76
-
77
-
78
-
79
-
80
-
81
-
82
-
83
-
84
-
85
-
86
-
87
 |
 |