Oki B420dn-Black PrintSuperVision 4.0 User Guide - Page 32
Adding Maps and Floor Plans to a Group
 |
View all Oki B420dn-Black manuals
Add to My Manuals
Save this manual to your list of manuals |
Page 32 highlights
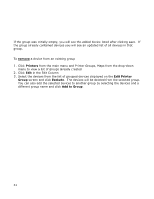
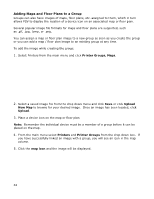
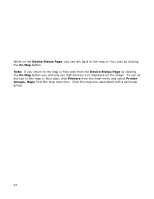
Adding Maps and Floor Plans to a Group Groups can also have images of maps, floor plans, etc. assigned to them, which in turn allows PSV to display the location of a device icon on an associated map or floor plan. Several popular image file formats for maps and floor plans are supported, such as .gif, .jpg, .bmp, or .png. You can assign a map or floor plan image to a new group as soon as you create the group or you can add a map / floor plan image to an existing group at any time. To add the image while creating the group: 1. Select Printers from the main menu and click Printer Groups, Maps. 2. Select a saved image file from the drop down menu and click Save or click Upload New Map to browse for your desired image. Once an image has been located, click Upload. 3. Place a device icon on the map or floor plan Note: Remember the individual device must be a member of a group before it can be placed on the map. 4. From the main menu select Printers and Printer Groups from the drop down box. If you have successfully linked an image with a group, you will see an icon in the map column. 5. Click the map icon and the image will be displayed. 32
-
 1
1 -
2
-
3
-
4
-
5
-
6
-
7
-
8
-
9
-
10
-
11
-
12
-
13
-
14
-
15
-
16
-
17
-
18
-
19
-
20
-
21
-
22
-
23
-
24
-
25
-
26
-
 27
27 -
 28
28 -
 29
29 -
 30
30 -
 31
31 -
 32
32 -
 33
33 -
 34
34 -
 35
35 -
 36
36 -
 37
37 -
38
-
39
-
40
-
41
-
42
-
43
-
44
-
45
-
46
-
47
-
48
-
49
-
50
-
51
-
52
-
53
-
54
-
55
-
56
-
57
-
58
-
59
-
60
-
61
-
62
-
63
-
64
-
65
-
66
-
67
-
68
-
69
-
70
-
71
-
72
-
73
-
74
-
75
-
76
-
77
-
78
-
79
-
80
-
81
-
82
-
83
-
84
-
85
-
86
-
87
-
88
-
89
-
90
-
91
-
92
-
93
-
94
-
95
-
96
-
97
-
98
-
99
-
100
-
101
-
102
-
103
-
104
-
105
-
106
-
107
-
108
-
109
-
110
-
111
-
112
-
113
-
114
-
115
-
116
-
117
-
118
-
119
-
120
-
121
-
122
-
123
-
124
-
125
-
126
-
127
-
128
-
129
-
130
-
131
-
132
-
133
-
134
-
135
-
136
-
137
-
138
-
139
-
140
-
141
-
142
-
143
-
144
-
145
-
146
-
147
-
148
-
149
-
150
-
151
-
152
-
153
-
154
-
155
-
156
-
157
-
158
-
159
-
160
-
161
-
162
-
163
-
164
-
165
-
166
-
167
-
168
-
169
-
170
-
171
-
172
-
173
-
174
-
175
-
176
-
177
-
178
-
179
-
180
-
181
-
182
-
183
-
184
-
185
-
186
-
187
-
188
-
189
-
190
-
191
-
192
-
193
-
194
-
195
-
196
-
197
 |
 |
