Oki B6500n Guide: Network User's, B6500 (English Network User's Guide) - Page 21
OKI LPR, Installing the OKI LPR Utility
 |
View all Oki B6500n manuals
Add to My Manuals
Save this manual to your list of manuals |
Page 21 highlights
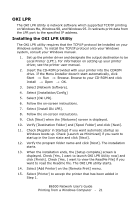
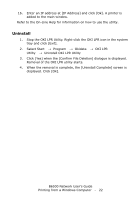
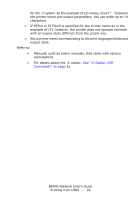
OKI LPR The OKI LPR Utility is network software which supported TCP/IP printing on Windows Me, Windows 98, and Windows 95. It redirects print data from the LPR port to the specified IP address. Installing the OKI LPR Utility The OKI LPR utility requires that the TCP/IP protocol be installed on your Windows system. To install the TCP/IP protocol onto your Windows system, consult your Windows manual. 1. Set up the printer driver and designate the output destination to be Local Printer (LPT:). For information on setting up your printer driver, see the printer user manual. 2. Insert the CD-ROM provided with your printer into the CDROM drive. If the Menu Installer doesn't start automatically, click Start → Run → Browse. Browse to your CD-ROM and click Install → Open → OK. 3. Select [Network Software]. 4. Select [Installation/Config] 5. Select [Oki LPR]. 6. Follow the on-screen instructions. 7. Select [Install Oki LPR]. 8. Follow the on-screen instructions. 9. Click [Next] when the [Welcome] screen is displayed. 10. Verify [Destination Folder] and [Spool Folder] and click [Next]. 11. Check [Register in Startup] if you want automatic startup as Windows boots up. Check [Launch as Minimized] if you want to startup in the Icon state and click [Next]. 12. Verify the program folder name and click [Next]. The installation starts. 13. When the installation ends, the [Setup complete] screen is displayed. Check [Yes, I want to launch OKI LPR Utility now] and click [Finish]. Check [Yes, I want to view the ReadMe File] if you want to read the Readme file. The OKI LPR utility starts. 14. Select [Add Printer] on the [Remote Print] menu. 15. Select [Printer] to accept the printer that has been added in Step 1. B6500 Network User's Guide Printing from a Windows Computer - 21
-
 1
1 -
2
-
3
-
4
-
5
-
6
-
7
-
8
-
9
-
10
-
11
-
12
-
13
-
14
-
15
-
 16
16 -
 17
17 -
 18
18 -
 19
19 -
 20
20 -
 21
21 -
 22
22 -
 23
23 -
 24
24 -
 25
25 -
 26
26 -
27
-
28
-
29
-
30
-
31
-
32
-
33
-
34
-
35
-
36
-
37
-
38
-
39
-
40
-
41
-
42
-
43
-
44
-
45
-
46
-
47
-
48
-
49
-
50
-
51
-
52
-
53
-
54
-
55
-
56
-
57
-
58
 |
 |
