Olympus C3040 C-3040 Quick Start Guide (512 KB) - Page 1
Olympus C3040 - CAMEDIA Digital Camera Manual
 |
View all Olympus C3040 manuals
Add to My Manuals
Save this manual to your list of manuals |
Page 1 highlights
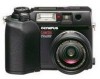
http://www.olympus.com C-3040ZOOM q Quick Start Guide q OLYMPUS AMERICA INC. Two Corporate Center Drive, Melville, NY 11747-3157, U.S.A. Tel. 631-844-5000 (Customer support) Tel. 1-888-553-4448 Thank you for purchasing this Olympus digital camera. This Quick Start Guide provides you with the information you need to start using your new Olympus camera right away. This guide is also useful for checking the button locations and names when you are reading the Instructions booklet. Refer to the Instructions provided with the camera for detailed information on using your Olympus camera. 1. Getting Started Loading the batteries 1. Follow the steps below to load the batteries. Before loading the batteries, check that the Mode dial is set to "OFF". Slide the battery compartment lock towards . Open the battery compartment cover. q w Load the batteries. Lithium battery AA-size packs (supplied) batteries Close the battery compartment cover. Slide the battery compartment lock back to . w q * When you close the battery compartment cover, press down on the cover to hold the batteries down. * Do not use manganese batteries. 2. Insert the SmartMedia (card). * Before inserting the card, check that the camera is switched off and that nothing is displayed on the control panel. Open the card cover and push the card in fully in the direction indicated by the arrow. (The card is used to record the pictures you take.) Open the card cover. Push the card in and close the card cover. Use the Mode dial to select the camera operation mode. If you are using the camera for the first time, the "P" (Program mode) setting provides a quick and easy way to take pictures. Mode dial DIAL A/S/M P OFF POW ER/MODE [Still picture shooting mode] P: Program mode. This mode allows you to take beautiful pictures simply by pressing the shutter button. A/S/M: The default mode for this setting is Aperture Priority mode, in which you select the aperture setting.You can also select Shutter Priority mode, in which you set the shutter speed, and Manual mode, in which you set both the aperture and the shutter speed. [Movie record mode] : Select this mode when you want to shoot a movie. [Playback mode] : Select this mode when you want to view the shots you have taken. [Camera off] OFF: Switches the camera off. Zoom lever Control panel Flash (built-in) Self-timer/Remote control lamp Remote control receiver Diopter adjustment dial Strap eyelet Connector cover Lens Microphone 5-Pin external flash socket Lens cap DC IN jack A/V output jack USB connector Serial connector (RS-232C) Connector cover Card cover Flash mode button ( ) Erase button ( ) Spot/Macro button ( ) Print button ( ) Viewfinder Monitor Arrow pad Mode dial Shutter button OK button ( ) AE lock button ( AEL ) Protect button ( ) Monitor button ( ) Card access lamp Battery compartment cover Bottom view Battery compartment lock Menu button ( ) Tripod socket Adjusting the Viewfinder for Easier Viewing Turn the diopter adjustment dial to adjust the viewfinder Viewfinder until you can see the AF target mark clearly. AF target mark Diopter adjustment dial Setting the Date and Time 1. Press in the release buttons on both sides of the cap to remove the lens cap. 2. Set the Mode dial to "P" (Program mode). 3. Press the (Menu) button. The menu screen appears on the Monitor. 4. Press on the Arrow pad to move the green highlighting frame so that "MODE SETUP" is selected. Then press . "SETUP" appears on the Monitor. The selected option is displayed in green. 5. Press the [OK] button. The MODE SETUP screen appears. AF/MF AF DRIVE WB AUTO ISO AUTO O [1/3] Menu screen 1/3 CARD SETUP MODE SETUP SETUP A/S/M MODE AE LOCK [3/3] Menu screen 3/3 ALL RESET W B + - SHARPNESS CONTRAST ON RED• • •x• • •BLUE NORMAL NORMAL [1/4] MODE SETUP screen 1/4 6. Press on the Arrow pad to select and then press . "SETUP" appears. (To return to the previous page, move the green selection frame to the top of the screen and then press on the Arrow pad.) 7. Press the [OK] button. The date/time setting screen appears. FILE NAME m/ft SETUP [4/4] Date time setting screen 8. Press or on the Arrow pad to select the date format. (You can select day/month/year, month/day/year or year/month/day.) 9. Press on the Arrow pad and then or to set the date and time. To move to the next setting (month → day), press (day → month), press . on the Arrow pad. To move back 10. When you have finished setting the date and time, press the [OK] button. 11. Press the [OK] button repeatedly until you exit the menu screen. 1AG6P1P0886--A VT2202-02
-
 1
1 -
 2
2
 |
 |
