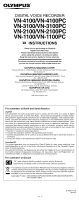
Olympus VN3100 VN-3100 Instructions (English) - Page 2
Getting Started - vn
 |
UPC - 050332299986
View all Olympus VN3100 manuals
Add to My Manuals
Save this manual to your list of manuals |
Page 2 highlights
Getting Started 4 Identification of Parts Built-in Microphone Microphone jack Hold switch STOP button USB terminal* PLAY button 0 (Rewind) button FOLDER/INDEX button Battery cover Earphone jack Display (LCD panel) Record/play indicator light REC (Record) button + button 9 (Fast Forward) button - button DISPLAY/MENU button ERASE button * PC (USB) terminal.... VN-1100PC/VN-2100PC/VN-3100PC/VN-4100PC 4 Inserting Batteries Built-in speaker 1 Lightly press down on the arrow and slide the battery cover open. 2 Insert two size-AAA alkaline batteries, observing the correct polarity. 3 Close the battery cover completely. Time/Date screen appears. The hour indicator flashes, indicating the start of the Time/Date setup process. (See "Setting Time/Date (TIME)" for details) An optional Ni-MH Rechargeable Battery (BR401) from Olympus can be used for the recorder. Replacing Batteries When appears on the display, replace the batteries as soon as possible. Size-AAA alkaline batteries are recommended. When the batteries are depleted, appears on the display, and the recorder shuts off. It is recommended to set the HOLD switch to the HOLD position before you replace batteries to maintain the current settings (Time/Date, etc.). For your convenience,the recorder also logs the current settings in nonvolatile memory at hourly intervals. HOLD 4 Power Supply The HOLD switch functions as a power button. When you do not use the recorder, set the HOLD switch to the HOLD position while the recorder is stopped. This will power off the recorder and minimize the battery drain. Power on...Reset the HOLD switch. Power off...Set the HOLD switch to the HOLD position. Standby Mode and Display Shut Off If the recorder is stopped or paused for 60 minutes or longer during recording or play back, it goes into Standby (power-save) mode, and the display shuts off. To exit Standby mode and turn on the display, press any button. - 2 -
-
 1
1 -
 2
2 -
 3
3 -
 4
4 -
 5
5 -
 6
6 -
 7
7 -
 8
8 -
9
-
10
 |
 |
