Omron HJ-322U Instruction Manual - Page 9
Settings
 |
View all Omron HJ-322U manuals
Add to My Manuals
Save this manual to your list of manuals |
Page 9 highlights
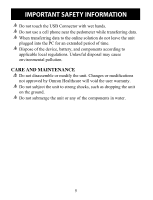
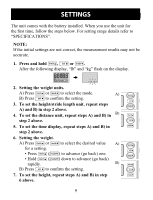
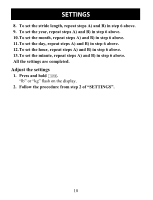
SETTINGS The unit comes with the battery installed. When you use the unit for the first time, follow the steps below. For setting range details refer to "SPECIFICATIONS". NOTE: If the initial settings are not correct, the measurement results may not be accurate. 1. Press and hold , or . After the following display, "lb" and "kg" flash on the display. 2. Setting the weight units. A) Press or to select the mode. A) B) Press to confirm the setting. 3. To set the height/stride length unit, repeat steps A) and B) in step 2 above. 4. To set the distance unit, repeat steps A) and B) in B) step 2 above. 5. To set the time display, repeat steps A) and B) in step 2 above. 6. Setting the weight. A) Press or to select the desired value A) for a setting. • Press ( ) to advance (go back) one. • Hold ( rapidly. ) down to advance (go back) B) B) Press to confirm the setting. 7. To set the height, repeat steps A) and B) in step 6 above. 9
-
 1
1 -
2
-
3
-
 4
4 -
 5
5 -
 6
6 -
 7
7 -
 8
8 -
 9
9 -
 10
10 -
 11
11 -
 12
12 -
 13
13 -
 14
14 -
15
-
16
-
17
-
18
-
19
-
20
-
21
-
22
-
23
-
24
-
25
-
26
-
27
-
28
 |
 |