Onkyo M-5010 2-Channel Amplifier M - Instruction Manual - Page 4

Features, Installing the Power Amplifier

Page 4 highlights

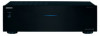
Features Contents M-5010 Power Amplifier • 75 W/ch (1kHz, 8 ohms, 0.08% THD, 2ch Driven FTC) • WRAT (Wide Range Amplifier Technology) • High Current Low Impedance Drive • 10,000 µF Capacitor x 2 • Three Stage Inverted Darlington Circuitry • Copper Bus Plate for Low Impedance Drive • 1/16"(16mm) Full-flat Chassis • Aluminum Front Panels • 12V Trigger in/out • Impedance Switch (4 ~ 8 ohms and 8 ~ 16 ohms) • Auto Power-on Function by Receiving Audio Signal • Auto Standby Function • OUTPUT (RCA, Through Out) Installing the Power Amplifier Ensure proper ventilation. Approx. 8 in. (20 cm) Introduction Important Safety Instructions 2 Precautions 3 Features 4 Installing the Power Amplifier 4 Getting to Know the Power Amplifier 5 Front Panel 5 Rear Panel 6 Connections Connections 7 Cable and Jacks 7 Connecting the AV Receiver 7 Connecting Your Speakers 8 Connecting the Power Cord 8 Advanced Operations Custom Setup 9 Setting the TRIGGER 9 Setting the Auto Standby Function 9 Setting the Speaker Impedance 9 Others Operations 10 Troubleshooting 10 Specifications 11 Approx. 8 in. (20 cm) Approx. 8 in. (20 cm) Approx. 4 in. (10 cm) Install the power amplifier on a sturdy rack or shelf. Position it so that its weight is evenly dispersed on its four legs. Do not install the power amplifier in a place with vibration or an unstable location. The power amplifier is designed to have high conversion efficiency, however, its temperature will become much higher than other audio equipment. Therefore, make sure not to hamper heat dissipation by ensuring proper ventilation. En 4

  • 1
  • 2
  • 3
  • 4
  • 5
  • 6
  • 7
  • 8
  • 9
  • 10
  • 11
  • 12

4
En
Features
M-5010 Power Amplifier
• 75 W/ch (1kHz, 8 ohms, 0.08% THD, 2ch Driven FTC)
• WRAT (Wide Range Amplifier Technology)
• High Current Low Impedance Drive
• 10,000 μF Capacitor x 2
• Three Stage Inverted Darlington Circuitry
• Copper Bus Plate for Low Impedance Drive
• 1/16"(16mm) Full-flat Chassis
• Aluminum Front Panels
• 12V Trigger in/out
• Impedance Switch (4 ~ 8 ohms and 8 ~ 16 ohms)
• Auto Power-on Function by Receiving Audio Signal
• Auto Standby Function
• OUTPUT (RCA, Through Out)
Install the power amplifier on a sturdy rack or shelf.
Position it so that its weight is evenly dispersed on its four
legs. Do not install the power amplifier in a place with
vibration or an unstable location.
The power amplifier is designed to have high conversion
efficiency, however, its temperature will become much
higher than other audio equipment.
Therefore, make sure
not to hamper heat dissipation by ensuring proper
ventilation.
Contents
Introduction
Important Safety Instructions
.........................................
2
Precautions
......................................................................
3
Features
............................................................................
4
Installing the Power Amplifier
.........................................
4
Getting to Know the Power Amplifier
.............................
5
Front Panel
.....................................................................
5
Rear Panel
.....................................................................
6
Connections
Connections
.....................................................................
7
Cable and Jacks
.............................................................
7
Connecting the AV Receiver
..........................................
7
Connecting Your Speakers
............................................
8
Connecting the Power Cord
...........................................
8
Advanced Operations
Custom Setup
...................................................................
9
Setting the TRIGGER
.....................................................
9
Setting the Auto Standby Function
.................................
9
Setting the Speaker Impedance
.....................................
9
Others
Operations
......................................................................
10
Troubleshooting
.............................................................
10
Specifications
.................................................................
11
Installing the Power Amplifier
Approx. 8 in.
(20 cm)
Ensure proper ventilation.
Approx. 8 in.
(20 cm)
Approx. 8 in. (20 cm)
Approx. 4 in.
(10 cm)