Onkyo TX-NR414 Owner Manual - Page 35
Using the Home Menu, En-35
 |
View all Onkyo TX-NR414 manuals
Add to My Manuals
Save this manual to your list of manuals |
Page 35 highlights
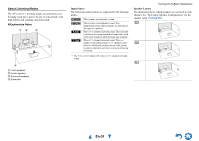
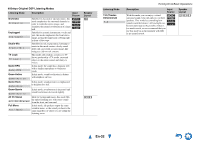
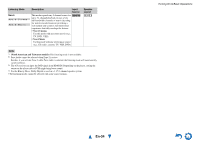
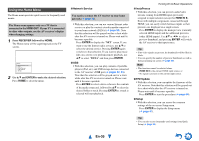
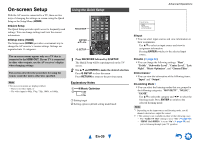
Using the Home Menu The Home menu provides quick access to frequently used menus. The Home menu appears only on a TV that is connected to the HDMI OUT. If your TV is connected to other video outputs, use the AV receiver's display when changing settings. 1 Press RECEIVER followed by HOME. The Home menu will be superimposed on the TV screen. Home Network Service USB InstaPrevue F/W Update Setup 2 Use R/X and ENTER to make the desired selection. Press HOME to close the menu. ■ Network Service You need to connect the AV receiver to your home network (➔ page 72). ` With this selection, you can use various Internet radio services or play the contents stored in media connected to your home network (DLNA) (➔ page 23). Note that this selection will be grayed out for a short while after the AV receiver is turned on. Please wait until it becomes operable. Press ENTER to display the "NET" screen. If you want to use the Internet radio services, use R/X to select the desired service. Pressing ENTER again switches to that selection. If you want to play music files on a server or to perform remote playback, use R/X to select "DLNA" and then press ENTER. ■ USB ` With this selection, you can play contents of portable players (iPod, etc.) and USB storage devices connected to the AV receiver's USB port (➔ pages 22, 23). Note that this selection will be grayed out for a short while after the AV receiver is turned on. Please wait until it becomes operable. Press ENTER to select a drive or browse the contents of the media connected, followed by R/X to select the desired folder or track. Pressing ENTER as a track is selected will start playback. Turning On & Basic Operations ■ InstaPrevue `With this selection, you can preview audio/video streams coming from HDMI inputs previously assigned to input selectors (except for HDMI IN 6). Even with multiple components connected through HDMI, you can easily switch between inputs as their previews are displayed on a single screen. Press ENTER to display the main preview (currently selected HDMI input) and the additional previews (other HDMI inputs). Use R/X or F/S to select a preview thumbnail, and pressing ENTER will switch the AV receiver to that input source. Tip • If no video signals are present, the thumbnails will be filled in black. • You can specify the number of preview thumbnails as well as their positioning on screen (➔ page 50). Note • This function cannot be selected when: - HDMI IN 6 is the current HDMI input source, or - No signal is present on the current input source. ■ F/W Update `With this selection, you can update the firmware of the AV receiver. Note that this selection will be grayed out for a short while after the AV receiver is turned on. Please wait until it becomes operable. Press ENTER to start the procedure (➔ page 64). ■ Setup `With this selection, you can access the common settings of the on-screen Setup menu. Press ENTER to display the Setup menu (➔ page 41). Tip • You can also access frequently used settings from Quick Setup (➔ page 39). En-35
-
 1
1 -
2
-
3
-
4
-
5
-
6
-
7
-
8
-
9
-
10
-
11
-
12
-
13
-
14
-
15
-
16
-
17
-
18
-
19
-
20
-
21
-
22
-
23
-
24
-
25
-
26
-
27
-
28
-
29
-
 30
30 -
 31
31 -
 32
32 -
 33
33 -
 34
34 -
 35
35 -
 36
36 -
 37
37 -
 38
38 -
 39
39 -
 40
40 -
41
-
42
-
43
-
44
-
45
-
46
-
47
-
48
-
49
-
50
-
51
-
52
-
53
-
54
-
55
-
56
-
57
-
58
-
59
-
60
-
61
-
62
-
63
-
64
-
65
-
66
-
67
-
68
-
69
-
70
-
71
-
72
-
73
-
74
-
75
-
76
-
77
-
78
-
79
-
80
-
81
-
82
-
83
-
84
-
85
-
86
-
87
-
88
-
89
-
90
-
91
-
92
-
93
-
94
-
95
-
96
-
97
-
98
-
99
-
100
-
101
-
102
-
103
-
104
-
105
-
106
-
107
-
108
-
109
-
110
-
111
-
112
-
113
-
114
-
115
-
116
-
117
-
118
-
119
-
120
-
121
-
122
-
123
-
124
-
125
-
126
-
127
-
128
 |
 |