Optoma EH412ST EH412ST User Manual - Page 14
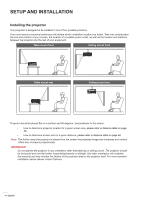
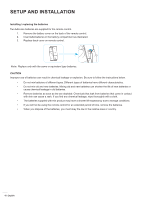
SETUP AND INSTALLATION, Installing the projector - ceiling mount
 |
View all Optoma EH412ST manuals
Add to My Manuals
Save this manual to your list of manuals |
Page 14 highlights
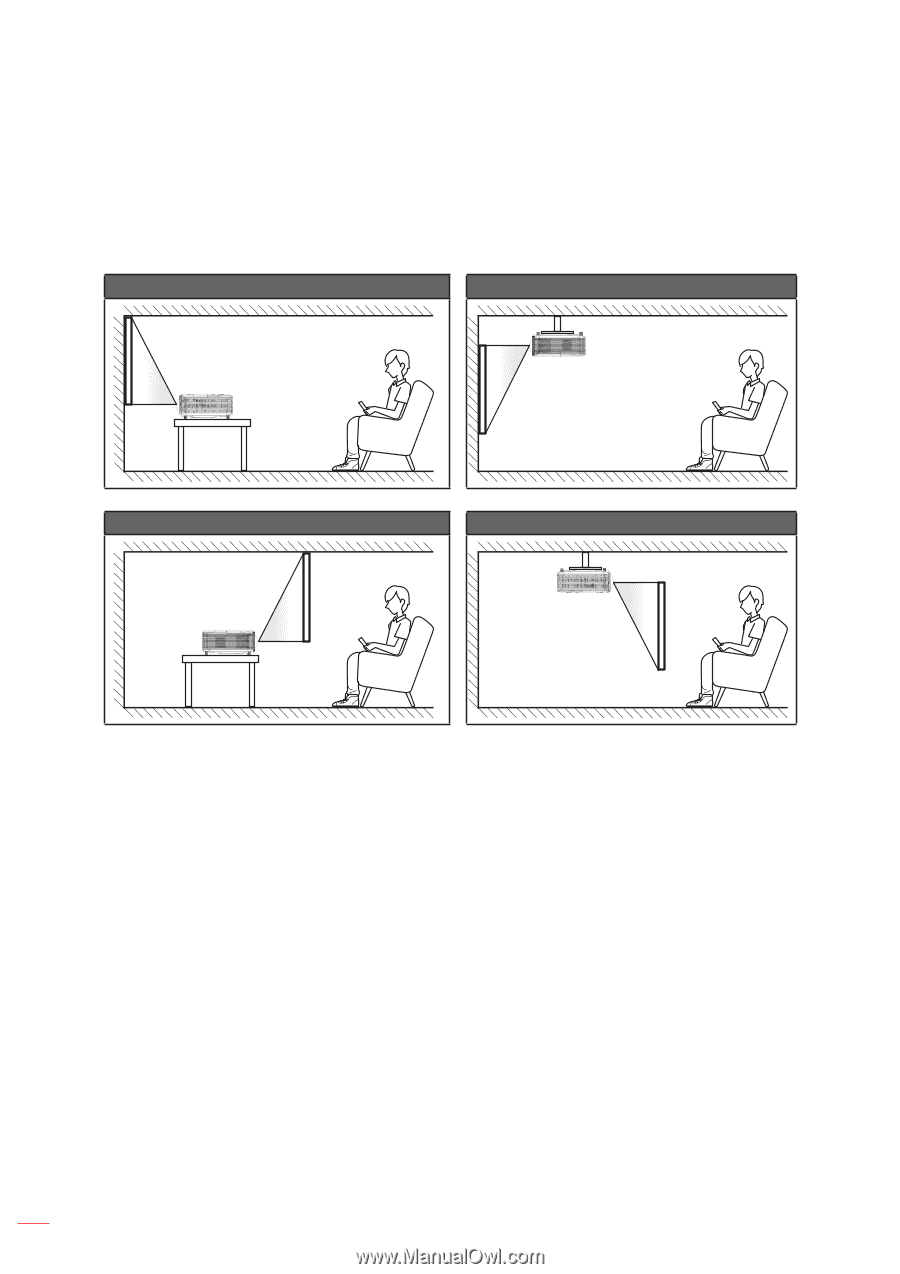
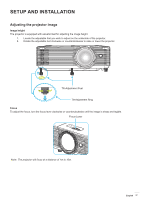
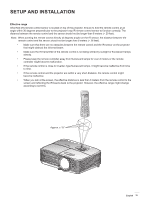
SETUP AND INSTALLATION Installing the projector Your projector is designed to be installed in one of four possible positions. Your room layout or personal preference will dictate which installation location you select. Take into consideration the size and position of your screen, the location of a suitable power outlet, as well as the location and distance between the projector and the rest of your equipment. Table mount front Ceiling mount front Table mount rear Ceiling mount rear Projector should be placed flat on a surface and 90 degrees / perpendicular to the screen. ‡‡ How to determine projector location for a given screen size, please refer to distance table on page 46. ‡‡ How to determine screen size for a given distance, please refer to distance table on page 46. Note: The further away the projector is placed from the screen the projected image size increases and vertical offset also increases proportionally. IMPORTANT! Do not operate the projector in any orientation other that table top or ceiling mount. The projector should be horizontal and not tilted either forwards/backwards or left/right. Any other orientation will invalidate the warranty and may shorten the lifetime of the projector lamp or the projector itself. For none standard installation advise please contact Optoma. 14 English
-
 1
1 -
2
-
3
-
4
-
5
-
6
-
7
-
8
-
 9
9 -
 10
10 -
 11
11 -
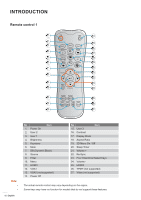 12
12 -
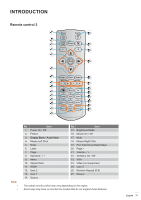 13
13 -
 14
14 -
 15
15 -
 16
16 -
 17
17 -
 18
18 -
 19
19 -
20
-
21
-
22
-
23
-
24
-
25
-
26
-
27
-
28
-
29
-
30
-
31
-
32
-
33
-
34
-
35
-
36
-
37
-
38
-
39
-
40
-
41
-
42
-
43
-
44
-
45
-
46
-
47
-
48
-
49
-
50
-
51
-
52
-
53
-
54
-
55
-
56
-
57
-
58
 |
 |