Optoma TW1692 User's Manual - Page 53
Ceiling Installation - ceiling projector mount
 |
UPC - 796435417048
View all Optoma TW1692 manuals
Add to My Manuals
Save this manual to your list of manuals |
Page 53 highlights
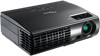
Appendices v Damage to the projector as a result of incorrect installation voids the warranty. Ceiling Installation To prevent damage to your projector please use the recommended mounting package for installation. To ensure compliance, only use a UL Listed ceiling mount and screws that meet the following specifications: M4 x 3 Ceiling Mounts, Maximum length 6mm Refer to the following diagram to ceiling mount the projector. v Ensure at least 10cm clearance between the ceiling and the underside of the projector. v Avoid locating the projector near heat sources such as air conditioning and heaters. Excess heat may cause the projector to 218.00 power off. 77.49 178.58 103.30 25.63 70.50 56.50 44.70 218.00 Ceiling Mount M4x0.7(Max L=6mm) 53 English
-
 1
1 -
2
-
3
-
4
-
5
-
6
-
7
-
8
-
9
-
10
-
11
-
12
-
13
-
14
-
15
-
16
-
17
-
18
-
19
-
20
-
21
-
22
-
23
-
24
-
25
-
26
-
27
-
28
-
29
-
30
-
31
-
32
-
33
-
34
-
35
-
36
-
37
-
38
-
39
-
40
-
41
-
42
-
43
-
44
-
45
-
46
-
47
-
 48
48 -
 49
49 -
 50
50 -
 51
51 -
 52
52 -
 53
53 -
 54
54 -
 55
55 -
 56
56 -
 57
57
 |
 |
