Oster 16-Inch Electric Skillet English - Page 4
HOW - best
 |
View all Oster 16-Inch Electric Skillet manuals
Add to My Manuals
Save this manual to your list of manuals |
Page 4 highlights
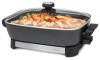
HOW TO: USING YOUR ELECTRIC SKILLET 1 Make sure the temperature probe is turned o . Push the temperature probe rmly into its socket found at the side of the appliance. Plug into a standard 120 Volt AC outlet. 2 Set the temperature you want by turning the knob on the temperature probe. The indicator light will come on. Set the temperature of your choice opposite the indicator light. When the light goes o , the chosen cooking temperature has been reached. During cooking, the light will blink on and o indicating the temperature is being maintained. Guidance in the choice of temperatures is supplied later in this book. 3 It is recommended that you do not cook with the Electric Skillet standing on temperature sensitive surfaces. 4 For simmering, set the temperature control knob to 300°F/150°C or SIMMER and wait until the liquid boils. Turn the knob toward the WARM setting. Set the dial to this point each time SIMMER is speci ed in a recipe. 5 Do not use metal utensils in your Electric Skillet as they may damage the non-stick coating. Wood or plastic coated spatulas are best. If you use plastic tools, make sure they are suitable for use on hot surfaces. 6 To remove the temperature probe, wrap your hand around the temperature probe and pull out. COOKING GUIDE FOOD BACON EGGS (fried) EGGS (scrambled) PANCAKES HAMBURGER (½-inch thick) HAM (½-inch to ¼-inch slices) POTATOES (country fried) (crispy brown) SAUSAGE FISH PORK CHOPS (breaded) (brown) CUBE or MINUTE STEAKS LIVER (Calf's, Lamb or Tender Beef ) FRENCH TOAST CRUSTY CHICKEN (Use 4 Tbsp. Oil) DO NOT USE WATER TEMPERATURE 350°F/175°C 300°F/150°C 325°F/162°C 375°F/190°C 375°F/190° 325°F/162°C 325°F/162°C 325°F/162°C 340°F/170°C 375°F/190°C 375°F /190°C 225°F /110°C 400°F/205°C 350°F/175°C 325°F/162°C 400°F/200°C 300°F/150°C APPROXIMATE TIME 5 8 MIN. 3 5 MIN. 2 3 MIN. 1 3 MIN. Rare 4 8 MIN. Well Done 9 12 MIN. 10 20 MIN. 10 12 MIN. 10 12 MIN. 12 15 MIN. 5 8 MIN. 10 15 MIN. 30 40 MIN. 2 4 MIN. 5 10 MIN. 4 6 MIN. 10 15 MIN. 12 18 MIN. 6 www.oster.com www.oster.com 7
-
 1
1 -
 2
2 -
 3
3 -
 4
4 -
 5
5 -
 6
6 -
 7
7 -
 8
8 -
 9
9 -
 10
10 -
11
 |
 |
