Oster 6-Slice Digital Toaster Oven Manual - Page 16
Display will show the Warm Function
 |
View all Oster 6-Slice Digital Toaster Oven manuals
Add to My Manuals
Save this manual to your list of manuals |
Page 16 highlights
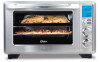
Using the Warm Function (See Fig. 9) Step 1. Turn the Function Knob to the Warm function. When you select the Warm function, the lower heating element will heat. Default Temperature: 150ºF. Default Time: 60 minutes. You may manually activate the Turbo Convection Heat by pressing the Turbo button once to turn it on. The blue light of the Turbo button will turn on. Step 2. To set the temperature: Turn the Temperature Knob if you wish to increase or decrease the temperature setting. For the Warm Function, the temperature can be set from 150 to 200ºF in 25-degree increments. Step 3. To set the time: Turn the Time Knob if you wish to increase or decrease the warming time. The maximum time setting for Warm is 60 minutes (1 hour). Once you have selected the desired warming time, press the Start button to initiate the warming process. Step 4. To Start: Press the Start/Cancel Button to start the warming process. The red Start/Cancel Button light will illuminate. The LCD Display will show the Warm Function, the countdown time and the selected temperature. The unit will begin to work and the timer will start counting down. When the Warming cycle is complete, the unit will emit 3 beeps. The LCD and the Start/Cancel Button Light will turn off after 30 seconds. NOTE: You can cancel the warming cycle at any time by pressing the Start/Cancel Button once. The red Start/Cancel Button light will turn off whenever a function has been completed or a function is manually cancelled. English-16 Figure 9
-
 1
1 -
2
-
3
-
4
-
5
-
6
-
7
-
8
-
9
-
10
-
 11
11 -
 12
12 -
 13
13 -
 14
14 -
 15
15 -
 16
16 -
 17
17 -
 18
18 -
 19
19 -
 20
20 -
 21
21 -
22
-
23
-
24
-
25
-
26
-
27
-
28
-
29
-
30
-
31
-
32
-
33
-
34
-
35
-
36
-
37
-
38
-
39
-
40
-
41
-
42
-
43
 |
 |
