Panasonic 60LCX64 Mmd Digital Tuner - Page 99
CAUTION, Lamp replacement procedure - replacement lamp
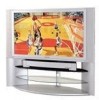 |
View all Panasonic 60LCX64 manuals
Add to My Manuals
Save this manual to your list of manuals |
Page 99 highlights
Replacing the lamp unit Lamp replacement procedure 1 Turn power off, wait until power indicator stops blinking red, then unplug the power cord from the wall outlet and confirm that the area around the lamp unit has cooled down. POWER button /POWER indicator 4 Loosen the lamp unit screw with a screwdriver. Then, grasp the lamp unit as shown in the diagram, and slowly remove from the Device Display. Lamp unit screw LAMP indicator • Please wait more than one hour for lamp replacement. [If you need to replace the lamp more urgently] • The Projection display has a forced cooling feature. After the POWER button is turned OFF, and during the first minute of the normal cooling fan operation, press the VOL+ button on the Device Display and ▲ button on the remote control at same time for more than 5 seconds. The cooling fan operates for about 10 minutes. The LAMP indicator flashes red 5 times every 5 seconds. Lamp unit handle CAUTION • Because the lamp unit is hot immediately after its use, touching it may cause burns. • Please allow the lamp to cool before handling or replacing the lamp unit. 5 Insert the new lamp unit being careful of the insertion direction. • Press on the arrow mark making sure insertion is done correctly. 2 Remove the Front cover. Place your fingertips under the Front cover and pull it from the Device Display. Front cover 3 Loosen the Lamp cover screw. First read caution and warning labels on lamp cover. Then, loosen the lamp cover screw by using a screwdriver. Lamp cover handle Screwdriver Lamp cover screw 6 Replace the Lamp unit and cover screws. Tighten the lamp unit/cover screw with a screwdriver. • Properly dispose of old lamp. Please see page 98. Note Attach the lamp unit and lamp unit housing door securely. If the lamp unit and lamp unit housing door are not attached securely, the protective circuit will be activated and the lamp will not turn on. 7 Replace the Front cover. After lamp replacement, you must reset the lamp time. Refer to the instructions enclosed with the lamp unit (Part No.: TY-LA1000). 99 Information
-
 1
1 -
2
-
3
-
4
-
5
-
6
-
7
-
8
-
9
-
10
-
11
-
12
-
13
-
14
-
15
-
16
-
17
-
18
-
19
-
20
-
21
-
22
-
23
-
24
-
25
-
26
-
27
-
28
-
29
-
30
-
31
-
32
-
33
-
34
-
35
-
36
-
37
-
38
-
39
-
40
-
41
-
42
-
43
-
44
-
45
-
46
-
47
-
48
-
49
-
50
-
51
-
52
-
53
-
54
-
55
-
56
-
57
-
58
-
59
-
60
-
61
-
62
-
63
-
64
-
65
-
66
-
67
-
68
-
69
-
70
-
71
-
72
-
73
-
74
-
75
-
76
-
77
-
78
-
79
-
80
-
81
-
82
-
83
-
84
-
85
-
86
-
87
-
88
-
89
-
90
-
91
-
92
-
93
-
 94
94 -
 95
95 -
 96
96 -
 97
97 -
 98
98 -
 99
99 -
 100
100 -
 101
101 -
 102
102 -
 103
103 -
 104
104 -
105
-
106
-
107
-
108
-
109
-
110
-
111
-
112
 |
 |
