Panasonic A-55 A-55 Quick Start Guide - Page 13
Steps - 55 led
 |
View all Panasonic A-55 manuals
Add to My Manuals
Save this manual to your list of manuals |
Page 13 highlights
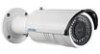
A-55·Quick Start Guide ● Make sure that there is no reflective surface too close to the camera lens. The IR light from the camera may reflect back into the lens causing reflection. ● The foam ring around the lens must be seated flush against the inner surface of the bubble to isolate the lens from the IR LEDS. Fasten the dome cover to camera body so that the foam ring and the dome cover are attached seamlessly. Steps: 1. Drill four screw holes in the wall according to the No.2 holes of the supplied drill template. 2 1 1 2 2 1 Cable Hole 1 2 Figure 2-1 Drill Template 2. Drill one cable hole according to the drill template. Note: If you want to route the cables through the side of the junction box, you may skip this step. 3. Fix the junction box to the wall with the expansion screws. 12
-
 1
1 -
2
-
3
-
4
-
5
-
6
-
7
-
 8
8 -
 9
9 -
 10
10 -
 11
11 -
 12
12 -
 13
13 -
 14
14 -
 15
15 -
 16
16 -
 17
17 -
 18
18 -
19
-
20
-
21
-
22
-
23
-
24
-
25
-
26
 |
 |
