Panasonic AE3000U Operating Instructions - Page 13
About Your Projector, Back and bottom view, ENGLISH - 13 - ceiling mount for
 |
UPC - 791871111741
View all Panasonic AE3000U manuals
Add to My Manuals
Save this manual to your list of manuals |
Page 13 highlights
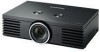
Preparation J Back and bottom view About Your Projector Air intake port Security lock Attach the commercial shackle lock which is provided with the projector. Compatible with the Kensington MicroSaver Security System. Top cover Hold the top cover at the back corner and slightly push up to open. (page 47) Front leg adjusters Screw up/down to adjust the projection angle. (page 15) Lens cover attachment hole Air intake port AC IN Connect the power cord to supply electronic power to the projector. (page 19) Safety cable attachment point Attach the safety cable when mounted on the ceiling. (page 56) Front leg adjusters Screw up/down to adjust the projection angle. (page 15) Connecting terminals (page 18) COMPUTER IN Connect an RGB signal cable from your PC. COMPONENT IN Connect YPBPR signal cables. S-VIDEO IN Connect a S-VIDEO signal cable. VIDEO IN Connect an RCA composite video cable. HDMI IN Connect HDMI signal cables. SERIAL Connect a compatible cable for controlling the projector remotely via your computer. (page 51) NOTE: • Do not cover the ventilation openings or place anything within 50 cm (20") of them as this may cause damage or injury. • The projector should only be used with the attached power cord to ensure optimum performance and avoid damage to the projector. • Do not open the top cover other than replacing the lamp unit. ENGLISH - 13
-
 1
1 -
2
-
3
-
4
-
5
-
6
-
7
-
 8
8 -
 9
9 -
 10
10 -
 11
11 -
 12
12 -
 13
13 -
 14
14 -
 15
15 -
 16
16 -
 17
17 -
 18
18 -
19
-
20
-
21
-
22
-
23
-
24
-
25
-
26
-
27
-
28
-
29
-
30
-
31
-
32
-
33
-
34
-
35
-
36
-
37
-
38
-
39
-
40
-
41
-
42
-
43
-
44
-
45
-
46
-
47
-
48
-
49
-
50
-
51
-
52
-
53
-
54
-
55
-
56
-
57
-
58
-
59
-
60
 |
 |
