Panasonic BL-C160A Installation Guide - Page 18
Camera Mounting
 |
UPC - 037988845484
View all Panasonic BL-C160A manuals
Add to My Manuals
Save this manual to your list of manuals |
Page 18 highlights
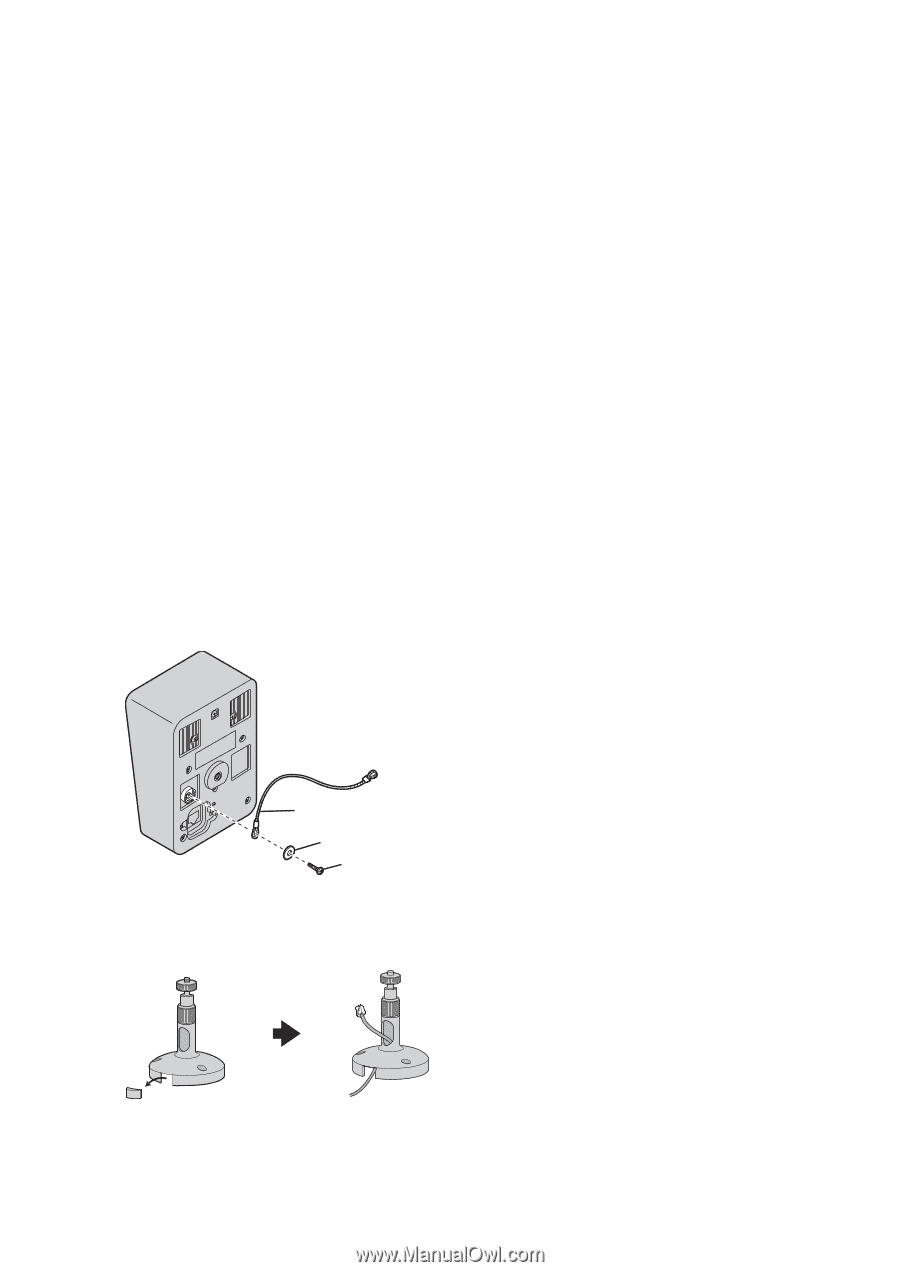
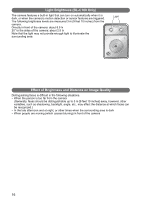
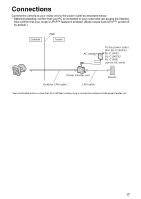
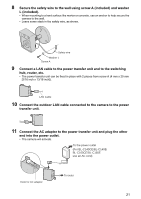
Camera Mounting Caution • Do not drive the screws into a soft material. Drive the screws into a secure area of the wall, such as a column, otherwise the camera may fall and be damaged. • Make sure you attach the safety wire when mounting the camera, to prevent the camera from falling. • Do not place the camera near any heat emitting devices (e.g., water heaters, air conditioners). (Placing the camera near heat emitting devices can cause the built-in sensor to not detect properly.) Note • Use a LAN cable that is no more than 30 m (98 feet 5 inches) long to connect the camera and the power transfer unit. • Use screws that are appropriate for the material of the wall. • The included screws are for use with wooden walls only. • Prolonged exposure to direct sunlight or halogen light may damage the camera's image sensor. Mount the camera appropriately. • Make sure to waterproof any openings or holes made during installation. • When connecting the cable, waterproof the cable using the included right-angle joint, foam strip and self bonding tape. • When installing cables through the ground, do not connect cables under the ground. Install cables through a conduit to protect them from water. • Refer to page 9-12 for information about the operation of the built-in sensor before deciding where to install the camera. 1 Secure the safety wire to the camera using screw B (included) and washer S (included). • Make sure you attach the safety wire when mounting the camera, to prevent the camera from falling. Safety wire Washer S Screw B 2 Remove the tab on the flexible stand, then pass an outdoor LAN cable through the notch. 18
-
 1
1 -
2
-
3
-
4
-
5
-
6
-
7
-
8
-
9
-
10
-
11
-
12
-
 13
13 -
 14
14 -
 15
15 -
 16
16 -
 17
17 -
 18
18 -
 19
19 -
 20
20 -
 21
21 -
 22
22 -
 23
23 -
24
-
25
-
26
-
27
-
28
-
29
-
30
-
31
-
32
 |
 |