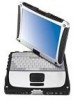
Panasonic CF-18NCHMBVM Notebook Computer - Page 15
Create a new account
 |
UPC - 092281860831
View all Panasonic CF-18NCHMBVM manuals
Add to My Manuals
Save this manual to your list of manuals |
Page 15 highlights
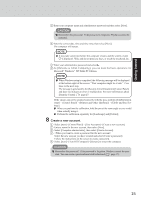
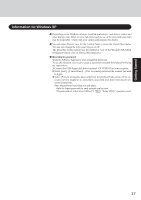
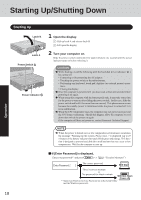
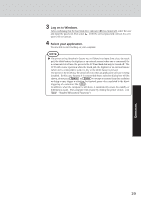
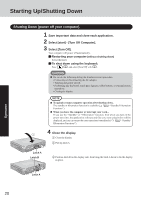
Getting Started 5 Enter your computer name and administrator password and then select [Next]. CAUTION Remember this password! If the password is forgotten, Windows cannot be operated. 6 Enter the correct date, time and time zone, then select [Next]. The computer will restart. NOTE It may take some time before the computer restarts and the screen of step 7 is displayed. Wait, and do not press any keys, or touch the touch pad, etc. 7 Enter your administrator password and select . 8 At [Welcome to Tablet Computing], you can learn the basic operations for Microsoft® Windows® XP Tablet PC Edition. NOTE When Windows setup is completed, the following message will be displayed at the bottom right of the screen: "Your computer might be at risk." Continue to the next step. The message is generated by the [Security Center] function in [Control Panel], and does not indicate an error or malfunction. For more information about [Security Center]: page 27. If the cursor can not be pointed correctly with the pen, perform [Calibration] in [start] - [Control Panel] - [Printers and Other Hardware] - [Tablet and Pen Settings]. When you perform the calibration, hold the pen at the same angle as you would when actually using it. Perform the calibration separately for [Landscape] and [Portrait]. 8 Create a new account. 1 Select [start] - [Control Panel] - [User Accounts] - [Create a new account]. 2 Enter a name for the new account, then select [Next]. 3 Select [Computer administrator], then select [Create Account]. 4 Select the new account you have created and select [Create a password]. Follow the instructions on the screen to create a password. 5 Select [start] - [Turn Off Computer] - [Restart] to restart the computer. CAUTION Remember this password! If the password is forgotten, Windows cannot be operated. You can create a password reset disk beforehand ( page 17). 15
-
 1
1 -
2
-
3
-
4
-
5
-
6
-
7
-
8
-
9
-
 10
10 -
 11
11 -
 12
12 -
 13
13 -
 14
14 -
 15
15 -
 16
16 -
 17
17 -
 18
18 -
 19
19 -
 20
20 -
21
-
22
-
23
-
24
-
25
-
26
-
27
-
28
-
29
-
30
-
31
-
32
-
33
-
34
-
35
-
36
-
37
-
38
-
39
-
40
-
41
-
42
-
43
-
44
-
45
-
46
-
47
-
48
-
49
-
50
-
51
-
52
 |
 |
