Panasonic CQ-C5301U Safety Guide - Page 8
XM Satellite Radio
 |
View all Panasonic CQ-C5301U manuals
Add to My Manuals
Save this manual to your list of manuals |
Page 8 highlights
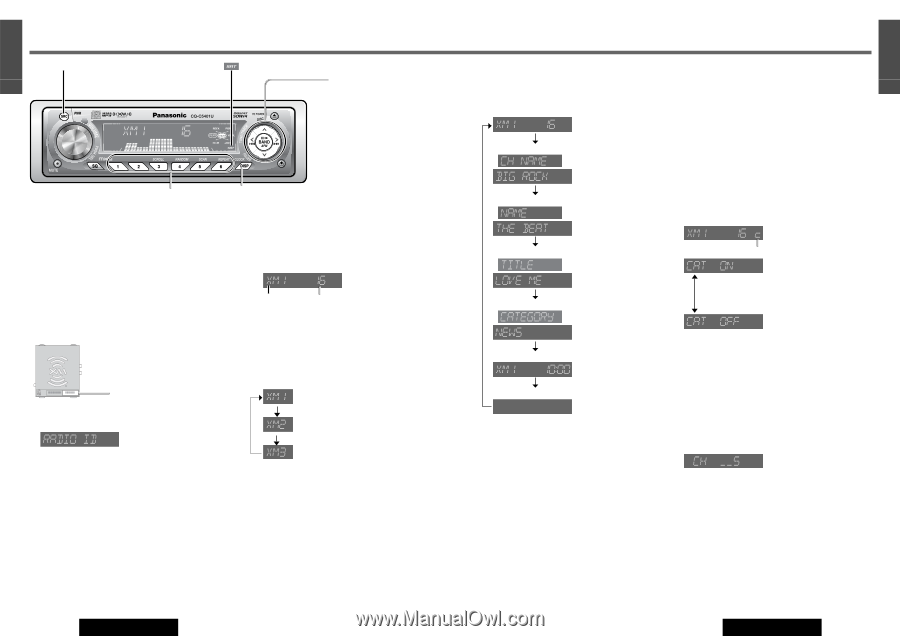
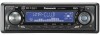
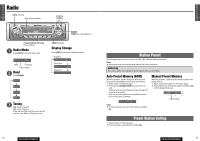
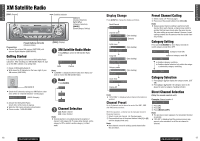
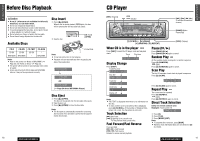
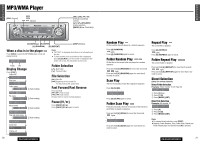
E N G XM Satellite Radio L I S [SRC: Source] H 15 (Satellite) indicator []] [[] (Channel Selection Category Selection) [BAND] (Band/Category Setting) Preset Buttons [1] to [6] (Channel station) Preparation: ¡ Connect the optional XM receiver (XMD1000) with optional Digital Adapter (XMDPAN100). Getting Started It is required to sign up to become an XM Satellite Radio subscriber. After checking your XM Satellite Radio ID, sign up on the XM's website or by calling them. q Check of XM Satellite Radio ID ¡ Write down the ID indicated on the lower right of your XM receiver (XMD1000). XMD 1000 L/C 1144XXXXXX XM RADIO ID : XXXXXXXX XM RADIO ID ¡ Check the ID shown by tuning your XM Radio to channel 0. (Refer to "Channel Selection" on this page.) (RADIO ID display) [DISP] (Display) q XM Satellite Radio Mode Press [SRC] to select the XM Satellite Radio mode. Band Channel Note: ¡ "LOADING" is displayed when it takes more than 2 sec- onds to receive the XM Satellite Radio. w Band Press [BAND]. w Activate the XM Satellite Radio Select either of the below to sign up. ¡ Web site: http://www.xmradio.com/activation ¡ Phone number: 1-800-852-9696 e Channel Selection [[]: Higher channel []]: Lower channel Note: ¡ Channel selection is not available during the reception of channel 1 with category ON. To receive other channels, set the category to OFF or switch to another category. (a Next page) 16 CQ-C5401U/C5301U Display Change Press [DISP] to change the display as follows. Band/Channel Channel name ( Artist name ( ) (Data loading) (Default) ) (Data loading) Song title ( ) (Data loading) Category name ( ) (Data loading) E N G L I Preset Channel Calling S H q Select a band. (a Previous page) 16 w Press one of the preset buttons from [1] to [6]. Note: ¡ Because preset memory setting is performed with Service IDs in each channel, a channel may switch to another that has been stored under the same Service IDs when calling up a preset channel. However, broadcasting contents are the same as what the stored channel provides. Category Setting Press and hold [BAND] for more than 2 seconds to switch category mode ON or OFF. (Category mode ON) appears at category mode ON ¡ Enables category switching. ¡ Enables channel selection only within the catego- ry selected by category switching. Clock Time Display Off Note: ¡ "UPDATING" is displayed when channel information is updated. Channel Preset Up to 6 channels can be stored in each of the XM1, XM2 and XM3 band selections. With this operation, a channel can be manually stored in the preset memory. q Select a band and channel. (a Previous page) w Press and hold one of the preset buttons from [1] to [6] until the display blinks once. Note: ¡ New channels overwrite existing saved channel after this procedure. Category Selection q Press [}] or [{] to display the category name. (CAT ON) w Press [}] or [{] while the category name is displayed to select a category. Seeking will start. Direct Channel Selection (Only for remote control unit) Example: Channel number 5 q Press [#]. w Press [5] e Press [BAND] (SET). Note: ¡ The previous screen reappears if a nonexistent channel is selected. ¡ "OFF AIR" is displayed and the previous screen reap- pears in a few seconds if an off-the-air channel is selected. 17 CQ-C5401U/C5301U
-
 1
1 -
2
-
 3
3 -
 4
4 -
 5
5 -
 6
6 -
 7
7 -
 8
8 -
 9
9 -
 10
10 -
 11
11 -
 12
12 -
 13
13 -
14
-
15
-
16
-
17
-
18
-
19
 |
 |