Panasonic DMC-FX500S Digital Camera - Page 53
Taking Pictures using Auto Bracket, until [AUTO BRACKET], appears, set the compensation range of
 |
UPC - 037988987818
View all Panasonic DMC-FX500S manuals
Add to My Manuals
Save this manual to your list of manuals |
Page 53 highlights
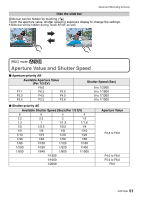
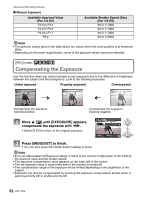
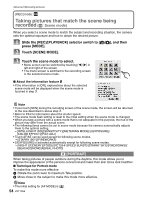
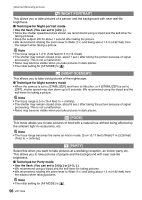
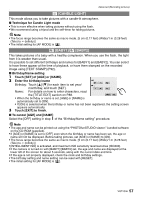
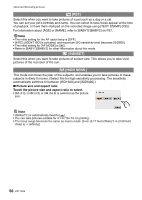
Advanced (Recording pictures) [REC] mode: ³±´²¿ Taking Pictures using Auto Bracket In this mode, 3 pictures are automatically recorded in the selected exposure compensation range each time the shutter button is pressed. You can select the picture with the desired exposure from the 3 pictures with different exposures. With auto bracket d1 EV 1st picture 2nd picture 3rd picture d0 EV j1 EV i1 EV 1 Move 3 [È] until [AUTO BRACKET] appears, set the compensation range of the exposure with 2/1. • When you do not use auto bracket, select [OFF] (0). 2 Press [MENU/SET] to finish. • You can also press the shutter button halfway to finish. Note • When setting auto bracket, [ ] appears on the screen. • When taking pictures using auto bracket after setting the exposure compensation range, the pictures taken are based on the selected exposure compensation range. When the exposure is compensated, the exposure compensation value appears on the lower left of the screen. • The auto bracket setting is canceled if you turn the camera off or [POWER SAVE] is activated. • When auto bracket is set, the auto review function is activated regardless of the auto review setting. (The picture is not enlarged.) You cannot set the auto review function in the [SETUP] menu. • The exposure may not be compensated with auto bracket depending on the brightness of the subject. • In shutter-priority AE and manual exposure, if the shutter speed is set to longer than 1 second auto bracket is disabled. • [Œ] is set for the flash when auto bracket is set. • Burst is canceled when auto bracket is set. VQT1Q36 53
-
 1
1 -
2
-
3
-
4
-
5
-
6
-
7
-
8
-
9
-
10
-
11
-
12
-
13
-
14
-
15
-
16
-
17
-
18
-
19
-
20
-
21
-
22
-
23
-
24
-
25
-
26
-
27
-
28
-
29
-
30
-
31
-
32
-
33
-
34
-
35
-
36
-
37
-
38
-
39
-
40
-
41
-
42
-
43
-
44
-
45
-
46
-
47
-
 48
48 -
 49
49 -
 50
50 -
 51
51 -
 52
52 -
 53
53 -
 54
54 -
 55
55 -
 56
56 -
 57
57 -
 58
58 -
59
-
60
-
61
-
62
-
63
-
64
-
65
-
66
-
67
-
68
-
69
-
70
-
71
-
72
-
73
-
74
-
75
-
76
-
77
-
78
-
79
-
80
-
81
-
82
-
83
-
84
-
85
-
86
-
87
-
88
-
89
-
90
-
91
-
92
-
93
-
94
-
95
-
96
-
97
-
98
-
99
-
100
-
101
-
102
-
103
-
104
-
105
-
106
-
107
-
108
-
109
-
110
-
111
-
112
-
113
-
114
-
115
-
116
-
117
-
118
-
119
-
120
-
121
-
122
-
123
-
124
-
125
-
126
-
127
-
128
-
129
-
130
-
131
-
132
-
133
-
134
-
135
-
136
-
137
-
138
-
139
-
140
 |
 |
