Panasonic DVD-RV32S DVDRV22 User Guide - Page 18
HOME THEATER-ENJOYING MORE POWERFUL SOUND, Recording to digital recording equipment or cassette tapes - dvd home theater sound system
 |
View all Panasonic DVD-RV32S manuals
Add to My Manuals
Save this manual to your list of manuals |
Page 18 highlights
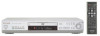
Home Theater-Enjoying more powerful sound This model can play Dolby Digital, but only in two channels. This model does not have a DTS decoder. You must connect a unit with a Dolby Digital or DTS decoder to enjoy surround sound. [Note] ≥The equipment connections described are examples. ≥Peripheral equipment and optional cables sold separately unless otherwise indicated. ≥Before connection, turn off all equipment and read the appropriate operating instructions. Digital connection To enjoy 5.1-ch surround sound Connect an amplifier with a built-in decoder or a decoder-amplifier combination. ≥Change the settings in "Digital output" to suit the decoder (➡ page 17). - Dolby Digital decoder: set "Dolby Digi- tal" to "Bitstream" - DTS decoder: set "DTS Digital Sur- round" to "Bitstream" - MPEG decoder: set "MPEG§" to "Bitstream" § Only for the Middle East, South Africa, Australia and N.Z. [Note] You cannot use DTS Digital Surround decoders not suited to DVD. To enjoy stereo or Dolby Pro Logic Connect a digital amplifier or system component. ≥Go to "Digital output" and change the settings to "PCM" and "Off" (➡ page 17). Analog connection To enjoy stereo or Dolby Pro Logic Connect an analog amplifier or system component. Analog amplifier or system component AUX IN L L Amplifier with built-in decoder or a digital amplifier R Audio cable R Advanced operations Speakers You can enjoy surround sound by connecting from three to six speakers. Example: Six speakers OPTICAL IN Optical digital audio cable Do not bend sharply when connecting. Insert fully, with this side facing up. OPTICAL DIGITAL AUDIO OUT (PCM/BITSTREAM) OPTICAL AUDIO OUT L COMPO VIDEO PB SUB- R PR WOOFER Connecting an active subwoofer You can enjoy more powerful bass by connecting an active subwoofer. ≥Place the subwoofer as close as possible to the front center. ≥Turn BASS PLUS on to boost the output from the subwoofer (➡ page 13). ≥Adjust the volume on the subwoofer to suit your preference. Audio cable SUBWOOFER To the subwoofer's input terminal ∫ Recording to digital recording equipment or cassette tapes ≥Digital recording ≥Analog recording You can record the digital signal directly onto digital recording equipment. You can record to a digital recording equipment or cassette deck. Using The signals on DVDs will be converted to 48 kHz/16 bit linear PCM. analog connection means sound will be unaffected by the copy guards Ensure the following conditions are met. ≥The recording equipment can handle a sampling frequency of 48 kHz. found on DVDs. To make an analog recording ≥You cannot record MP3 (or WMA for U.S.A., Canada and units with PX Connect the recording equipment with an audio cable (➡ [B] above). printed on the outer packaging [DVD-RV32] [DVD-RV27]). To make a digital recording 1. Connect the recording equipment with an optical digital audio cable (➡ [A] above). 2. When recording DVDs, make the following settings. ADVANCED SURROUND: OFF (➡ page 13) PCM Down Conversion: Yes (➡ page 17) RQT6236 Dolby Digital: PCM (➡ page 17) DTS Digital Surround: Off (➡ page 17) MPEG§: PCM (➡ page 17) 18 § Only for the Middle East, South Africa, Australia and N.Z.
-
 1
1 -
2
-
3
-
4
-
5
-
6
-
7
-
8
-
9
-
10
-
11
-
12
-
 13
13 -
 14
14 -
 15
15 -
 16
16 -
 17
17 -
 18
18 -
 19
19 -
 20
20 -
 21
21 -
 22
22 -
 23
23 -
24
-
25
 |
 |
