Panasonic DVDS53 Dvd/cd Player - English/spanish - Page 9
STEP 2 The remote control, STEP 3 QUICK SETUP, STEP 2
 |
View all Panasonic DVDS53 manuals
Add to My Manuals
Save this manual to your list of manuals |
Page 9 highlights
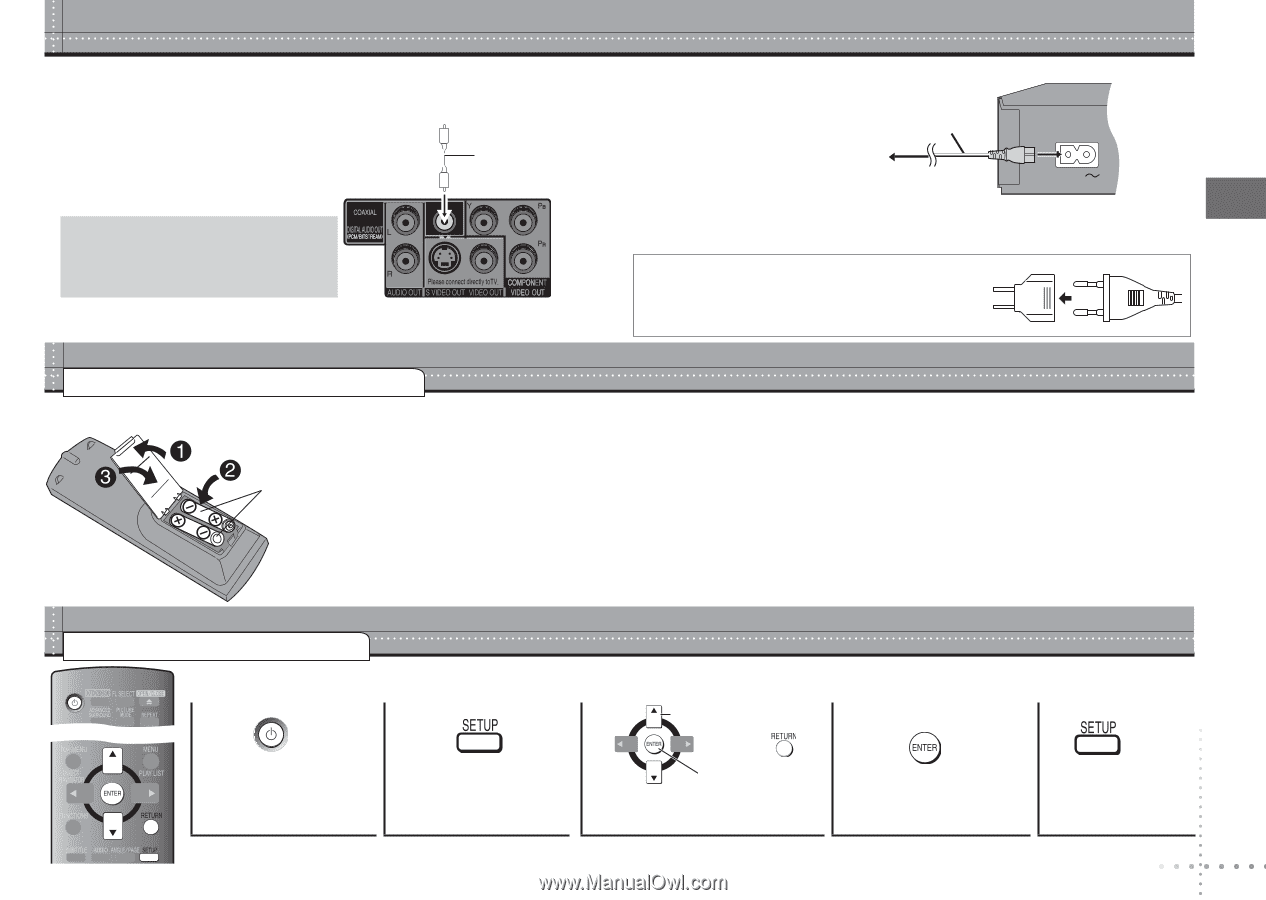
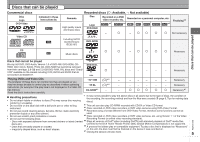
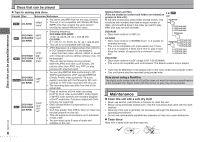
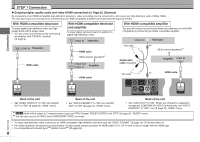
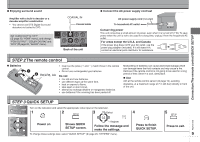
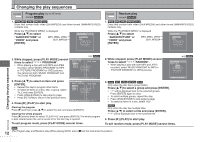
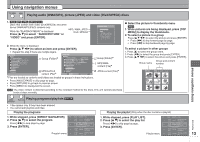
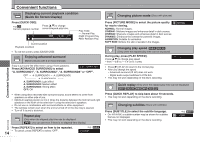
Enjoying surround sound Amplifier with a built-in decoder or a decoder-amplifier combination • You cannot use DTS Digital Surround decoders not suited to DVD. Set "AUDIO OUT" to "OFF" ( page 20, "HDMI" menu), and change "PCM OUTPUT", "DOLBY DIGITAL" and "DTS" ( page 20, "AUDIO" menu). COAXIAL IN Coaxial cable Back of the unit Connect the AC power supply cord last AC power supply cord (included) To household AC outlet AC IN Conserving power This unit consumes a small amount of power, even when it is turned off (1 W). To save power when the unit is not to be used for a long time, unplug it from the household AC outlet. For areas except the U.S.A. and Canada If the power plug does not fit your AC outlet, use the power plug adaptor (included). If it still doesn't fit, contact an electrical parts distributor for assistance. Connection/The remote control/QUICK SETUP STEP 2 The remote control Batteries R6/LR6, AA • Insert so the poles (4 and 3) match those in the remote control. • Do not use rechargeable type batteries. Do not: • mix old and new batteries. • use different types at the same time. • heat or expose to flame. • take apart or short circuit. • attempt to recharge alkaline or manganese batteries. • use batteries if the covering has been peeled off. Mishandling of batteries can cause electrolyte leakage which can damage items the fluid contacts and may cause a fire. Remove if the remote control is not going to be used for a long period of time. Store in a cool, dark place. Use Aim at the remote control sensor ( page 10), avoiding obstacles, at a maximum range of 7 m (23 feet) directly in front of the unit. STEP 3 QUICK SETUP Turn on the television and select the appropriate video input on the television. 1 2 3 Select 4 5 RQTC0128 Power on Shows QUICK SETUP screen. Register Follow the message and make the settings. To change these settings later, select "QUICK SETUP" ( page 20, "OTHERS" menu). Press to finish QUICK SETUP. Press to exit. 9
-
 1
1 -
2
-
3
-
 4
4 -
 5
5 -
 6
6 -
 7
7 -
 8
8 -
 9
9 -
 10
10 -
 11
11 -
 12
12 -
 13
13 -
 14
14 -
15
-
16
-
17
-
18
-
19
-
20
-
21
-
22
-
23
-
24
-
25
-
26
-
27
-
28
-
29
-
30
-
31
-
32
 |
 |