Panasonic HC-MDH3 Basic Owners Manual
Panasonic HC-MDH3 Manual
 |
View all Panasonic HC-MDH3 manuals
Add to My Manuals
Save this manual to your list of manuals |
Panasonic HC-MDH3 manual content summary:
- Panasonic HC-MDH3 | Basic Owners Manual - Page 1
Video Camera Model No. HC-MDH3 Please read these instructions carefully before using this product, and save this manual for future use. More detailed operating instructions are available in "Owner's Manual (PDF format)". To read it, download it from the website. https://eww.pavc.panasonic - Panasonic HC-MDH3 | Basic Owners Manual - Page 2
choosing Panasonic! located on the back of your camera. Be sure to retain this manual as your convenient camera information source. Date of Purchase covers. ≥ Do not repair this unit by yourself. Refer servicing to qualified service personnel. CAUTION! To reduce the risk of fire, electric shock - Panasonic HC-MDH3 | Basic Owners Manual - Page 3
To assure continued compliance, follow the attached installation instructions and use only shielded interface cables when connecting to Support Contact: Panasonic HC-MDH3 Panasonic Corporation of North America Two Riverfront Plaza, Newark, NJ 07102-5490 http://shop.panasonic.com/support HC-MDH3 - Panasonic HC-MDH3 | Basic Owners Manual - Page 4
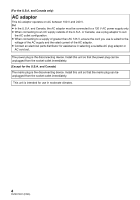
(For the U.S.A. and Canada only) AC adaptor This AC adaptor operates on AC between 100 V and 240 V. But ≥ In the U.S.A. and Canada, the AC adaptor must be connected to a 120 V AC power supply only. ≥ When connecting to an AC supply outside of the U.S.A. or Canada, use a plug adaptor to suit the AC - Panasonic HC-MDH3 | Basic Owners Manual - Page 5
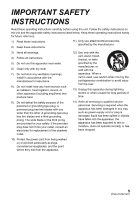
block any ventilation openings. Install in accordance with the manufacturer's instructions. 8) Do not install near any heat sources such as unused for long periods of time. 14) Refer all servicing to qualified service personnel. Servicing is required when the apparatus has been damaged in any - Panasonic HC-MDH3 | Basic Owners Manual - Page 6
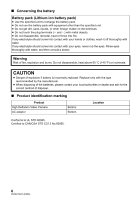
the batteries, please contact your local authorities or dealer and ask for the correct method of disposal. ∫ Product identification marking Product High Definition Video Camera AC adaptor Bottom Bottom Location Conforms to UL STD 60065. Certified to CAN/CSA STD C22.2 No.60065. 6 DVQX1481 (ENG) - Panasonic HC-MDH3 | Basic Owners Manual - Page 7
far away as possible from electromagnetic equipment (such as microwave ovens, TVs, video games etc.). ≥ If you use this unit on top of or near may alter the camera body or peel the surface finish. Do not use these solvents. ≥ When using a chemical dust cloth, follow the instructions that came with - Panasonic HC-MDH3 | Basic Owners Manual - Page 8
Do not lift up this unit by the handle with the tripod still attached ≥ When the tripod is attached, its weight will also affect the unit's handle, possibly causing the handle to break and hurting the user. ≥ To carry the unit while the tripod is attached, take hold of the tripod. Do not swing the - Panasonic HC-MDH3 | Basic Owners Manual - Page 9
start/stop button in the following screen for three seconds. Screen to delete the SD card data is displayed, so select [YES] and follow the instruction on the screen. 9 (ENG) DVQX1481 - Panasonic HC-MDH3 | Basic Owners Manual - Page 10
recorded in AVCHD format. AVCHD: This recording method is suitable for playback on a high-definition TV. Audio is recorded in Dolby Audio™. ∫ Indemnity about recorded content Panasonic does not accept any responsibility for damages directly or indirectly due to any type of problems that result - Panasonic HC-MDH3 | Basic Owners Manual - Page 11
unit unattended. Please note that Panasonic does not accept any responsibility for cards. ∫ For the purposes of this owner's manual ≥ The battery pack is referred to as the scene(s)". ≥ Scene(s) recorded with [REC MODE] set to [AVCHD]: "AVCHD scene(s)". ≥ Notation of < > indicates the setup item name - Panasonic HC-MDH3 | Basic Owners Manual - Page 12
menu screen 41 Language Selection 41 Menu structure 42 Others Troubleshooting 44 About copyright 46 Specification 47 Optional accessories 49 Limited Auto Mode/Manual Mode ..... 31 Using the zoom 32 Manual Recording 33 Focus 33 Iris/Gain adjustment 34 White Balance 35 Manual shutter speed - Panasonic HC-MDH3 | Basic Owners Manual - Page 13
Eyecup (l 20) VYC1080 Lens cap (l 19) SYA0073 Diffusion filter (white) (l 20) 1ZE1HCMDH3GCZ (For U.S.A. only) If accessories are lost, customers can visit us at http://shop.panasonic.com/support for further information about obtaining replacement parts. 13 (ENG) DVQX1481 - Panasonic HC-MDH3 | Basic Owners Manual - Page 14
possible, we recommend using a cable with a length of 1.5 m (4.9 feet) or less. Refer to the following support site for information about an external media device. http://panasonic.jp/support/global/cs/e_cam (This Site is English only) A USB 2.0 B External media device (commercially-available - Panasonic HC-MDH3 | Basic Owners Manual - Page 15
Importing data to a PC Image data can be imported to a PC for editing by inserting the SD card used for recording with the unit into that PC. ≥ A PC with an SD card slot or an SD card reader is required. A SDHC Memory Card/SDXC Memory Card* B PC * SD cards are optional and not supplied with this - Panasonic HC-MDH3 | Basic Owners Manual - Page 16
(In Playback Mode) 10 Grip belt (l 19) 11 Status indicator (l 26) 12 Power switch (l 26) 13 Recording start/stop button (l 30) 14 Camera remote terminal [CAM REMOTE] ≥ FOCUS IRIS terminal (3.5 mm (0.14 q) diameter mini jack) ≥ ZOOM S/S terminal (2.5 mm (0.1 q) diameter super mini jack) 15 Headphone - Panasonic HC-MDH3 | Basic Owners Manual - Page 17
19 Shoulder strap fixture 20 Built-in microphone 21 Built-in LED light 22 Recording lamp 23 Lens 24 Lens hood 25 Multi-manual ring (l 33) 26 Camera function button [CAMERA FUNCTION] (l 33) 27 LED LIGHT switch ≥ Turns on/off the built-in LED light. 28 Iris button [IRIS] (l 34) 29 Intelligent auto - Panasonic HC-MDH3 | Basic Owners Manual - Page 18
up to 180o A towards the lens or 90o B towards the opposite direction. 38 Eyecup mount (l 20) 39 Eyecup (l 20) 40 Accessory shoe 42 Speaker 43 VIDEO OUT terminal 44 AUDIO OUT terminal 45 Charging lamp [CHG] (l 22) 46 DC input terminal [DC IN] (l 22) 47 Battery release button [PUSH] (l 21) 48 - Panasonic HC-MDH3 | Basic Owners Manual - Page 19
ビ ヒ 50 51 52 53 49 49 SD Card slot cover (l 25) 50 Card slot 2 (l 25) 51 Access lamp (card 2) (l 25) 52 Card slot 1 (l 25) 53 Access lamp (card 1) (l 25) ∫ Attaching/removing the lens cap Protect the lens surface with the lens cap while the unit is not used. ≥ Place your fingers in the - Panasonic HC-MDH3 | Basic Owners Manual - Page 20
∫ Attaching the eyecup Attach by aligning the notch of the eyecup attachment part with the protrusion at the inside of the eyecup. A Notch B Protrusion ∫ Using the diffusion filter (supplied) of the built-in LED light The supplied diffusion filter softens the light by reducing its glare. Use the - Panasonic HC-MDH3 | Basic Owners Manual - Page 21
or failure occurring as a result of use of a counterfeit battery pack. To ensure that safe products are used we would recommend that a genuine Panasonic battery pack is used. Inserting/removing the battery Install the battery by inserting it in the direction shown in the figure. Removing the battery - Panasonic HC-MDH3 | Basic Owners Manual - Page 22
the AC adaptor is unplugged from the AC outlet by accident. ≥ Do not use any other AC adaptors except the supplied one. ≥ We recommend using Panasonic batteries (l 13, 21, 49). ≥ If you use other batteries, we cannot guarantee the quality of this product. ≥ Do not heat or expose to flame. ≥ Do - Panasonic HC-MDH3 | Basic Owners Manual - Page 23
recordable times and the actual recordable times are based on the conditions below. These become shorter in other conditions. j When [REC MODE] is set to [AVCHD] and [REC FORMAT] is set to [PH 1080/59.94i] j When using the viewfinder (times in parentheses are when using the LCD monitor) j A cable is - Panasonic HC-MDH3 | Basic Owners Manual - Page 24
or still pictures to an SD card. ≥ We recommend that you use a Panasonic Memory Card. This unit (an SDXC compatible device) is compatible with SDHC Memory Slow Recording 50 Mbps Speed Class ratings Class10 Label examples AVCHD All Class4 or more ≥ Keep the memory card out of reach of children - Panasonic HC-MDH3 | Basic Owners Manual - Page 25
Inserting/removing an SD card When using an SD card for the first time, it is necessary to format the SD card. (l 29) When the SD card is formatted, all of the recorded data is deleted. Once the data is deleted, it cannot be restored. Caution: Check that the access lamp has gone off. ヒ ビ - Panasonic HC-MDH3 | Basic Owners Manual - Page 26
Preparation Turning the unit on/off Set the power switch to ON while pressing the lock release button B to turn on the unit. To turn off the unit Set the power switch to OFF while pressing the lock release button. The status indicator goes off. A The status indicator lights on. ≥ To turn on - Panasonic HC-MDH3 | Basic Owners Manual - Page 27
∫ About the operation icons ///: Touch when changing a page or performing settings. ≥ Do not touch the LCD monitor with hard pointed tips, such as ball point pens. Viewfinder adjustment Adjusting the field of view This setting will not affect the images actually recorded. It adjusts the field of - Panasonic HC-MDH3 | Basic Owners Manual - Page 28
When this unit is turned on, the message [SET TIME ZONE AND DATE/TIME] may appear. To make these settings, select [YES], and follow the instructions from Step 2-3 of the time zone setting procedure. Time zone Time difference from the Greenwich Mean Time can be set. 1 Select the menu. (l 41) MENU - Panasonic HC-MDH3 | Basic Owners Manual - Page 29
Recording Selecting a media to record [SD CARD 1] and [SD CARD 2] can be selected separately to record motion pictures or still pictures. 1 Select the menu. (l 41) MENU : [RECORD SETUP] # [MEDIA SELECT] 2 Touch the media to record motion pictures or still pictures. ≥ The media is selected separately - Panasonic HC-MDH3 | Basic Owners Manual - Page 30
Recording Recording motion pictures 1 Set the mode switch B to to switch to Recording Mode. ≥ Open the LCD monitor. 2 Press the recording start/stop button C to start recording. A When you begin recording, REC (red) is displayed. ≥ Recording will stop when you press the recording start/stop button - Panasonic HC-MDH3 | Basic Owners Manual - Page 31
settings. (l 33, 35) ≥ The following settings in Manual Mode are canceled when you switch to Intelligent Auto Mode: j Focus (l 33) j Focus Assist j Iris (l 34) j GAIN (l 34) j White Balance (l 35) j Shutter speed (l 36) j [SCENE MODE] ∫ Camera controls that are disabled in Intelligent Auto Mode - Panasonic HC-MDH3 | Basic Owners Manual - Page 32
side: Wide-angle recording (zoom out) W T W ∫ Zooming with the multi-manual ring You can also perform zooming by rotating the multi-manual ring. ≥ You can also adjust focus and iris with the multi-manual ring. (l 33) A Multi-manual ring 3 A side: B Wide-angle recording (zoom out) B side: Close-up - Panasonic HC-MDH3 | Basic Owners Manual - Page 33
GAIN AUTO WB AUTO SHUTTER AUTO A Multi-manual ring B Camera function button C IRIS button D iA/MANUAL/FOCUS switch E Jog dial F Manual ring setting [FOCUS], [ZOOM], [IRIS] G Manual icon Focus Use the multi-manual ring to adjust focus. If auto focusing is difficult due to - Panasonic HC-MDH3 | Basic Owners Manual - Page 34
. F4.0 A Auto iris icon* B Iris value * It is displayed in Auto Iris Mode. Gain adjustment ≥ Use the jog dial to change the settings. ≥ Switch to Manual Mode. (l 31) 1 Touch the LCD monitor in the recording screen. ≥ Operation icons are displayed. 2 Touch GAIN AUTO to switch to - Panasonic HC-MDH3 | Basic Owners Manual - Page 35
Mode. (l 31) 1 Touch the LCD monitor in the recording screen. ≥ Operation icons are displayed. 2 Touch WB AUTO to switch to Manual White Balance Mode. ≥ The previously used White Balance mode will be selected. WB AUTO 5600K VAR A [WB] B Color temperature display ≥ Displayed when - Panasonic HC-MDH3 | Basic Owners Manual - Page 36
Mode. (l 31) 1 Touch the LCD monitor in the recording screen. ≥ Operation icons are displayed. 2 Touch SHUTTER AUTO to switch to Manual Shutter Mode. SHUTTER AUTO A [SHUTTER] B Auto Shutter display ≥ This is displayed in Auto Shutter Mode. C Shutter speed 3 Adjust the shutter speed by - Panasonic HC-MDH3 | Basic Owners Manual - Page 37
Recording USER button Each of the USER button can register one function from the 30 available functions. ≥ There are 3 USER buttons (USER1 to 3) on the main body and 4 USER button icons (USER4 to USER7) displayed on the LCD monitor. Setting the USER button 1 Select the menu. (l 41) MENU : [USER SW - Panasonic HC-MDH3 | Basic Owners Manual - Page 38
Functions of the USER button ∫ List of USER button functions ≥ Please refer to "Owner's Manual" (PDF format) for more information about the functions of the USER button. Item Icon Function [INH] [FA1] [FA2] Invalid Focus - Panasonic HC-MDH3 | Basic Owners Manual - Page 39
Playback Motion picture/Still picture playback リンリヴ ヒ ヶヴユン ビ 1 Set the mode switch A to to switch to Playback Mode. 2 Touch the play mode select icon B. D Media display The selected media is displayed in yellow. 3 Select the media E you wish to play back. - Panasonic HC-MDH3 | Basic Owners Manual - Page 40
≥ (If you have touched the recording mode option [AVCHD]) After you have touched a recording format option, one of the following icons will be displayed on each thumbnail. j PS : Scenes recorded in [PS 1080/59. - Panasonic HC-MDH3 | Basic Owners Manual - Page 41
Menu Using the menu screen リンリヴ ヒ ヶヴユン ビ ヮユワヶ 1 Press the MENU button A. 2 Touch the top menu B. 3 Touch the submenu C. ≥ Next (Previous) page can be displayed by touching / . 4 Touch the desired item to enter the setting. 5 Touch [EXIT] to exit the menu - Panasonic HC-MDH3 | Basic Owners Manual - Page 42
Menu Menu structure Please refer to "Owner's Manual" (PDF format) for details. ∫ Menu structure in Recording mode [CAMERA SETUP] [SYSTEM MODE] [USER SW] [ [ZEBRA DETECT 1]/[ZEBRA DETECT 2]/[MARKER]/[GUIDE LINES]/[SAFETY ZONE]/[CENTER MARKER]/[REC COUNTER]/ [VIDEO OUT OSD]/[DATE/TIME]/[DATE FORMAT]/[ - Panasonic HC-MDH3 | Basic Owners Manual - Page 43
∫ Menu structure in Playback mode [VIDEO SETUP]*1 [PICT. SETUP]*2 [REPEAT PLAY]/[RESUME PLAY]/[SCENE PROTECT]/[DELETE] ] [RESOLUTION]/[DOWN CONV.]/[HDMI TC OUTPUT]*1/[LCD/EVF OUTPUT] [DISP SETUP] [VIDEO OUT OSD]/[DATE/TIME]/[DATE FORMAT]/[AUDIO LEVEL METER]*1/[CARD & BATTERY]/[OTHER DISPLAY]/[ - Panasonic HC-MDH3 | Basic Owners Manual - Page 44
Others Troubleshooting ∫ It is not a malfunction in following cases The lens, the viewfinder or LCD , but this is because the unit is using MOS for the image sensor. This is not a malfunction. Problem This unit cannot be turned on. This unit does not stay on long enough. Battery runs down quickly. - Panasonic HC-MDH3 | Basic Owners Manual - Page 45
Problem Scenes/still pictures cannot be played back. Playback Check points ≥ Any scenes/still pictures where the thumbnails are system frequencies are indicated with . This unit cannot play back these scenes. Refer to the "Owner's Manual" (PDF format) for more details. 45 (ENG) DVQX1481 - Panasonic HC-MDH3 | Basic Owners Manual - Page 46
LLC. ≥ "AVCHD", "AVCHD Progressive" and the "AVCHD Progressive" logo are trademarks of Panasonic Corporation and and products mentioned in these instructions are usually the registered trademarks encode video in compliance with the AVC Standard ("AVC Video") and/or (ii) decode AVC Video that was - Panasonic HC-MDH3 | Basic Owners Manual - Page 47
Video Camera Power source: 7.2 V (When using battery) 12 V (When using AC adaptor) Power consumption: 27.4 W (During recording: 9.2 W; during charging: 27.4 W) indicates safety information Recording format: [MOV]/[MP4]/ AVCHD version 2.0 (AVCHD (VBR) Refer to "Owner's Manual" (PDF format) for the - Panasonic HC-MDH3 | Basic Owners Manual - Page 48
94p, 480/59.94p, VIERA Link not supported AV connector video output level; 1.0 Vp-p, 75 h Audio output: HDMI Type A connector audio output level; Linear PCM AV connector audio output level (Line); 2 ch Headphone output; 3.5 mm (0.14 q) stereo mini jack Camera - Panasonic HC-MDH3 | Basic Owners Manual - Page 49
AG-VBR89 VW-LF49N Battery pack Battery pack Battery pack Filter kit (For U.S.A. only) To order optional accessories please visit http://shop.panasonic.com or your local Photo Specialty Dealer. NOTE: Accessories and/or model numbers may vary by country. Please consult your local dealer. Product - Panasonic HC-MDH3 | Basic Owners Manual - Page 50
as is". Mail-In Service--Online Repair Request Online Repair Request To submit a new repair request and for quick repair status visit our Web Site at http://shop.panasonic.com/support. When shipping the unit, carefully pack, include all supplied accessories listed in the Owner's Manual, and send it - Panasonic HC-MDH3 | Basic Owners Manual - Page 51
with this product develops during or after the warranty period, you may contact your dealer or Service Center. If the problem is not handled to your satisfaction, then write to: Consumer Affairs Department Panasonic Corporation of North America 661 Independence Pkwy Chesapeake, VA 23320 PARTS AND - Panasonic HC-MDH3 | Basic Owners Manual - Page 52
, or (c) refund your purchase price. The decision to repair, replace or refund will be made by Panasonic Canada Inc. Camcorder Products - One (1) year, WARRANTY SERVICE For product operation, repairs and information assistance, please visit our Support page: www.panasonic.ca/english/support IF - Panasonic HC-MDH3 | Basic Owners Manual - Page 53
or Service Center; buy spare parts and accessories by our Web Site to Latin American: COUNTRY Panama Colombia Ecuador Costa Rica El Salvador Guatemala Uruguay Paraguay Chile WEB SITE www.panasonic.com/pa/soporte/ www.panasonic.com/co/soporte/ www.panasonic.com/ec/soporte/ www.panasonic.com - Panasonic HC-MDH3 | Basic Owners Manual - Page 54
54 DVQX1481 (ENG) - Panasonic HC-MDH3 | Basic Owners Manual - Page 55
55 (ENG) DVQX1481 - Panasonic HC-MDH3 | Basic Owners Manual - Page 56
Web site: http://www.panasonic.com Panasonic Corporation of North America Two Riverfront Plaza, Newark, NJ 07102-5490 http://shop.panasonic.com Panasonic Canada Inc. 5770 Ambler Drive, Mississauga, Ontario, L4W 2T3 www.panasonic.com © Panasonic Corporation 2018 Printed in Japan DVQX1481ZA
-
 1
1 -
 2
2 -
 3
3 -
 4
4 -
 5
5 -
 6
6 -
 7
7 -
8
-
9
-
10
-
11
-
12
-
13
-
14
-
15
-
16
-
17
-
18
-
19
-
20
-
21
-
22
-
23
-
24
-
25
-
26
-
27
-
28
-
29
-
30
-
31
-
32
-
33
-
34
-
35
-
36
-
37
-
38
-
39
-
40
-
41
-
42
-
43
-
44
-
45
-
46
-
47
-
48
-
49
-
50
-
51
-
52
-
53
-
54
-
55
-
56
 |
 |

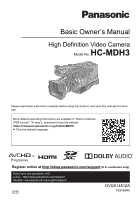
Basic Owner’s Manual
High Definition Video Camera
Model No.
HC-MDH3
Please read these instructions carefully before using this product, and save this manual for future
use.
More detailed operating instructions are available in “Owner’s Manual
(PDF format)”. To read it, download it from the website.
≥
Click the desired language.
If you have any questions, visit :
U.S.A. : http://shop.panasonic.com/support
Canada : www.panasonic.ca/english/support
Register online at http://shop.panasonic.com/support
(U.S. customers only)
DVQX1481ZA
F0318AR0