Panasonic KXTG2302 2.4 Ghz Digital Cdl - Page 2
Getting Started
 |
View all Panasonic KXTG2302 manuals
Add to My Manuals
Save this manual to your list of manuals |
Page 2 highlights
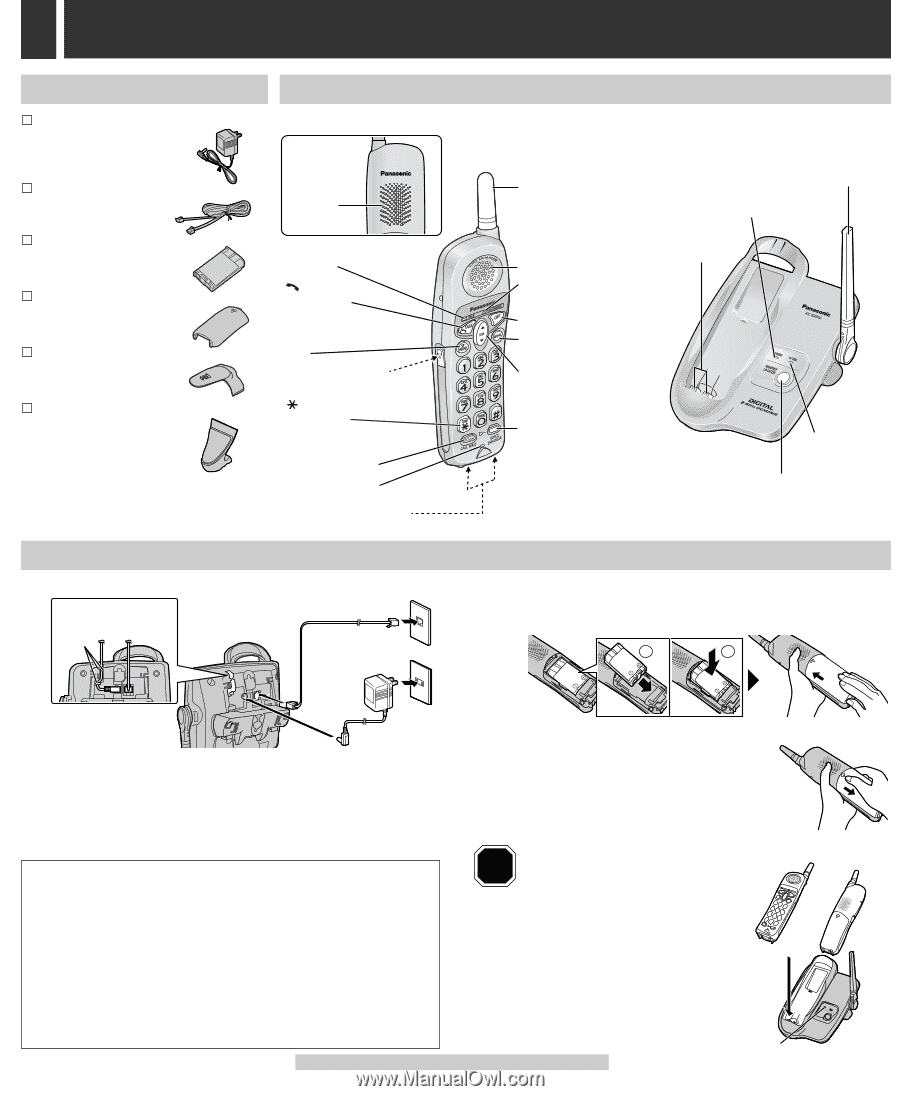
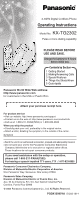
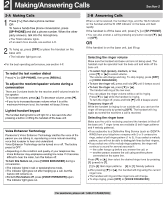
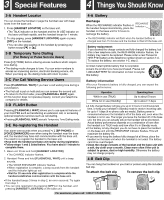
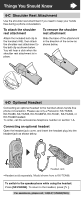
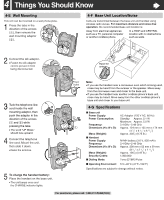
1 Getting Started Section 1 1-A Accessories 1-B Location of Controls AC Adaptor one Order No. PQLV1Z (PQLV1) Handset Back side Telephone Line Cord one Order No. PQJA10075Z Speaker Battery one Order No. HHR-P104 Handset Cover one Order No. PQKK10140Z2 Belt Clip one Order No. PQKE10375Z2 TALK Indicator (2-A, 2-B) [ ] (TALK) Button (2-A) [SP-PHONE] (Speakerphone) Button (2-A) Headset Jack (4-D) Shoulder Rest Attachment ...........one Order No. PQKE10364Z1 [ ] (TONE) Button (3-B) [FLASH/CALL WAIT] Button (3-C, 3-D) For extra orders, call 1-800-332-5368. For hearing or speech impaired TTY users, call 1-866-605-1277. Microphone (2-A) Charge Contacts (4-A) Base unit Antenna Antenna (4-F) CHARGE Indicator (1-C) Receiver RECHARGE Indicator (4-A) Charge Contacts (4-A) [OFF] Button (2-A) [REDIAL] Button (2-A) VOL. (VOLUME) Key ([M], [L]) (2-A, 2-B) [VOICE ENHANCER] Button and Indicator (1-C, 2-A) IN USE Indicator (2-B, 3-A) [HANDSET LOCATOR] Button (3-A) 1-C Settings 1 Connect as shown. Fasten the AC adaptor cord. Hooks Single-Line Telephone Jack (RJ11C) Telephone Line Cord Power Outlet (AC 120 V, 60 Hz) 2 Insert the battery (#), and press it down until it snaps into the compartment ($). Close the cover. 1 2 AC Adaptor • USE ONLY WITH Panasonic AC ADAPTOR PQLV1 (Order No. PQLV1Z). • The AC adaptor must remain connected at all times. (It is normal for the adaptor to feel warm during use.) • The unit will not work during a power failure. We recommend connecting a standard telephone to the same telephone line or to the same telephone jack using the Panasonic KX-J66 T-adaptor. To select the dialing mode TONE (preset) or PULSE Make sure the handset and base unit are not being used. The handset must be operated near the base unit and while off the base unit. 1. Press [VOICE ENHANCER], then press [8]. • The VOICE ENHANCER indicator flashes. To replace the battery: Press the notch on the cover firmly and slide it as indicated by the arrow. Replace the old battery with a new one (4-A). Close the cover and charge the battery for 6 hours. 3 STOP Charge the battery for 6 hours. • See section 4-A for more details. • The unit beeps once and the CHARGE indicator OR lights. 2. To select PULSE, press [1]. OR To select TONE, press [2]. 3. Press [VOICE ENHANCER]. • The handset beeps and the indicator light goes out. CHARGE Indicator For assistance, please call: 1-800-211-PANA(7262)
-
 1
1 -
 2
2 -
 3
3 -
 4
4 -
 5
5 -
 6
6 -
 7
7 -
 8
8
 |
 |