Panasonic PT-D6000ULS Operating Instructions - Page 17
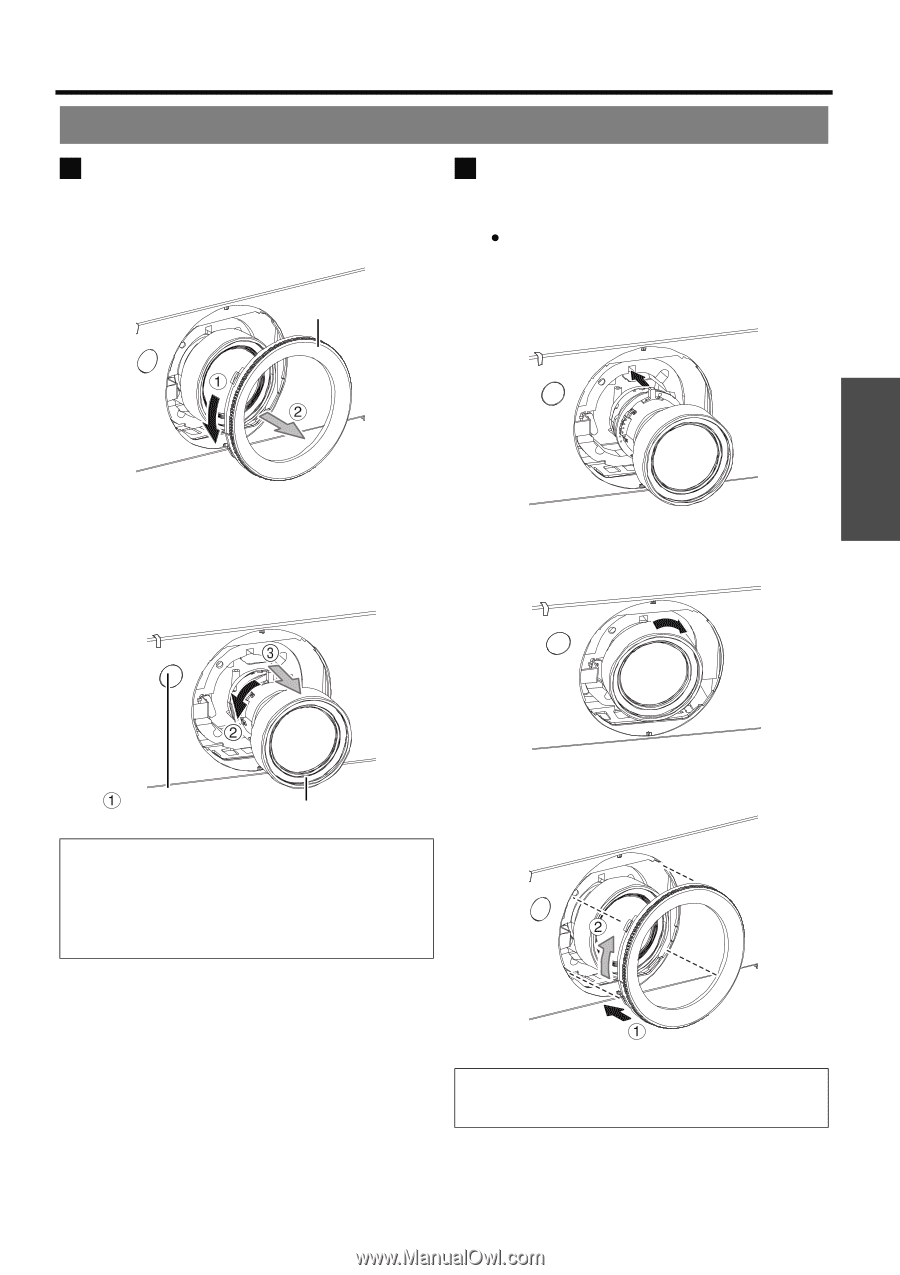
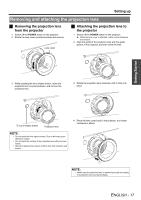
Removing and attaching the projection lens, Setting up, Removing the projection lens
 |
UPC - 791871111857
View all Panasonic PT-D6000ULS manuals
Add to My Manuals
Save this manual to your list of manuals |
Page 17 highlights
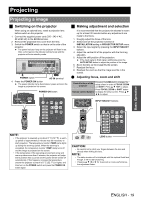
Setting up Removing and attaching the projection lens J Removing the projection lens from the projector 1. Switch off the POWER button on the projector. 2. Rotate the lens cover counterclockwise and remove. Lens cover J Attaching the projection lens to the projector 1. Switch off the POWER button on the projector. When the lens cover is attached, rotate counterclockwise and remove. 2. Align the guide of the projection lens with the guide groove in the projector, and then insert the lens. Getting Started 3. While pressing the lens release button, rotate the projection lens counterclockwise, and remove the projection lens. 3. Rotate the projection lens clockwise until it clicks into place. Lens release button Projection lens NOTE: • Do not touch the lens signal contact. Dust or dirt may cause defective contact. • Do not touch the surface of the projection lens with your bare hands. • Store the replaced lens where it will be free from vibration and impact. 4. Place the lens cover back to the projector, and rotate clockwise to attach. NOTE: • Make sure the projection lens is attached securely by rotating the projection lens counterclockwise. ENGLISH - 17
-
 1
1 -
2
-
3
-
4
-
5
-
6
-
7
-
8
-
9
-
10
-
11
-
 12
12 -
 13
13 -
 14
14 -
 15
15 -
 16
16 -
 17
17 -
 18
18 -
 19
19 -
 20
20 -
 21
21 -
 22
22 -
23
-
24
-
25
-
26
-
27
-
28
-
29
-
30
-
31
-
32
-
33
-
34
-
35
-
36
-
37
-
38
-
39
-
40
-
41
-
42
-
43
-
44
-
45
-
46
-
47
-
48
-
49
-
50
 |
 |