Panasonic PVL751 PVL751 User Guide - Page 15
Basic Operation, Built-in Auto Light (using The Light, Replacing The Bulb
 |
View all Panasonic PVL751 manuals
Add to My Manuals
Save this manual to your list of manuals |
Page 15 highlights
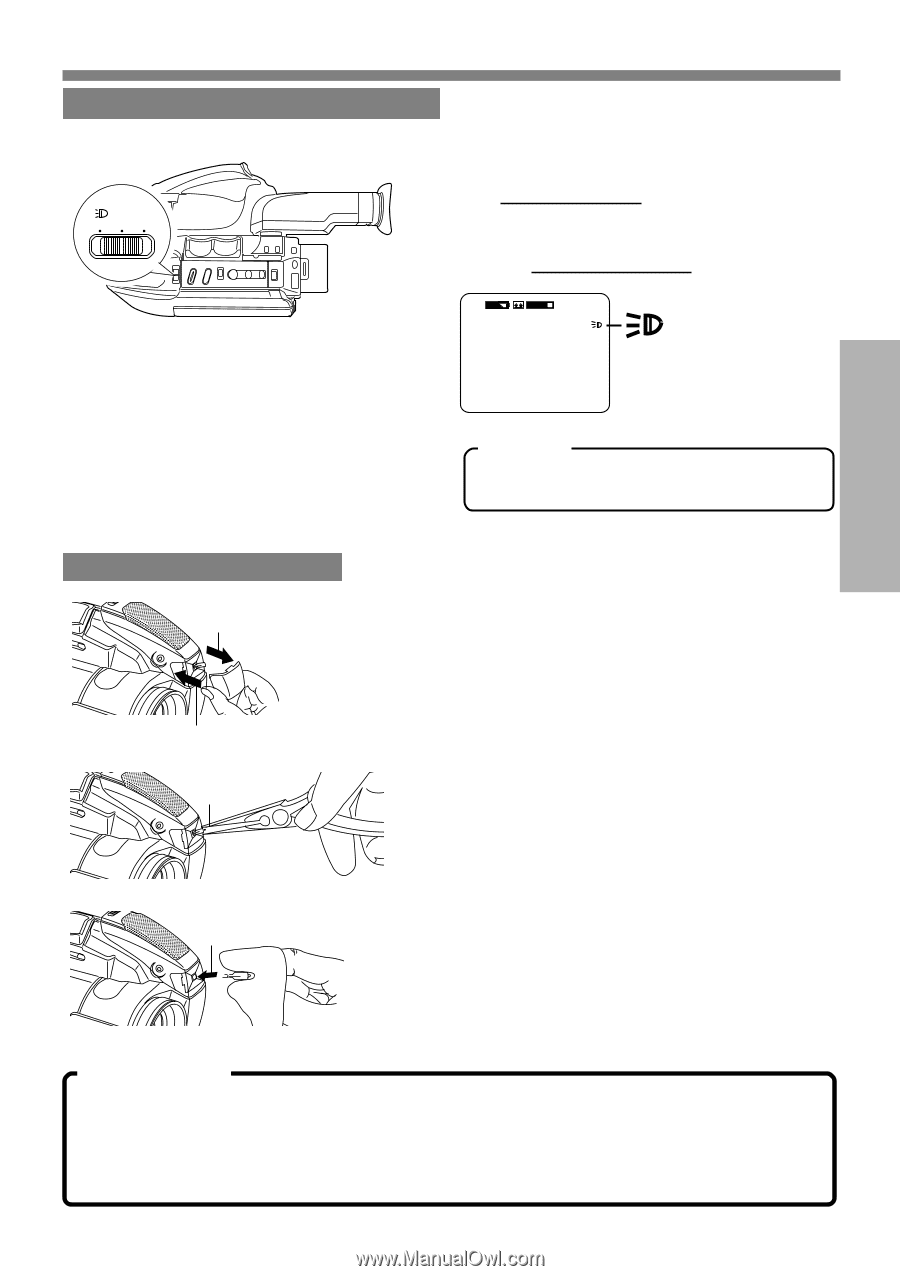
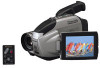
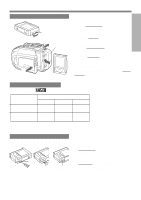
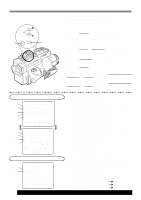
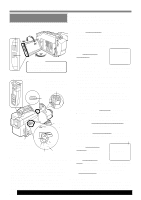
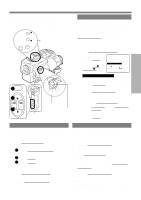
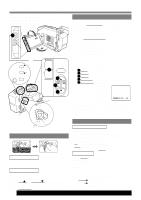
Built-in Auto Light Using the Light For recording in dim lighting. Before you begin... • Connect Camcorder to power source. • Set POWER to CAMERA. LIGHT ON OFF AUTO Set LIGHT to AUTO. Light turns on/off automatically according to lighting conditions. Or, set LIGHT to ON/OFF manually. Note: • Using Light reduces battery operating time. • Provide proper ventilation when using Light extensively in a hot environment. • Using Light when the Camcorder is powered by a car battery may shorten bulb life. • Set Light to OFF when not in use. 1x SP REC 12:00:00AM JAN 1 2001 appears in EVF or LCD monitor when Light is on. Caution: Light becomes hot. Never cover Light while on. Basic Operation Replacing the Bulb 1 4 2 3 Before you begin... • Order Part No. VULS0001 (VLLW0015 and cushions) for replacement bulb unit. • Set POWER to OFF. 1 Press in on both sides of lens cover and pull straight out and off. 2 Using Tweezers or needle-nose pliers, carefully remove bulb. • Take unit to service center if you need assistance. 3 Replace bulb using a clean cloth or tissue. (Do not touch with fingers.) 4 Replace lens cover. Note: • Handle bulb gently. Excessive force may cause bulb to crack. DANGER: Use only replacement bulb (PART NO. VLLW0015) supplied by Panasonic to reduce risk of fire. Handle new bulb with cloth or tissue as skin oils will decrease bulb life. Remove lens cover and allow bulb to cool before replacing to avoid possible burn hazard. 15
-
 1
1 -
2
-
3
-
4
-
5
-
6
-
7
-
8
-
9
-
 10
10 -
 11
11 -
 12
12 -
 13
13 -
 14
14 -
 15
15 -
 16
16 -
 17
17 -
 18
18 -
 19
19 -
 20
20 -
21
-
22
-
23
-
24
-
25
-
26
-
27
-
28
-
29
-
30
-
31
-
32
-
33
-
34
-
35
-
36
-
37
-
38
-
39
-
40
-
41
-
42
-
43
-
44
-
45
-
46
-
47
-
48
-
49
-
50
-
51
-
52
-
53
-
54
-
55
-
56
-
57
-
58
-
59
-
60
 |
 |