Panasonic SCEN17 SAEN15 User Guide - Page 6

Control guide, MP3 operations, Regarding CDs

Page 6 highlights

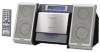
Control guide OPEN/ LIGHT DISPLAY CLOSE SLEEP 1 2 3 CLOCK/ TIMER ADJ 4 5 6 TIMER SET/CHECK 7 8 9 PGM/CLEAR -AUTO PRESET 0 >=10 AUX TUNER/ CD BAND VOL VOL EXTRA SOUND LIVE PLAY D.BASS EQ VIRTUALIZER MODE ALBUM The shaded buttons, such as , function in the same way as the buttons on the remote control. Standby/on switch [^, POWER ^/l 3 Press to switch the unit from on to standby mode or vice versa. In standby mode, the unit is still consuming a small amount of power. Light button [LIGHT] Turn on and off the light of display for better viewing in a darkened room. The factory setting is ON. SLEEP timer button [SLEEP 5 Clock/timer adjust button [CLOCK/TIMER ADJ 5 Timer set/check button [TIMER SET/CHECK 5 CD program/clear, tuner preset button [PGM/CLEAR, -AUTO PRESET 3, 4 AUX button [AUX 2 Tuner/band select button [TUNER/BAND 4 Volume buttons [VOL -, + VOL, - VOLUME 3 Extra D.Bass button [EXTRA D.BASS 5 Sound EQ button [SOUND EQ 5 Album skip, preset channel select buttons [2, 1, u ALBUM i 4, 6 CD open/close button [;, OPEN/CLOSE 3 Display button [DISPLAY 5 Numbered buttons [1-9, 0, >=10 3 CD play/pause button [q/h CD 3 CD stop button [g 3 Play mode button [PLAY MODE 3, 4, 6 Live virtualizer button [LIVE VIRTUALIZER 5 CD skip/search, frequency select, time adjust buttons [u, i, -, +, u/-, +/i 3, 4, 5 Standby indicator When the unit is connected to the AC mains supply, this indicator lights up in standby mode and goes out when the unit is turned on. Remote control signal sensor Display MP3 operations This unit can play MP3, a method of compressing audio without overtly Limitations on MP3 hurting audio quality. • This unit is compatible with multi-session but if there are a lot of sessions it When creating MP3 files to play on this unit • Maximum number of tracks and albums: 999 tracks and 256 albums. • Compatible compression rate: Between 64 kbps and 320 kbps (stereo). 128 kbps (stereo) is recommended. • Disc formats: ISO9660 level 1 and level 2 (except for extended formats). • It is better not to create folders (album) within folders (004album below). takes more time for play to start. Keep the number of sessions to a minimum to avoid this. • This unit cannot play files recorded using packet write. • If the disc includes both MP3 and normal audio data (CD-DA), the unit plays the type recorded in the inner part of the disc. If the disc includes both MP3 and other types of audio data (e.g. WMA or WAV), the unit plays only the MP3. CD-ROM drive 001album 001track.mp3 002track.mp3 Naming tracks and albums Prefix with 3-digit numbers in the order you want to play Extension • Depending on how you create MP3 files, they may not play in the order you numbered them or may not play at all. • Upper case alphanumeric characters and an underbar "_" can be displayed on this unit. Lower case characters are converted to upper case. 003track.MP3 002album 001track.mp3 (or.MP3) 004track.mp3 005track.mp3 004album Up to 31 characters for tracks and albums 3 008track.MP3 009track.MP3 If you created an album such as 004album on 003album the left, the files may not play in order. 006track.mp3 007track.MP3 The albums would play in the order Regarding CDs Note on CD-R and CD-RW This unit can play CD-R and CD-RW recorded with CD-DA or MP3. Use an audio recording disc for CD-DA and finalize∗ it when you finish recording. The unit may not be able to play some discs due to the condition of the recording. ∗A process performed after recording that enables CD-R/CD-RW players OPEN/ LIGHT DISPLAY CLOSE SLEEP 1 2 3 CLOCK/ TIMER ADJ 4 5 6 TIMER SET/CHECK 7 8 9 PGM/CLEAR -AUTO PRESET 0 >=10 AUX TUNER/ CD BAND VOL VOL EXTRA SOUND LIVE PLAY D.BASS EQ VIRTUALIZER MODE ALBUM CD q/h PLAY MODE u ALBUM i Album play You can listen to tracks within albums. [ALBUM] : Album play u ALBUM i PLAY MODE Select the Select album " [ALBUM] " or " [ALBUM] &" CD q/h Start play [ALBUM] &: • Skip the Album album repeat u ALBUM i to play audio CD-R and CD-RW. Caution Choose discs with this mark: Do not; • use irregularly shaped CDs. • attach extra labels and stickers. • use CDs with labels and stickers that are coming off or with adhesive exuding from under labels and stickers. • attach scratch-proof covers or any other kind of accessory. • write anything on the CD. • clean CDs with liquids (Wipe with a soft, dry cloth.). Note about using a DualDisc • The digital audio content side of a DualDisc does not meet the technical specifications of the Compact Disc Digital Audio (CD-DA) format so play may not be possible. • Do not use a DualDisc in this unit as it may get scratched or scraped. 6

  • 1
  • 2
  • 3
  • 4
  • 5
  • 6
  • 7
  • 8

6
Standby/on switch [
^
,
POWER
^
/l
]
......................................................
3
Press to switch the unit from on to standby mode or vice versa.
In standby mode, the unit is still consuming a small amount of power.
Light button [LIGHT]
Turn on and off the light of display for better viewing in a darkened room.
The factory setting is ON.
SLEEP timer button [SLEEP]
...............................................................
5
Clock/timer adjust button [CLOCK/TIMER ADJ]
................................
5
Timer set/check button [TIMER SET/CHECK]
.....................................
5
CD program/clear, tuner preset button
[PGM/CLEAR, –AUTO PRESET]
.......................................................
3, 4
AUX button [AUX]
..................................................................................
2
Tuner/band select button [TUNER/BAND]
..........................................
4
Volume buttons [VOL –, + VOL, – VOLUME +]
....................................
3
Extra D.Bass button [EXTRA D.BASS]
................................................
5
Sound EQ button [SOUND EQ]
............................................................
5
Album skip, preset channel select buttons
[
2
,
1
,
u
ALBUM
i
]
.....................................................................
4, 6
CD open/close button [
;
, OPEN/CLOSE]
...........................................
3
Display button [DISPLAY]
.....................................................................
5
Numbered buttons [1–9, 0,
10]
...........................................................
3
CD play/pause button [
q
/
h
CD]
...........................................................
3
CD stop button [
g
]
................................................................................
3
Play mode button [PLAY MODE]
..................................................
3, 4, 6
Live virtualizer button [LIVE VIRTUALIZER]
.......................................
5
CD skip/search, frequency select, time adjust buttons
[
u
,
i
, –, +,
u
/–, +/
i
]
.........................................................
3, 4, 5
Standby indicator
When the unit is connected to the AC mains supply, this indicator lights
up in standby mode and goes out when the unit is turned on.
Remote control signal sensor
Display
This unit can play MP3, a method of compressing audio without overtly
hurting audio quality.
When creating MP3 files to play on this unit
• Maximum number of tracks and albums: 999 tracks and 256 albums.
• Compatible compression rate:
Between 64 kbps and 320 kbps (stereo).
128 kbps (stereo) is recommended.
• Disc formats: ISO9660 level 1 and level 2 (except for extended formats).
• It is better not to create folders (album) within folders (
004
album below).
Limitations on MP3
• This unit is compatible with multi-session but if there are a lot of sessions it
takes more time for play to start. Keep the number of sessions to a
minimum to avoid this.
• This unit cannot play files recorded using packet write.
• If the disc includes both MP3 and normal audio data (CD-DA), the unit
plays the type recorded in the inner part of the disc.
If the disc includes both MP3 and other types of audio data (e.g. WMA or
WAV), the unit plays only the MP3.
• Depending on how you create MP3 files, they may not play in the order you
numbered them or may not play at all.
• Upper case alphanumeric characters and an underbar “_” can be displayed
on this unit. Lower case characters are converted to upper case.
Note on CD-R and CD-RW
This unit can play CD-R and CD-RW recorded with CD-DA or MP3. Use an
audio recording disc for CD-DA and finalize
it when you finish recording.
The unit may not be able to play some discs due to the condition of the
recording.
A process performed after recording that enables CD-R/CD-RW players
to play audio CD-R and CD-RW.
Caution
Choose discs with this mark:
Do not;
• use irregularly shaped CDs.
• attach extra labels and stickers.
• use CDs with labels and stickers that are coming off or with adhesive
exuding from under labels and stickers.
• attach scratch-proof covers or any other kind of accessory.
• write anything on the CD.
• clean CDs with liquids (Wipe with a soft, dry cloth.).
Note about using a DualDisc
• The digital audio content side of a DualDisc does not meet the technical
specifications of the Compact Disc Digital Audio (CD-DA) format so play
may not be possible.
• Do not use a DualDisc in this unit as it may get scratched or scraped.
Control guide
LIGHT
SLEEP
CLOCK/
TIMER ADJ
DISPLAY
TIMER
SET/CHECK
PGM/CLEAR
-
AUTO PRESET
OPEN/
CLOSE
1
2
3
4
5
6
7
8
0
9
>
=
10
AUX
TUNER/
BAND
CD
EXTRA
D.BASS
SOUND
EQ
LIVE
VIRTUALIZER
PLAY
MODE
ALBUM
VOL
VOL
The shaded buttons, such as
, function in the
same way as the buttons on the remote control.
>
=
MP3 operations
001
album
001
track.
mp3
002
track.
mp3
003
track.
MP3
008
track.
MP3
009
track.
MP3
002
album
004
track.
mp3
005
track.
mp3
004
album
003
album
006
track.
mp3
007
track.
MP3
CD-ROM drive
3
If you created an album such as
004
album on
the left, the files may not play in order.
The albums would play in the order
À
,
Á
,
Â
,
Ã
.
Naming tracks and albums
Prefix with 3-digit numbers in the order you
want to play
001
track.
mp3
(
or.
MP3)
Up to 31 characters for tracks and albums
Extension
LIGHT
SLEEP
CLOCK/
TIMER ADJ
DISPLAY
TIMER
SET/CHECK
PGM/CLEAR
-
AUTO PRESET
OPEN/
CLOSE
1
2
3
4
5
6
7
8
0
9
>
=
10
AUX
TUNER/
BAND
CD
EXTRA
D.BASS
SOUND
EQ
LIVE
VIRTUALIZER
PLAY
MODE
ALBUM
VOL
VOL
u
ALBUM
i
PLAY MODE
CD
q
/
h
Select
” or
&
[ALBUM]
[ALBUM]
Select the
album
• Skip the
album
u
ALBUM
i
PLAY MODE
CD
q
/
h
u
ALBUM
i
Album
play
You can
listen to
tracks within
albums.
Album play
&
:
Album
repeat
[ALBUM]
[ALBUM]
Start
play
Regarding CDs