Pfaff 75 Owner's Manual - Page 4
Operate, Sewing, Machine, Workplate
 |
View all Pfaff 75 manuals
Add to My Manuals
Save this manual to your list of manuals |
Page 4 highlights
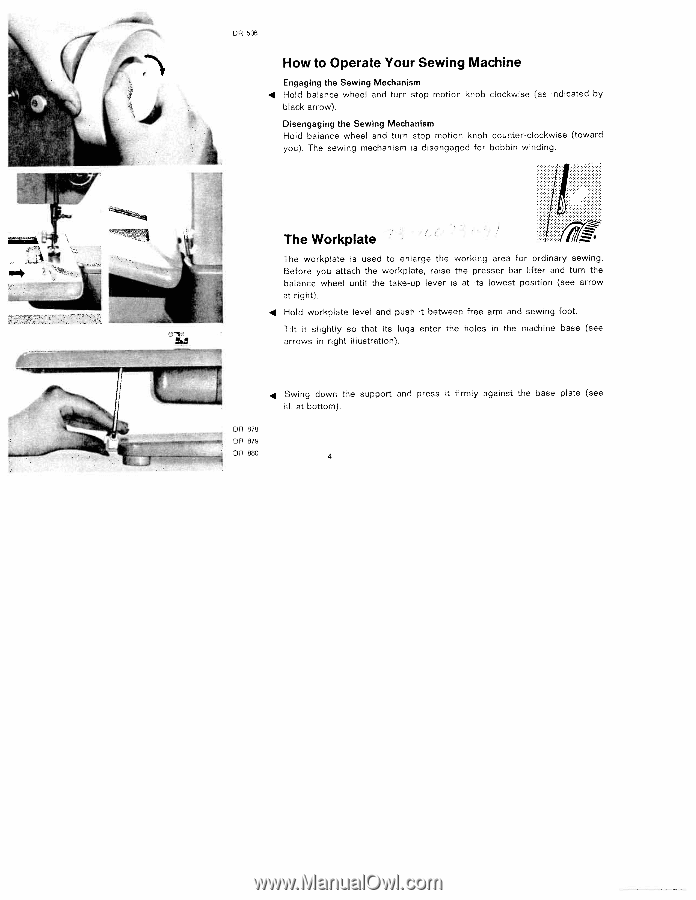
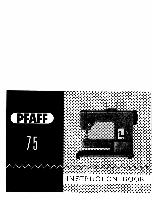
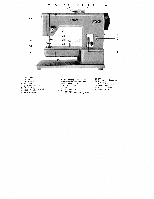
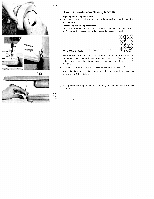
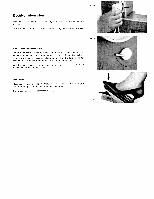
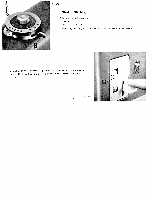
DR 506 A How to Operate Your Sewing Machine Engaging the Sewing Mechanism 4 Hold balance wheel and turn stop motion knob ciockwise (as indicated by Dlack arrow). Disengaging the Sewing Mechanism Hold balance wheel and turn stop motion knob counter-clockwse (toward you). The sewing mechanism is disengaged for bobbin winding. The Workplate The workplate is used to enlarge the working area for ordinary sewing. -4 Before you attach the workpiate, raise the presser bar lifter and turn the balance wheel until the take-up lever is at its lowest position (see arrow at right). 4 Hold workplate level and push it between free arm and sewing foot. Tilt it slightly so that its lugs enter the holes in the machine base (see arrows in right illustration). 4 Swing down the support and press it firmly against the base plate (see Il. at bottom). DR 878 DR 879 DR 880 4
-
 1
1 -
 2
2 -
 3
3 -
 4
4 -
 5
5 -
 6
6 -
 7
7 -
 8
8 -
 9
9 -
 10
10 -
11
-
12
-
13
-
14
-
15
-
16
-
17
-
18
-
19
-
20
-
21
-
22
-
23
-
24
-
25
-
26
-
27
-
28
-
29
-
30
-
31
-
32
-
33
-
34
-
35
-
36
-
37
-
38
-
39
-
40
-
41
-
42
-
43
-
44
-
45
-
46
-
47
-
48
-
49
-
50
-
51
-
52
 |
 |