Pfaff hobby 1010 Owner's Manual
Pfaff hobby 1010 Manual
 |
View all Pfaff hobby 1010 manuals
Add to My Manuals
Save this manual to your list of manuals |
Pfaff hobby 1010 manual content summary:
- Pfaff hobby 1010 | Owner's Manual - Page 1
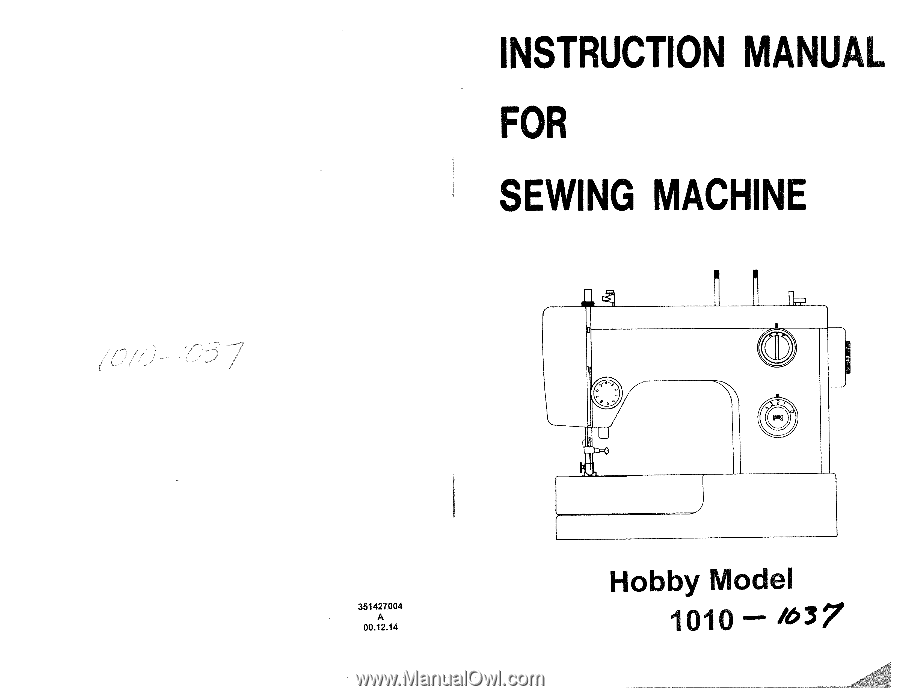
INSTRUCTION MANUAL FOR SEWING MACHINE 0] 351427004 0012.14 Hobby Model 1010 - 37 - Pfaff hobby 1010 | Owner's Manual - Page 2
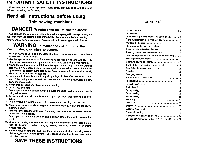
presser foot, etc. 15. Always unplug sewing machine from the electrical outlet when removing covers, lubricating, or when making any other user servicing adjustments mentiçned in the Instruction manual. SAVE THESE INSTRUCTIONS CONTENTS Names of Parts I&2 Accessories 3 Before sewing (Power - Pfaff hobby 1010 | Owner's Manual - Page 3
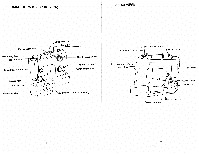
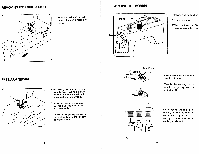
OF PARTS (FRONT VIEW) (REAR VIEW) Zigzag width dal resure Regulator Take up lever Thread tension dial Presser toot Shuttle Extension table Sub-spool pin pin Top cover Needle position knor Reverse button d al read guide for upper threading Bobbin winder Bobbin winder spindle Upper thread guide - Pfaff hobby 1010 | Owner's Manual - Page 4
a screw type bulb with 12W/i 5W(Max). IMPORTANT When leaving the sewing machine unattended, the plug must be removed from the socket outlet. When servicing the sewing machine, or when removing covers or changing lamps, the machine must be disconnected from the supply by removing the plug from the - Pfaff hobby 1010 | Owner's Manual - Page 5
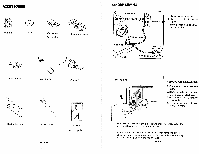
:REE.Ai SEWING 1. This sewing machine can be used as a fiat bed machine but easily converts to free arm machine by removing the extension table. 2. Especially useful for sewing sleeves, pant , release .the screw of upper thread guide and ad just up or down until bobbin winding is balanced. -6- - Pfaff hobby 1010 | Owner's Manual - Page 6
cover. 2.Open hinged latch of bobbIn case and pull bobbin case out of machine. 3.Release the latch and bob bin will fall out easily. INSERTING BOBBIN 5cm of thread from bobbin and it into bobbin case as shown. 2.Guide the end of thread into slot. Tension spring 3.Puli into slot and under - Pfaff hobby 1010 | Owner's Manual - Page 7
both threads and place them together under presser foot to the rear of machine. 3. Place fabric under presser foot from the front, lower presser foot. 4.Startto sew (see page 16) CHANGING SEWING DIRECTIONS 1 Lower needle down into fabric and raise presser foot, pivot the fabric around the needle to - Pfaff hobby 1010 | Owner's Manual - Page 8
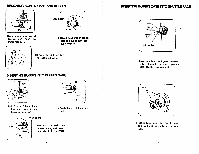
CONTROL DIAL 1 Reverse button 2. Zig-zag width dial 3. Thread tension dial 4. Needle position knob 5 Stitch length dial -11- ADJUSTiNG THREAD TENSION Coaect Weak Strong Upper thread tension may be adjusted by turning the thread tension dial. Fabric Incorrect Inside of fabric Upper thread - Pfaff hobby 1010 | Owner's Manual - Page 9
to release pressure. (Heavy fabrics) 3. Insufficient pressure may cause poor feeding, skipped stitches, or difficulty in guiding the fabric. 4. No pressure adjustment is required when darn ing or sewing embroidery. DROP FEED A B A Push feed lever down to drop feed below needle plate for darning - Pfaff hobby 1010 | Owner's Manual - Page 10
foot. 4. Depress foot/Speed control and start to sew. 5. Test the machine stitches on a scrap of fabric you plan to use, adjusting the machine for the length of stitch and tension suitable to your fabric. Attention 1, When 'turning the balance wheel manually, always turn it toward, you. 2.Guide - Pfaff hobby 1010 | Owner's Manual - Page 11
to the edge of seam. 2.Push the reverse button and sew in reverse 'for about 3-4 cms. 3.Raise needle to its highest position. 4.Lift presser foot and pulloul the fabric to rear of machine. 5.Cut threads as shown on the thread cutter. - 17- STRAIGHT STITCH 1 This type of stitching is the one used - Pfaff hobby 1010 | Owner's Manual - Page 12
in position. 3.Place button between presser foot and fabric and lower presser foot. 4.Manually turn hand wheel towards you ensuring that the needle enters into both holes of button wfthout obstruction. (Increase or decrease width setting). 5.Sew about 7 stitches. to 6.Pull both threads the underside - Pfaff hobby 1010 | Owner's Manual - Page 13
sufficiently so that the workpiece edge runs freely through the groove under the foot. Only suitable materials can be used and some practice may be necessary both threads through the same path as for normal sewing. Separate threads before last thread guide above the needle. Insert one thread into the - Pfaff hobby 1010 | Owner's Manual - Page 14
distance from edge of material. 2. Set guide hole on bed, at right of needle plate, and adjust dis tance from the needle to the guide for desired seam allowance. 3. Run machine with edge of material touching guide. 23 - - r Before sewing fit buttonhole foot as shown. Cut buttonhole along centre - Pfaff hobby 1010 | Owner's Manual - Page 15
PROBLEMS WHAT TO DO PROBABLE CAUSE - Feed dog down. - Machine not moving. . Stitch length dial in o position. - Light pressure on presser foot off burrs completely. Machine Jamming Knocking Noise Puckering - No oil. -Dust and thread in shuttle. - Tension too tight - Sewing foot pressure too strong
-
 1
1 -
 2
2 -
 3
3 -
 4
4 -
 5
5 -
 6
6 -
 7
7 -
8
-
9
-
10
-
11
-
12
-
13
-
14
-
15
 |
 |
INSTRUCTION
MANUAL
FOR
SEWING
MACHINE
0]
Hobby
Model
351427004
0012.14
1010
—
37