Pfaff hobbylock 797 Owner's Manual - Page 10
Pfaff hobbylock 797 Manual
 |
View all Pfaff hobbylock 797 manuals
Add to My Manuals
Save this manual to your list of manuals |
Page 10 highlights
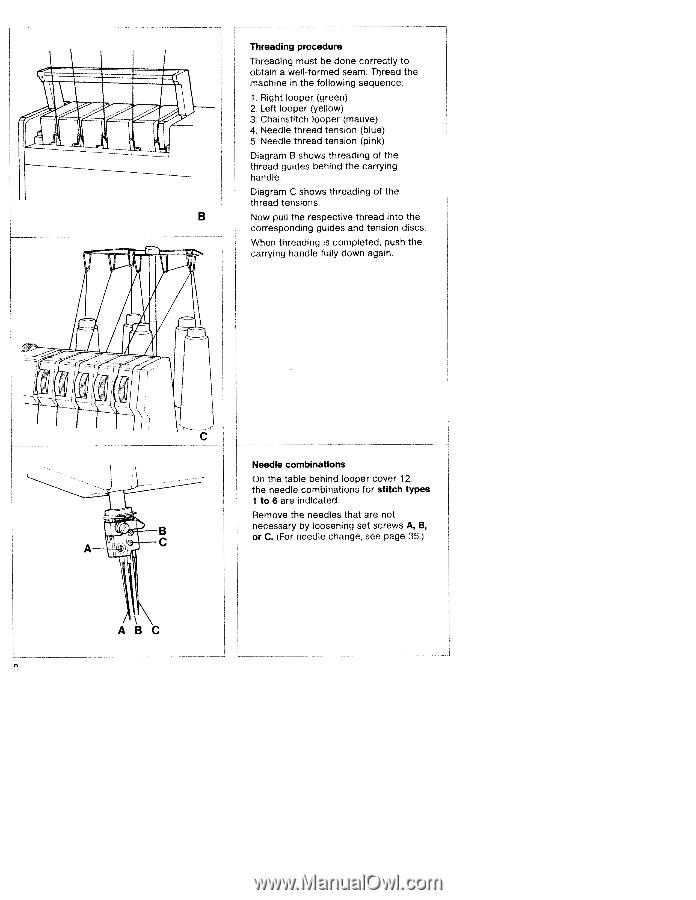
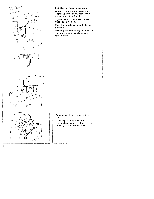
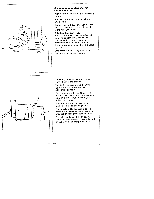
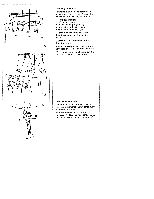
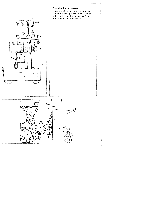
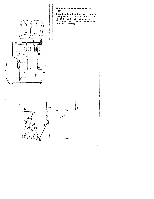
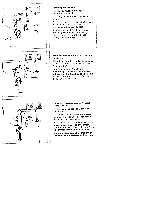
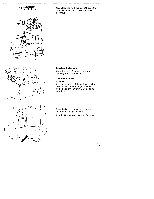
Threading procedure Threading must be done correctly to obtain a well-formed seam. Thread the machine in the following sequence: 1. Right looper (green) 2. Left looper (yellow) 3. Chainstitch looper (mauve) 4. Needle thread tension (blue) 5. Needle thread tension (pink) Diagram B shows threading of the thread guides behind the carrying handle. Diagram C shows threading of the thread tensions. B Now pull the respective thread into the corresponding guides and tension discs. When threading is completed, push the carrying handle fully down again. AS Needle combinations On the table behind looper cover 12, the needle combinations for stitch types ito 6 are indicated. Remove the needles that are not necessary by loosening set screws A, B, or C (For needle change, see page 35.) -
-
 1
1 -
2
-
3
-
4
-
 5
5 -
 6
6 -
 7
7 -
 8
8 -
 9
9 -
 10
10 -
 11
11 -
 12
12 -
 13
13 -
 14
14 -
 15
15 -
16
-
17
-
18
-
19
-
20
-
21
-
22
-
23
-
24
-
25
-
26
-
27
-
28
-
29
-
30
-
31
-
32
-
33
-
34
-
35
-
36
-
37
-
38
-
39
-
40
-
41
-
42
-
43
-
44
-
45
-
46
-
47
 |
 |