Pfaff select 1540 Owner's Manual - Page 43
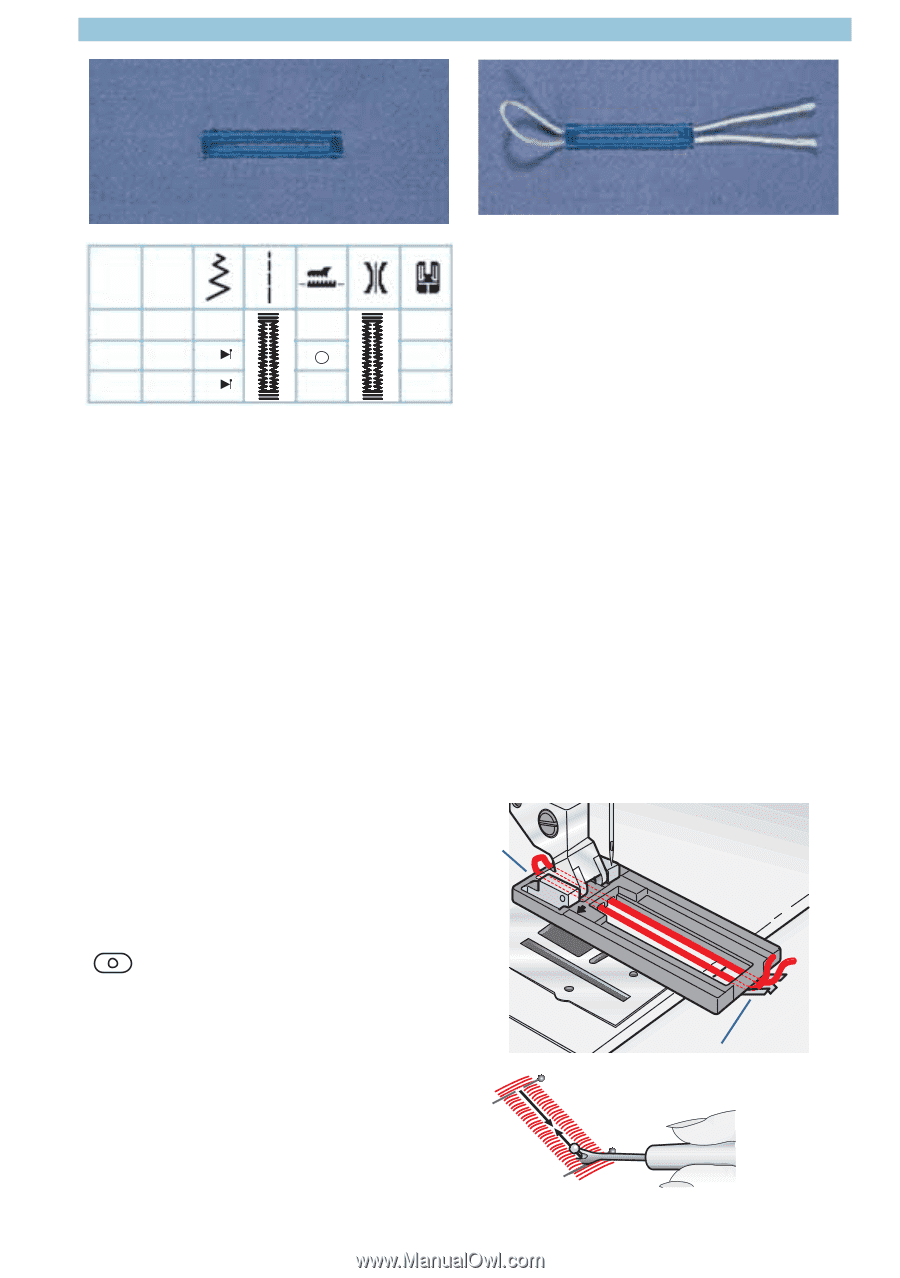
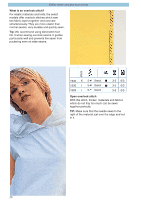
Standard buttonhole, Standard buttonhole with gimp thread
 |
View all Pfaff select 1540 manuals
Add to My Manuals
Save this manual to your list of manuals |
Page 43 highlights
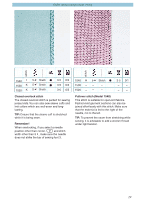
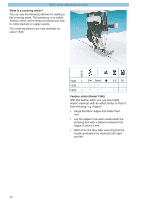
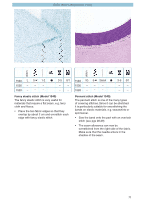
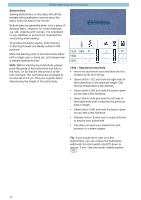
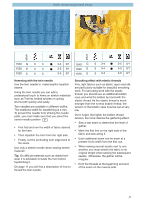
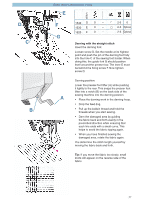
Utility stitches and practical sewing stitch 1540 - - - 1530 ABC 5- 0/1 1520 ABC 5- 0/1 1520/1530 - Standard buttonhole • Insert the buttonhole foot and slide the foot forward as far as it will go. • Select stitch A. Sew the left side of the buttonhole to the required length. Clip the top thread after a few stitches. • Select stitch B and sew a few bartacks while holding the fabric securely. • Select stitch C. Sew the right side of the buttonhole until it matches the previous side in length. • Select stitch B and sew a few bartacks while holding the fabric securely. • Select stitch D. Secure the buttonhole by sewing a few stitches. • Carfully cut open your buttonhole with scissors or a seam ripper. Tip: If you would like to sew very fine buttonholes, you can reduce the buttonhole width with the stitch width dial (27) down to approx. 3 mm. Use the center needle position . Standard buttonhole with gimp thread To sew especially durable buttonholes, on heavy fabrics, knits or sportswear, we recommend using a gimp thread. On knits the gimp thread is particularly important to prevent the buttonhole from stretching. • Lay the gimp thread over the rear protrusion A and pass the thread ends underneath the presser foot towards the front. • Clamp the threads to the left and right of protrusion B. • Slide the buttonhole runner as far forwards as possible and sew the buttonhole as described for your select model. • Pull the loop of the gimp thread into the buttonhole and cut the threads. A B Carfully cut open your buttonhole with scissors or a seam ripper. 33
-
 1
1 -
2
-
3
-
4
-
5
-
6
-
7
-
8
-
9
-
10
-
11
-
12
-
13
-
14
-
15
-
16
-
17
-
18
-
19
-
20
-
21
-
22
-
23
-
24
-
25
-
26
-
27
-
28
-
29
-
30
-
31
-
32
-
33
-
34
-
35
-
36
-
37
-
 38
38 -
 39
39 -
 40
40 -
 41
41 -
 42
42 -
 43
43 -
 44
44 -
 45
45 -
 46
46 -
 47
47 -
 48
48 -
49
-
50
-
51
-
52
-
53
-
54
-
55
-
56
-
57
-
58
-
59
-
60
-
61
-
62
-
63
-
64
-
65
-
66
-
67
-
68
-
69
-
70
-
71
-
72
-
73
-
74
-
75
-
76
-
77
-
78
-
79
-
80
-
81
-
82
 |
 |