Philips AJ7030D User manual - Page 12
Connect power, Set clock - 12
 |
View all Philips AJ7030D manuals
Add to My Manuals
Save this manual to your list of manuals |
Page 12 highlights
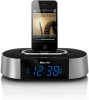
Note • You can only use AC power as power supply. The pre-installed lithium CR2032 battery can only back up time and alarm. • When power is disconnected, the display backlight is off. For first-time use: Remove the protective tab to activate the battery. To replace the battery: B Connect power C Caution • Risk of product damage! Ensure that the power voltage corresponds to the voltage printed on the back or underside of the clock radio. • Risk of electric shock! When you unplug the AC adapter, always pull the plug from the socket. Never pull the cord. Set clock 1 In standby mode, press and hold SET for two seconds to activate clock setting mode. » [12H] or [24H] is displayed. 2 Press TUNING +/- or / repeatedly to select 12/24 hour format. 3 Press SET again to confirm. » The hour digits begin to blink. 4 Repeat Steps 2 to 3 to set the hour and minute.
-
 1
1 -
2
-
3
-
4
-
5
-
6
-
 7
7 -
 8
8 -
 9
9 -
 10
10 -
 11
11 -
 12
12 -
 13
13 -
 14
14 -
 15
15 -
 16
16 -
 17
17 -
18
-
19
-
20
-
21
-
22
-
23
-
24
-
25
-
26
 |
 |
