Philips DCM278 User manual - Page 12
Auto install radio stations, Set clock, Connect power
 |
UPC - 609585175402
View all Philips DCM278 manuals
Add to My Manuals
Save this manual to your list of manuals |
Page 12 highlights
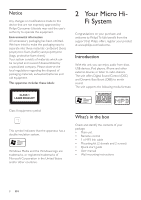
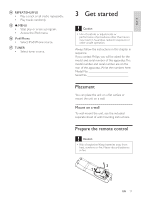
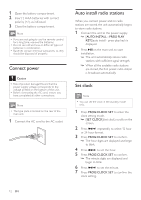
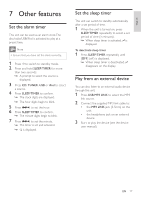
1 Open the battery compartment. 2 Insert 2 AAA batteries with correct polarity (+/-) as indicated. 3 Close the battery compartment. Note • If you are not going to use the remote control for a long time, remove the batteries. • Do not use old and new or different types of batteries in combination. • Batteries contain chemical substances, so they should be disposed of properly. Connect power Caution • Risk of product damage! Ensure that the power supply voltage corresponds to the voltage printed on the bottom of the unit. • Before connecting the AC cord, ensure you have completed all other connections. Note • The type plate is located on the rear of the main unit. 1 Connect the AC cord to the AC outlet. Auto install radio stations When you connect power and no radio stations are stored, the unit automatically begins to store radio stations. 1 Connect the unit to the power supply. » [AUTO INSTALL - PRESS PLAY KEY](auto install - press play key) is displayed. 2 Press on the main unit to start installation. » The unit automatically stores radio stations with sufficient signal strength. » When all the available radio stations are stored, the first preset radio station is broadcast automatically. Set clock Note • You can set the clock in the standby mode only. 1 Press PROG/CLOCK SET to enter the clock setting mode. » [SET CLOCK](set clock) scrolls on the screen. 2 Press / repeatedly to select 12 hour or 24 hour format. 3 Press PROG/CLOCK SET to confirm. » The hour digits are displayed and begin to blink. 4 Press / to set the hour. 5 Press PROG/CLOCK SET to confirm. » The minute digits are displayed and begin to blink. 6 Press / to set the minute. 7 Press PROG/CLOCK SET to confirm the clock setting. 12 EN
-
 1
1 -
2
-
3
-
4
-
5
-
6
-
 7
7 -
 8
8 -
 9
9 -
 10
10 -
 11
11 -
 12
12 -
 13
13 -
 14
14 -
 15
15 -
 16
16 -
 17
17 -
18
-
19
-
20
-
21
 |
 |