Philips FWR7 User manual - Page 22
External Recording
 |
View all Philips FWR7 manuals
Add to My Manuals
Save this manual to your list of manuals |
Page 22 highlights
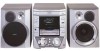
DSC English EXTERNAL RECORDING STANDBY ON CD 1 CD 2 CD 3 DISPLAY CDR R7 FW- CD RECORDABLE MINI HIFI SYSTEM CD-TEXT EDITING CD RECORDER DIGITAL / ANALOG AUX TUNER iR SENSOR CD TEXT CLOCK/TIME OPEN/CLOSE JOG CONTROL YES RECORD CD CD MASTER VOLUME PURE NO PROG SEARCH STOP REC LEVEL SEARCH PLAY/ PAUSE COMPILE CD EDIT TRACK TEXT REC TYPE FINALIZE ERASE LOUDNESS INCREDIBLE URR OUND 7 If a digital source is selected: After the recording process, the CD recorder stops automatically. Note: Recordings from DAT or DCC will automatically stop after 20 seconds of silence. If an analog source is selected: At the end of the recording process, the CD recorder stops after a silence of 20 seconds on the source material. • To stop recording manually, press STOP & on the unit. yRECORDING IN PROGRESS goes off. Manual recording Manual recording from an external source 1 Make sure the CDR(W) is absolutely free of scratches and dust particles. 2 Repeatedly press DIGITAL / ANALOG AUX to select the input for the external source from which you want to record. yAUX Digital is displayed if the digital input is selected. yAUX Analog is displayed if the analog input is selected. Analog or digital recording? When making recordings from an external source, we recommend to do analog recording only if digital recording is not possible. Digital recording will usually result in better sound quality. Recording with automatic start Recording of an entire disc or a track with automatic start 1 Make sure the CDR(W) is absolutely free of scratches and dust particles. 2 Repeatedly press DIGITAL / ANALOG AUX to select the input for the external source from which you want to record. yAUX Digital is displayed if the digital input is selected. yAUX Analog is displayed if the analog input is selected. 3 Press REC TYPE on the unit to enter the recording menu. 4 Rotate JOG CONTROL to select either: yAUX CD?: for recording with synchronized start of an entire disc yAUX Track?: for recording with synchronized start of a track 5 Press YES to confirm your selection. yStart Source, AUX and the remaining recording time of the CDR(W) are displayed. 6 Start playback on the selected source. yThe CD recorder starts to record simultaneously and RECORDING IN PROGRESS is shown. The remaining recording time on the CDR(W) is displayed. Note: If you start playback on the selected source within a track, recording starts at the beginning of the next track or after 2.7 seconds of silence in analog recordings. 3 Press REC TYPE on the unit to enter the recording menu. 4 Rotate JOG CONTROL to select the type of recording. yAUX Manual?: for manual start of recording 5 Press YES to confirm your selection. yWait is displayed. yRecord?, AUX and the remaining recording time of the CDR(W) are displayed. 6 Start playback on the external source in order to set the optimal recording level on the CD recorder (see "REC LEVEL key"). 7 Stop playback on the external source. 8 Go to the beginning of the desired track. 9 Press YES on the unit and simultaneously start playback on the external source. yThe CD recorder starts to record and RECORDING IN PROGRESS is shown. The remaining recording time of the CDR(W) is displayed. Note: If Check Input is flashing, check the digital connection. 10 Press STOP & on the unit to stop recording. yUpdate is displayed and RECORDING IN PROGRESS goes off. DO NOT FORGET TO FINALIZE! Finalizing a CDR(W) disc is a simple procedure, necessary to: - play a recorded CDR on a standard CD player or - play a recorded CDRW on a CDRW compatible CD player and CD recorder. 22
-
 1
1 -
2
-
3
-
4
-
5
-
6
-
7
-
8
-
9
-
10
-
11
-
12
-
13
-
14
-
15
-
16
-
 17
17 -
 18
18 -
 19
19 -
 20
20 -
 21
21 -
 22
22 -
 23
23 -
 24
24 -
 25
25 -
 26
26 -
 27
27 -
28
-
29
-
30
-
31
-
32
 |
 |
