Philips HTS3565D User manual - Page 49
Radio Operations
 |
UPC - 609585146938
View all Philips HTS3565D manuals
Add to My Manuals
Save this manual to your list of manuals |
Page 49 highlights
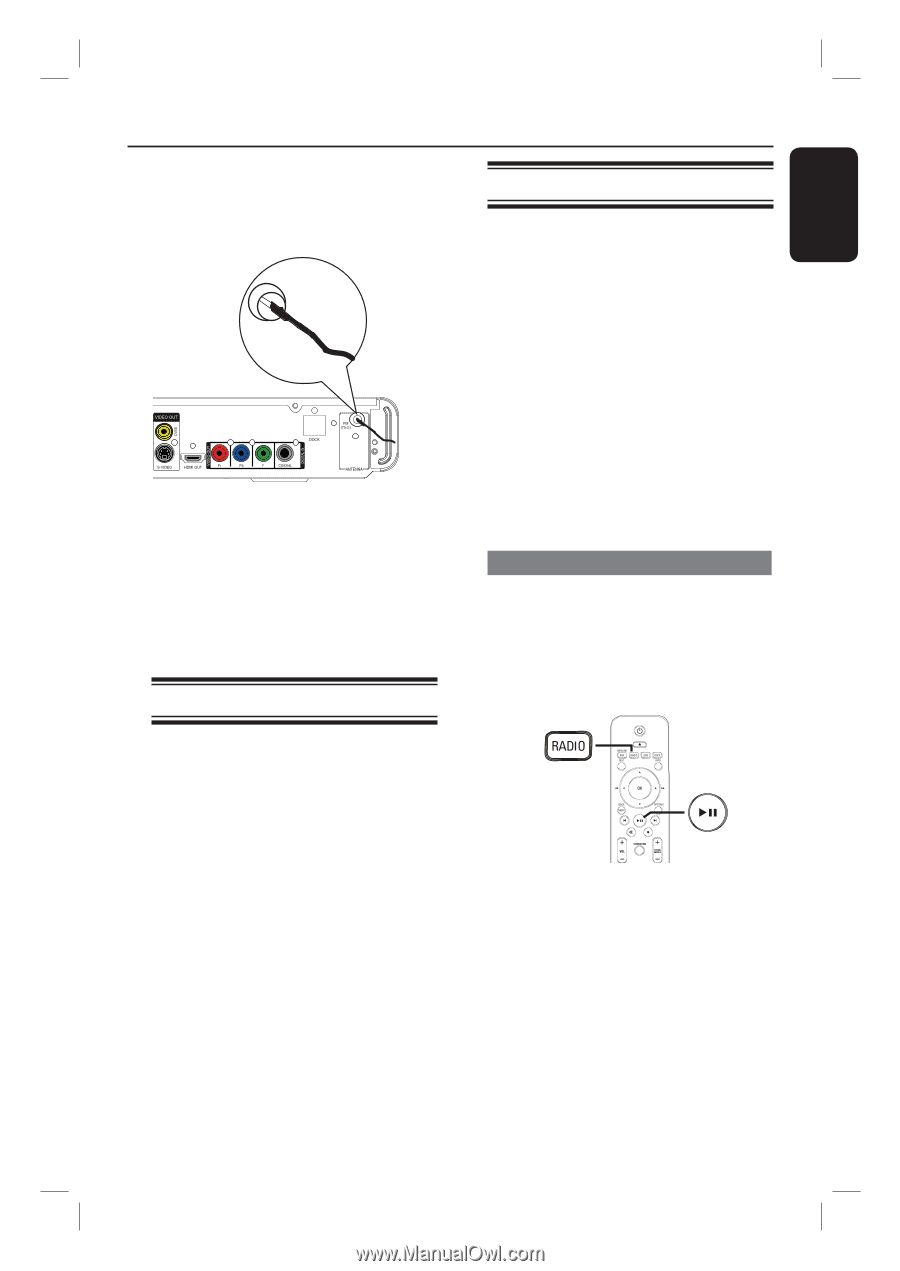
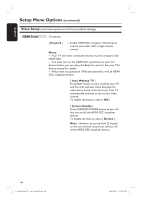
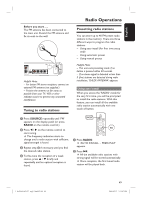
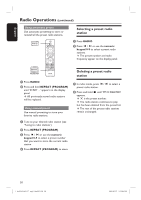
English Before you start ..... The FM antenna has been connected to the main unit. Extend the FM antenna and fix its ends to the wall. Helpful Hints: - For better FM stereo reception, connect an external FM antenna (not supplied.) - Position the antenna as far away as possible from your TV, VCR or other radiation source to prevent any unwanted interference. Tuning to radio stations Radio Operations Presetting radio stations You can store up to 40 FM preset radio stations in the memory. There are three different ways to program the radio stations: - Using auto install (for first time setup only) - Using automatic preset - Using manual preset Helpful Hints: - This unit exits presetting mode if no button is pressed within 20 seconds. - If no stereo signal is detected or less than 5 (five) stations are detected during radio installation, 'CHECK ANTENNA' appears. Using auto install When you access the 'RADIO' mode for the very first time, you will be prompted to install the radio stations. With this feature, you can install all the available radio station automatically with one touch of button. A Press SOURCE repeatedly until 'FM' appears on the display panel (or press RADIO on the remote control.) B Press / on the remote control to start tuning. The frequency indication starts to change until a radio station with sufficient signal strength is found. C Repeat step B if necessary until you find the desired radio station. D To fine-tune the reception of a weak station, press / briefly and repeatedly until an optimal reception is found. A Press RADIO. 'AUTO INSTALL ... PRESS PLAY' appears. B Press u. All the available radio stations with strong signal will be stored automatically. Once complete, the first tuned radio station will be played back. 1_hts3565-66D_37_eng2_final813.i49 49 49 2008-03-27 3:12:07 PM
-
 1
1 -
2
-
3
-
4
-
5
-
6
-
7
-
8
-
9
-
10
-
11
-
12
-
13
-
14
-
15
-
16
-
17
-
18
-
19
-
20
-
21
-
22
-
23
-
24
-
25
-
26
-
27
-
28
-
29
-
30
-
31
-
32
-
33
-
34
-
35
-
36
-
37
-
38
-
39
-
40
-
41
-
42
-
43
-
 44
44 -
 45
45 -
 46
46 -
 47
47 -
 48
48 -
 49
49 -
 50
50 -
 51
51 -
 52
52 -
 53
53 -
 54
54 -
55
-
56
-
57
-
58
-
59
 |
 |