Philips HTS6600 User manual - Page 20
Mounting the main unit on, the wall
 |
UPC - 609585122062
View all Philips HTS6600 manuals
Add to My Manuals
Save this manual to your list of manuals |
Page 20 highlights
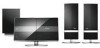
Optional Connections (continued) English 6 Mounting the main unit on the wall WARNING! Only qualified personnel can perform the installation. Never do it yourself in order to avoid any unexpected damage to the equipment or injury to personnel. Note: Philips accepts absolutely no liability for any accidents or damage resulting from inadequate assembly or mounting, misuse or abuse, or natural disasters. Before you start ... Ensure that all the cables are connected to the rear panel before you mount the main unit A Push down the rear cover from the top. B Lift the rear cover outward to detach it from the main unit. C Loosen the screws from the stand and remove the stand from the main unit. D Hold the supplied bracket in position and mark holes on the wall for the screws. Drill holes and insert the rubber wall plugs (not supplied) into the holes. E Use the screws (not supplied) to secure the bracket onto the wall. F Hook the main unit firmly onto the mounted bracket by sliding the knobs through the bracket's key holes and lock into position. 20
-
 1
1 -
2
-
3
-
4
-
5
-
6
-
7
-
8
-
9
-
10
-
11
-
12
-
13
-
14
-
 15
15 -
 16
16 -
 17
17 -
 18
18 -
 19
19 -
 20
20 -
 21
21 -
 22
22 -
 23
23 -
 24
24 -
 25
25 -
26
-
27
-
28
-
29
-
30
-
31
-
32
-
33
-
34
-
35
-
36
-
37
-
38
-
39
-
40
-
41
-
42
-
43
-
44
-
45
-
46
-
47
-
48
-
49
-
50
-
51
-
52
-
53
-
54
-
55
-
56
-
57
 |
 |
