Philips MMS30517 User Guide - Page 8
Installation
 |
UPC - 037849904909
View all Philips MMS30517 manuals
Add to My Manuals
Save this manual to your list of manuals |
Page 8 highlights
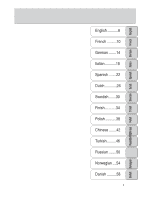
English French German Italian Spanish Dutch Swedish Finish Polish Chinese Turkish Russian Norwegian Danish Installation (Illustration page 3) 1. Connect the LINE IN cable (green color) from Safety OUT 1 at the soundcard to INPUT 1 LINE , AND • Do not expose the speakers to excessive heat 2. Connect the SURROUND IN cable (black color) (caused by heating equipment or direct from OUT 2 at the soundcard to INPUT 1 SURR sunlight). To reduce the risk of fire or electric (only applicable if a 4-channel soundcard is shock, do not expose this appliance to rain or available), AND/OR moisture. If fluid spills into the speakers, 3. Connect another LINE IN cable from another stereo audio-visual source to INPUT 2 STEREO, disconnect any connections immediately and let the speakers dry before reusing them. AND/OR • You may clean the speakers with a soft, slightly 4. Connect another LINE IN cable from another stereo audio-visual source to INPUT 3 STEREO dampened lint-free cloth. Do not use any cleaning agents as they may have a corrosive effect. 5. Connect the front left satellite speaker to • If the speakers do not operate, disconnect them SATELLITE FR.L from the power supply. Wait a few seconds 6. Connect the front right satellite speaker to before reconnecting them to the power supply. SATELLITE FR.R 7. Connect the surround left satellite speaker to SATELLITE SR.L 8. Connect the surround right satellite speaker to SATELLITE SR.R 9. Connect the Remote Control IR-EYE connector to the REMOTE IR-EYE and place the eye on top of your monitor/ desktop PC 10. Connect the fixed mains power cord to the AC outlet 11. Switch on (and switch off as well) the system using the STANDBY button on the remote control 12. Tune the system using the controls on the soundcard/ sound source and the controls on the remote control NOTE: Do not insert the power plug into the AC outlet until all connections are made! 8
-
 1
1 -
2
-
 3
3 -
 4
4 -
 5
5 -
 6
6 -
 7
7 -
 8
8 -
 9
9 -
 10
10
 |
 |
