Philips S9311 User manual - Page 17
Cleaning the Trimmer
 |
View all Philips S9311 manuals
Add to My Manuals
Save this manual to your list of manuals |
Page 17 highlights
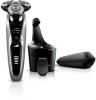
30 ENGLISH C Q During the drying phase, the drying symbol blinks. Q The drying phase takes approximately 4 hours. When completed, the drying symbol will light up continuously. Q Do not press the ON/OFF button while the cleaning cycle is running. If this does occur, the cleaning cycle will stop and the cleaning or drying symbol goes off .The cleaning cycle can be re-started by pressing the ON/OFF button once. Q If the power plug is disconnected before the cleaning cycle is complete, reconnect the plug into the outlet and the cleaning cycle can be re-started by pressing the ON/OFF button once. C NOTE:When the cleaning cartridge filter is full, the replacement symbol blinks orange. (See 'Replacing the SmartClean System Cartridge'). C 9 When the entire cleaning cycle is complete and the shaver is hygienically clean, the ready symbol lights up continuously. The battery symbol on the shaver will light up to indicate the shaver is fully charged. 1 C 3 10 Press the top cap (1), pull the shaver 2 forward (2) and lift shaver from SmartClean holder (3). ENGLISH 31 Q The SmartClean System automatically turns off 30 minutes after the cleaning and drying phases are complete. C 11 Place the shaver in the SmartClean System to protect shaver heads. Cleaning the Trimmer Clean the trimmer after each use. C 1 Attach the trimmer to shaver. 2 Turn shaver ON. C 3 Rinse the trimmer under hot water. BUT BE CAREFUL TO TEST WATER FIRST SO AS NOT TO BURN OR SCALD HANDS. 4 Turn shaver off. Shake off excess water and allow trimmer to air dry thoroughly. Tip: For optimal trimmer performance, lubricate the trimmer teeth with one drop of mineral oil every 6 months.
-
 1
1 -
2
-
3
-
4
-
5
-
6
-
7
-
8
-
9
-
10
-
11
-
 12
12 -
 13
13 -
 14
14 -
 15
15 -
 16
16 -
 17
17 -
 18
18 -
 19
19 -
 20
20 -
 21
21
 |
 |
