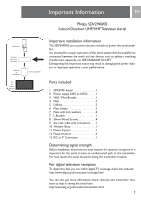
Philips SDV2940 User Manual - Page 5
For outdoor mast mount installation
 |
UPC - 609585160231
View all Philips SDV2940 manuals
Add to My Manuals
Save this manual to your list of manuals |
Page 5 highlights
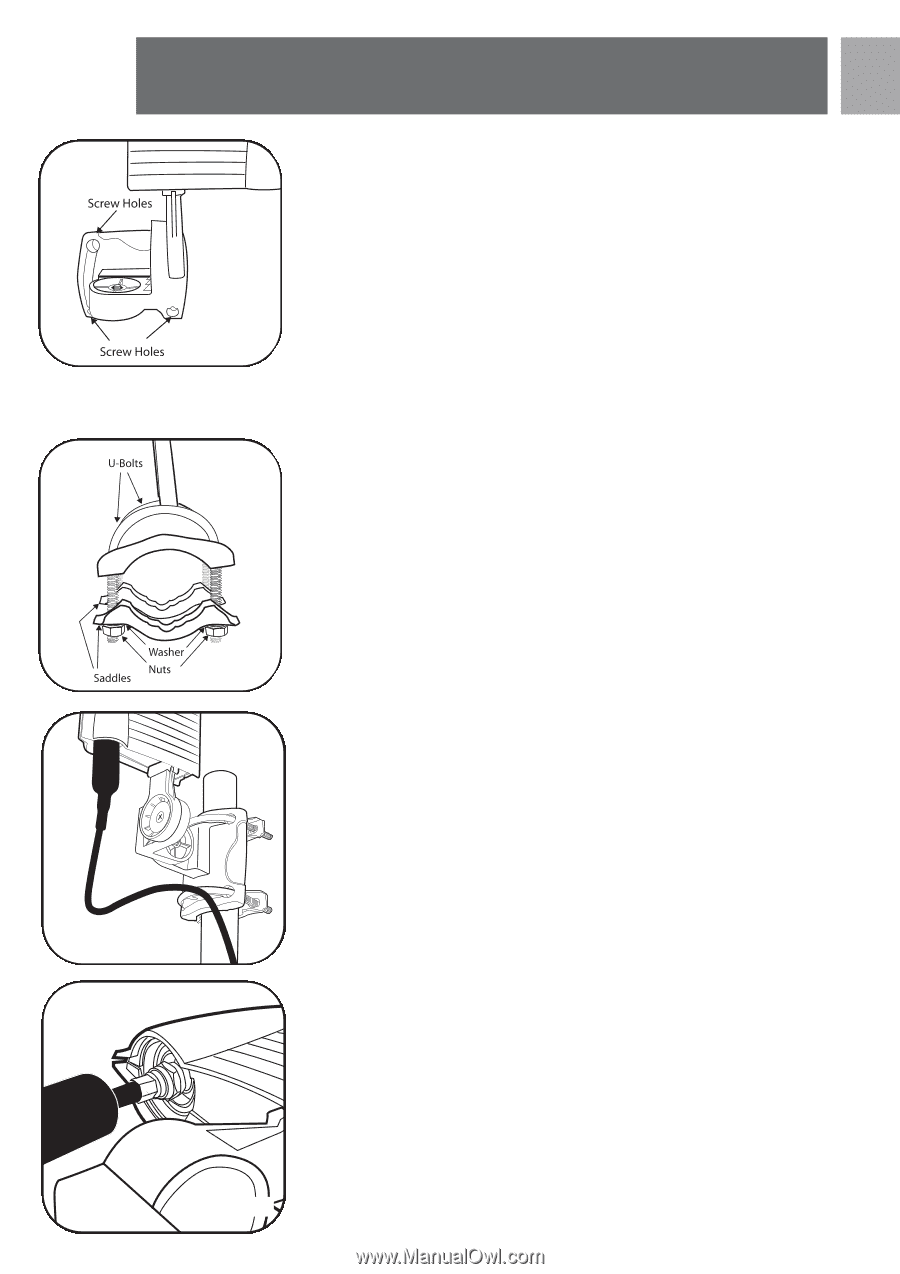
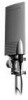
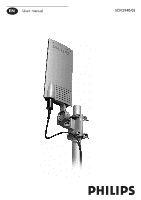
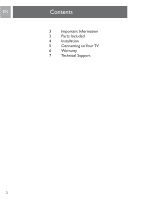
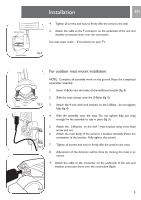
Installation EN 4. Tighten all screws and nuts to firmly affix the aerial to the wall. 5. Attach the cable to the F connector on the underside of the unit and weather protection boot over the connection. See next steps under - Connections to your TV fig.3 For outdoor mast mount installation: NOTE: Complete all assembly work on the ground. Raise the completed aerial after assembly. 1. Insert U-Bolts into the holes of the wall/mast bracket (fig. 4). 2. Slide the mast clamps onto the U-Bolts (fig. 4). fig.4 3. Attach the 4 nuts with lock washers to the U-Bolts - do not tighten fully (fig. 4). 4. Slide the assembly onto the mast. Do not tighten fully, just snug enough for the assembly to stay in place (fig. 5). 5. Attach the L-Bracket to the wall / mast bracket using cross head screw and nut. 6. Attach the main body of the aerial to L bracket vertically (Note the orientation of the bracket. Fully tighten this screw). 7. Tighten all screws and nuts to firmly affix the aerial to the mast. fig.5 8. Adjustment of the direction will be done by rotating the mast in its mount. 9. Attach the cable to the connector on the underside of the unit and weather protection boot over the connection (fig.6). fig.6 5
-
 1
1 -
 2
2 -
 3
3 -
 4
4 -
 5
5 -
 6
6 -
 7
7 -
 8
8
 |
 |