Philips SPC1030NC User manual (English) - Page 7
Connecting the WebCam to your, PC / laptop - driver
 |
View all Philips SPC1030NC manuals
Add to My Manuals
Save this manual to your list of manuals |
Page 7 highlights
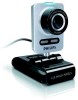
Or: If there are certain items you do not wish to install, check the boxes before these items. Select at least 'WebCam Driver SPC1030' and 'Philips CamSuite'. Click the 'Next' button. • The following software license agreement appears. 6 Click on 'Yes' to continue the installation. 5.2 Connecting the WebCam to your PC / laptop • The following screen appears. 7 Click 'Next' to continue. • The 'Reboot' screen appears. 8 Select 'Yes', then click 'Finish' to restart your PC / laptop. 1 Be sure to run the installation CD first, before connecting the WebCam to the PC / laptop. For this, refer to 5.1 'Installing the WebCam software'. 2 Turn on the PC / laptop. 3 Connect the USB connector of the USB cable to the USB port of the PC / laptop. • The WebCam will now derive its power from the PC / laptop. 4 Aim the webcam as required. 5 Use the clamp and the two rubber rims to attach the WebCam to your (flat panel) PC monitor or laptop screen. Or: Fold the clamp to place the WebCam on a desk or (large) desktop monitor. • After installation, the 'Philips CamSuite' shortcut ' ' will be visible in the Windows taskbar (bottom right of your screen). • In the 'Philips CamSuite' you can adjust the WebCam settings. For this, refer to 6 'WebCam settings'. 9 You can now connect your WebCam. Installation 7
-
 1
1 -
 2
2 -
 3
3 -
 4
4 -
 5
5 -
 6
6 -
 7
7 -
 8
8 -
 9
9 -
 10
10 -
 11
11 -
 12
12 -
13
-
14
-
15
-
16
-
17
-
18
-
19
-
20
 |
 |
