Philips VOIP8410B Quick start guide - Page 1
Philips VOIP8410B - Cordless Extension Handset Manual
 |
UPC - 609585131699
View all Philips VOIP8410B manuals
Add to My Manuals
Save this manual to your list of manuals |
Page 1 highlights
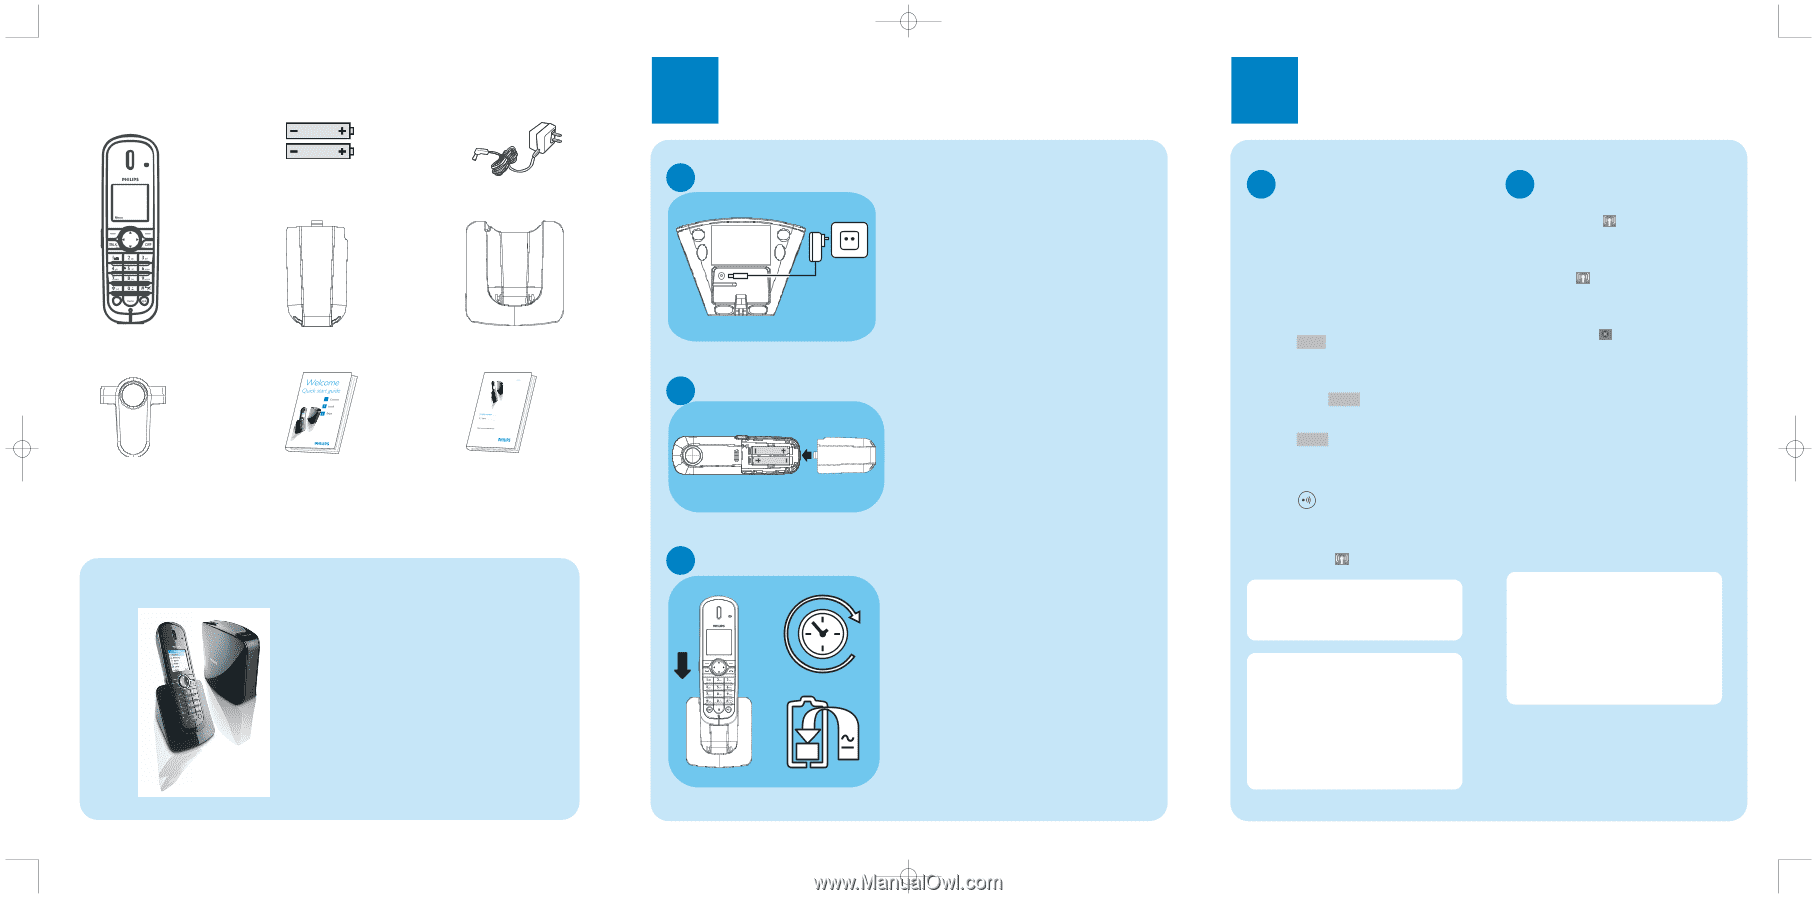
XtraHS_QSG_VOIP841_US-EN.qxd 19.01.2007 21:40 Seite 1 What's in the box Two 750mAh AAA NiMH batteries Power supply for charger Handset Battery door Charger Belt clip Quick start guide User manual What else will you need A VOIP841 1 Connect A Connect the charger ● Insert the plug of the charger power adapter into the socket on the bottom of the charger. ● Plug the power adapter into your power outlet. B Insert batteries C Charge handset 14 ● Place the 2 rechargeable NiMH AAA batteries, observing their polarities, into the battery compartment on the handset. ● Slide the battery door firmly into place. ● Before first use, put the handset on the charger and charge batteries for 14 hours. 2 Install A Register the handset Registration allows communication between the base unit and handset(s). If the handset cannot communicate with its base, you will not be able to make any call or use many of the functions and features on the phone. 1.Press Reg. . Register shall be highlighted. 2.Enter the system PIN (Default: 0000). Use Clear to correct typing errors. 3.Press Enter to confirm. ● Your handset starts searching for the base. 4.Press on the base unit until the two indications turn off. ● If registration is successful, the signal icon displays steadily. Tip : If registration failed, repeat the above procedure. Note : The base can register up to 4 handsets, then the base unit registration memory is full. If you attempt to register an additional handset, the registration process will be aborted. B Verify the signal strength The signal icon displays the link status between the handset and the base unit. Signal icon :The handset and base unit are linked.They can communicate. No signal icon :The handset and base unit have lost link.They are not able to communicate.Take your handset closer to the base unit to reconnect the link. If you move too far away from the base unit while you are on the phone, you will hear warning tones notifying you that the handset is almost out of range - lost link.Take the handset closer to the base unit or your call will be cut off shortly after the warning. Note : If your handset has lost link, you will not be able to make or receive any call. In addition, you will not be able to carry out many of the phone functions and features. 3111 285 33661
-
 1
1 -
 2
2
 |
 |