Pioneer AVH-2500NEX Installation Manual - Page 7
Installation using the, screw holes on the side, of this product, Installing the, microphone,
 |
View all Pioneer AVH-2500NEX manuals
Add to My Manuals
Save this manual to your list of manuals |
Page 7 highlights
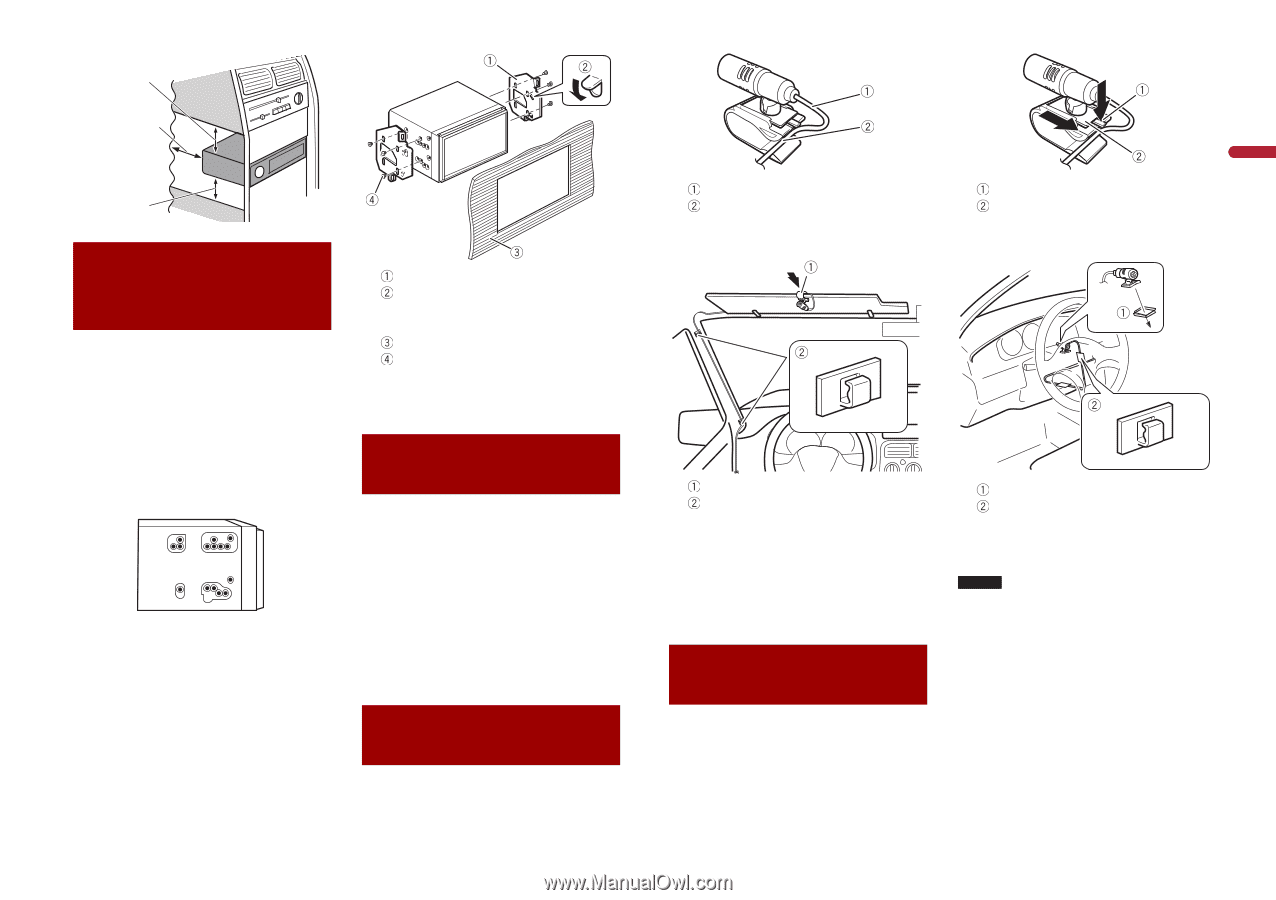
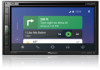
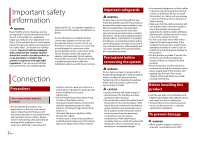
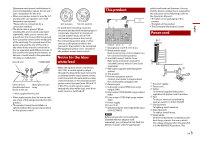
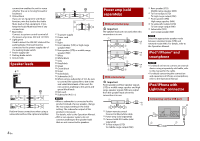
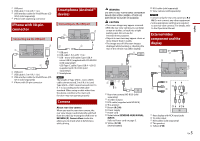
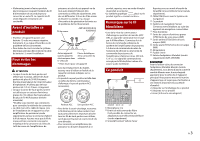
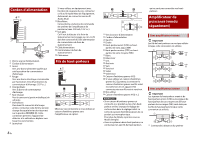
5 cm Leave ample space 5 cm Installation using the screw holes on the side of this product 1 Fastening this product to the factory radio-mounting bracket. Position this product so that its screw holes are aligned with the screw holes of the bracket, and tighten the screws at three locations on each side. Use either the truss head screws (5 mm × 9 mm) or flush surface screws (5 mm × 9 mm), depending on the shape of the bracket's screw holes. TIP The amount of this unit's protrusion from the dashboard/console can be adjusted by shifting the position of the screw hole of this unit to the factory radio-mounting bracket. Factory radio-mounting bracket If the pawl interferes with installation, you may bend it down out of the way. Dashboard or console Truss head screw or flush surface screw Be sure to use the screws supplied with this product. Installing the microphone • Install the microphone in a place where its direction and distance from the driver make it easiest to pick up the driver's voice. • Be sure to turn off (ACC OFF) the product before connecting the microphone. • Depending on the vehicle model, the microphone cable length may be too short when you mount the microphone on the sun visor. In such cases, install the microphone on the steering column. Mounting on the sun visor 1 Fit the microphone lead into the groove. Microphone lead Groove 2 Attach the microphone clip to the sun visor. Tab Microphone base 2 Mount the microphone on the steering column. Microphone clip Clamps Use separately sold clamps to secure the lead where necessary inside the vehicle. Install the microphone on the sun visor when it is in the up position. It cannot recognise the driver's voice if the sun visor is in the down position. Installation on the steering column 1 Detach the microphone base from the microphone clip by sliding the microphone base while pressing the tab. Double-sided tape Clamps Use separately sold clamps to secure the lead where necessary inside the vehicle. NOTE Install the microphone on the steering column, keeping it away from the steering wheel. En 7 English
-
 1
1 -
 2
2 -
 3
3 -
 4
4 -
 5
5 -
 6
6 -
 7
7 -
 8
8 -
 9
9 -
 10
10 -
 11
11 -
 12
12 -
13
-
14
-
15
-
16
-
17
-
18
-
19
-
20
-
21
-
22
-
23
-
24
-
25
-
26
-
27
-
28
 |
 |