Pioneer AVH-X2500BT Owner's Manual
Pioneer AVH-X2500BT Manual
 |
View all Pioneer AVH-X2500BT manuals
Add to My Manuals
Save this manual to your list of manuals |
Pioneer AVH-X2500BT manual content summary:
- Pioneer AVH-X2500BT | Owner's Manual - Page 1
DVD RDS AV RECEIVER AUTORADIO AV RDS LECTEUR DE DVD RADIO AV RDS CON DVD AVH-X5500BHS AVH-X4500BT AVH-X3500BHS AVH-X2500BT AVH-X1500DVD Owner's Manual Mode d'emploi Manual de instrucciones Español Français English - Pioneer AVH-X2500BT | Owner's Manual - Page 2
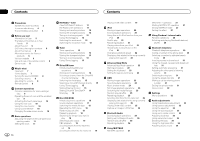
4 Before you start Information to User 5 The Safety of Your Ears is in Your Hands 5 About this unit 5 DVD video disc region numbers 6 About this manual 6 After-sales service for Pioneer products 6 Visit our website 6 Use and care of the remote control 6 Demo mode 6 What's what Head unit 7 Home - Pioneer AVH-X2500BT | Owner's Manual - Page 3
scroll 39 Setting the Pandora connect mode 39 Setting the Bluetooth audio 39 Clearing Bluetooth memory 39 Updating Bluetooth connection software 39 Displaying the Bluetooth system version 39 Setting the rear view camera (back up camera) 39 Auto EQ (auto-equalizing) 40 Setting the video signal 41 - Pioneer AVH-X2500BT | Owner's Manual - Page 4
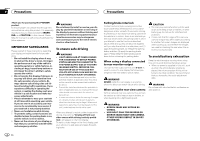
this manual. Please keep the manual in a safe and accessible place for future reference. WARNING Do not attempt to install or service your display by yourself. Installation or servicing of the display by persons without training and experience in electronic equipment and automotive accessories may - Pioneer AVH-X2500BT | Owner's Manual - Page 5
volume control at a low setting. ! Slowly increase the sound until you can hear it comfortably and clearly, without distortion. ! Once you have established a comfortable sound level, set the dial and leave it there. WARNING Handling the cord on this product or cords associated with accessories sold - Pioneer AVH-X2500BT | Owner's Manual - Page 6
on the model used. ! In the following instructions, USB memory sticks and USB audio players are collectively referred to as "USB storage device". ! In this manual, iPod and iPhone will be referred to as "iPod". After-sales service for Pioneer products Please contact the dealer or distributor from - Pioneer AVH-X2500BT | Owner's Manual - Page 7
to turn the display on. ! For details on how to operate a navigation system from this unit, refer to its operation manual. ! When an iPhone that is running an application that supports Advanced App Mode is connected, press MODE to switch to the application display. You can use the application by - Pioneer AVH-X2500BT | Owner's Manual - Page 8
/AVH-X3500BHS) ! Radio - Radio tuner (AVH-X4500BT/AVH-X2500BT/AVH-X1500DVD) ! Disc - Built-in DVD and CD player ! USB/iPod - USB/iPod ! Pandora - Pandoraâ internet radio ! Bluetooth Audio - Built-in Bluetooth audio (AVH-X5500BHS/AVH-X4500BT/AVHX3500BHS/AVH-X2500BT) ! AUX - AUX ! AV - AV input - Pioneer AVH-X2500BT | Owner's Manual - Page 9
playback. Common operations Section 03 Common operations for menu settings/lists 04 DVD-V 1 JAPNM12:43 01 01 (Function of AVH-X5500BHS/ AVH-X4500BT/AVH-X3500BHS/ AVH-X2500BT) Starting the Bluetooth telephone menu. For details refer to Bluetooth telephone on page 29. Displaying the list menu - Pioneer AVH-X2500BT | Owner's Manual - Page 10
on the sources listed below. - Disc: DVD-V, Video-CD, DivX, MPEG-1, MPEG-2, MPEG-4, JPEG - USB: DivX, MPEG-1, MPEG-2, MPEG-4, JPEG - iPod: Video - AV Input: A/V data - AUX: A/V data 1 Display the screen mode. 2 Touch the desired wide mode setting. FULL (full screen) The 4:3 picture is enlarged in - Pioneer AVH-X2500BT | Owner's Manual - Page 11
media CAUTION Keep hands and fingers clear of the unit when opening, closing, or adjusting the LCD panel. Be especially cautious of children's hands and fingers. Adjusting the LCD panel angle (Function of AVH-X5500BHS/AVH-X4500BT) Ejecting a disc (Function of AVH-X3500BHS/AVH-X2500BT/AVHX1500DVD - Pioneer AVH-X2500BT | Owner's Manual - Page 12
Setting the local seek level. 6 Tuning key Tuning up or down manually. Touch and hold down for more than two seconds to skip stations. Seek tuning starts as soon as you release. Touch again to cancel seek tuning. When an analog station is received BSM (best stations memory) automatically stores - Pioneer AVH-X2500BT | Owner's Manual - Page 13
AVH-X4500BT/AVH iPod. 3 Local key Setting the local seek level. memory. The selected radio station frequency has been stored in the memory. 4 Tuning key Tuning up or down manually best stations memory will be able to receive broadcasts from weaker song played before or after the currently playing - Pioneer AVH-X2500BT | Owner's Manual - Page 14
SiriusXM tuner operations (Function of AVH-X5500BHS/AVH-X3500BHS) You can use this unit to control SiriusXM Connect Vehicle Tuner, which is sold separately. For more information on how to install SiriusXM Connect Vehicle Tuner, consult the installation guide included with the tuner. Everything - Pioneer AVH-X2500BT | Owner's Manual - Page 15
of when the tag information is stored, the tag information for the song played before or after the currently playing song may also be stored. If a valid passcode is entered, the channel list appears on the Parental Control screen together with a lock or unlock icon. 3 The below operations can be - Pioneer AVH-X2500BT | Owner's Manual - Page 16
play 16 En Introducing movie operations You can use this unit to view DVD/DVD-R/DVDRW/CD/CD-R/CD-RW movie files. Touch panel keys DVD video 1 2 DVD-V 1 JAN PM 12:43 01 01 FULL four incremental settings during slow motion playback from DVD video/Video CD. 8 Stop key Stopping playback. If - Pioneer AVH-X2500BT | Owner's Manual - Page 17
Switching between media file types to play on DVD/CD/USB. c Bookmark key During playback, touch the point at which you want to resume playback the next time the disc is loaded. ! You can set one bookmark per DVD video. You can set up to five bookmarks total. ! To clear the bookmark on a disc, touch - Pioneer AVH-X2500BT | Owner's Manual - Page 18
depending on the disc. # Depending on the contents of the DVD disc, this function may not work properly. In such cases, use the touch panel keys to operate the DVD menu. Random play (shuffle) % Touch the random key. ! Songs - Play back videos/songs in the selected list in random order. ! Albums - Pioneer AVH-X2500BT | Owner's Manual - Page 19
playing DVD video discs recorded with LPCM audio, you can switch the audio output. When playing video CDs, you can switch between stereo and monaural audio output. ! This function is not available when disc play- back is stopped Video CDs) During playback of Video CDs featuring PBC (playback control - Pioneer AVH-X2500BT | Owner's Manual - Page 20
sound files. Note The play time may not display correctly. Touch panel keys iPod audio (Control Audio) 12 34 5 iPod Abcdefghi Abcdefghi Abcdefghi Abcdefghi 01'17'' d cb 1 JAN PM 12:43 1/9 x 12 All S.Rtrv AAppppr -05'29'' a98 7 6 iPod audio (App Mode) FULL fe 1 Song title Displaying - Pioneer AVH-X2500BT | Owner's Manual - Page 21
. 2 Operate the connected iPod to select a video/song and play. Notes ! The following functions are still accessible from the unit even if the control mode is set to App Mode. However, the operation will depend on your applications. - Playing/pausing - Fast forwarding/reversing - Tracking up/down - Pioneer AVH-X2500BT | Owner's Manual - Page 22
available for Advanced App Mode. - Please check iPhone applications supported Advanced App Mode at http://www.pioneerelectronics.com/ AppRadio Important ! Use the CD-IU201S (sold separately) when you use this function. ! The only port that supports Advanced App Mode is USB input. ! When listening to - Pioneer AVH-X2500BT | Owner's Manual - Page 23
Advanced App Mode also from a launcher application. 4 Press the home button to switch to the home display. 5 Touch the Apps key. 6 Operate the application. Setting the Keyboard CAUTION For your safety, the keyboard functionality is only available when the vehicle is stopped and the parking brake is - Pioneer AVH-X2500BT | Owner's Manual - Page 24
on USB. 5 Sound retriever key Refer to Using sound retriever on page 10. 6 Random key Playing songs in random order. 7 Repeat key Selecting the repeat range. 24 En 8 DB key Creating a database that enables searches by artist name, genre, and other options. Refer to Music browse mode on this - Pioneer AVH-X2500BT | Owner's Manual - Page 25
the displayed picture 90° clockwise. 9 Screen mode key Changing the screen mode. Refer to Changing the wide-screen mode on page 10. a Pause and play key Starting or pausing the slideshow. Basic operations Playing still images 1 Connect the USB device. Playback will automatically start. ! When - Pioneer AVH-X2500BT | Owner's Manual - Page 26
(Audio/Video Remote Control Profile): You can perform playback, pause playback, select songs, etc. ! As there is a wide variety of Bluetooth audio players run a Bluetooth audio player using this unit, refer to the instruction manual that came with the player as well as to this manual for assistance. - Pioneer AVH-X2500BT | Owner's Manual - Page 27
songs. It allows you to enjoy listening to music non-stop. ! This function is only available when a file on a USB storage device or a song on an iPod is being played. ! This function is not available when the control mode is set to App Mode. ! Depending on the file/song, sound effects may not be - Pioneer AVH-X2500BT | Owner's Manual - Page 28
access Pandora using the Pioneer car audio/video products: Connect an iPod to USB input or an Android device or a BlackBerry device using Bluetooth to play Pandora on this unit. ! iPod and iPhone compatibility Apple iPhone (first generation), iPhone 3G, iPhone 3GS, iPhone 4, iPhone 4S, iPod touch 1G - Pioneer AVH-X2500BT | Owner's Manual - Page 29
Using Pandoraâ internet radio Basic operations 2 Change the sort order. Playing tracks 1 Connect an iPod to USB input with a USB cable using an iPod or iPhone Dock Connector, or an Android device or BlackBerry device using Bluetooth. 2 Switch the source to Pandora. Skipping tracks 1 Press d (TRK - Pioneer AVH-X2500BT | Owner's Manual - Page 30
Section 16 Bluetooth telephone Bluetooth telephone 5 Tone key Turning the ring tone for incoming calls on or off. 6 Auto-answer key Turning automatic answering on or off. 7 History key Switching to the missed, received and dialed call lists. 8 Key pad key Switching the mode to enter the phone - Pioneer AVH-X2500BT | Owner's Manual - Page 31
Error" appears. In such cases, try again from the beginning. Note Inverting the names of your contacts from this unit does not affect the data on your Bluetooth device. Using the missed, received and dialed call lists The 80 most recent calls dialed, received, and missed are stored in the memory - Pioneer AVH-X2500BT | Owner's Manual - Page 32
Section 16 Bluetooth telephone Settings 17 Voice control If your cellular phone is equipped with the voice control feature, you can use voice commands to make calls, for example. ! Operation varies depending on the type of cellular phone. Refer to the instruction manual that came with your - Pioneer AVH-X2500BT | Owner's Manual - Page 33
set to Full on the System Menu. You can change the fader/balance setting the Custom2 curve is selected, the Custom2 curve will be updated. 1 Press the home button to switch to the home EQ has not been carried out. Using sonic center control Sound that is suited for the listening position can easily - Pioneer AVH-X2500BT | Owner's Manual - Page 34
filter When you do not want low sounds from the subwoofer output frequency range to play from the front or rear speakers, turn on the HPF (high pass filter). with this function. ! Video CD, CD, compressed audio, DivX, MPEG-1, MPEG-2 and MPEG-4 are automatically set to the same source level adjustment volume. - Pioneer AVH-X2500BT | Owner's Manual - Page 35
language code input display is shown when Others is selected. Refer to Language code chart for DVD on page 64. % Touch 0 to 9 to input the details, refer to the disc's instructions. 3 Touch Multi Angle on the Video Setup menu to turn angle icon display on or off. Setting the aspect ratio There are - Pioneer AVH-X2500BT | Owner's Manual - Page 36
manually Setting parental lock Some DVD video discs let you use parental lock to restrict children from viewing violent and adult-oriented scenes. You can set parental lock to the desired level. ! When you have a parental lock level set and play a disc featuring parental lock, code number input - Pioneer AVH-X2500BT | Owner's Manual - Page 37
App Mode, set to iPhone. NAVI Apps Completing Picture Adjustment for the Navigation system when the RGB input setting is set to NAVI. Completing Picture Adjustment for the Advanced App Mode when the RGB input setting is set to iPhone. Adjusting the Picture Adjustment for the rear view camera - Pioneer AVH-X2500BT | Owner's Manual - Page 38
! The language can be changed for the follow- ing: - Audio menu - System menu - Video Setup menu - Bluetooth menu - On-screen display Setting SiriusXM Tune Startä Refer to Setting SiriusXM Tune Startä on page 16. Setting Demo Mode Once Demo Mode is turned on, the Demo screen appears. Refer to Demo - Pioneer AVH-X2500BT | Owner's Manual - Page 39
Bluetooth module of this unit. Setting the rear view camera (back up camera) CAUTION Pioneer recommends the use of a camera which outputs mirror-reversed images. Otherwise, the screen image will appear reversed. This unit features a function that automatically switches to the rear view camera video - Pioneer AVH-X2500BT | Owner's Manual - Page 40
be adjusted to a high pass filter setting. ! Previous settings for auto EQ will be overwritten. ! If using an AVH-X3500BHS, AVH-X2500BT, or AVH-X1500DVD, connect a microphone extension cable (sold separately) to the AUX input in advance. Performing auto EQ 1 Stop the car in a place that is - Pioneer AVH-X2500BT | Owner's Manual - Page 41
the AV input. 1 Press the home button to switch to the home display. 2 Touch the system key to open the system menu. 3 Touch Video Signal Setting on the function menu. Video Signal Setting items are displayed. ! AV - Adjusts the AV video signal ! AUX - Adjusts the AUX video signal ! Camera - Adjusts - Pioneer AVH-X2500BT | Owner's Manual - Page 42
Bluetooth wireless connection on this page. For further details concerning the procedures for establishing Bluetooth wireless connections, refer to the instruction manual and Bluetooth device addresses. # To cancel searching, touch Stop. # If three devices are already paired, Memory Full is - Pioneer AVH-X2500BT | Owner's Manual - Page 43
memory. The set color will be recalled from the memory on the entire screen. ! Park your car in a safe place cannot be adjusted properly, consult your local Pioneer dealer. 1 Turn the source off. Refer AUX) When connecting an auxiliary device using a mini plug cable iPods and portable audio/video - Pioneer AVH-X2500BT | Owner's Manual - Page 44
24 Other functions 25 % Insert the stereo mini plug into the AUX input jack on this unit. Refer to Connection on page 46. Resetting the microprocessor By pressing RESET, you can reset the microprocessor to its initial settings without changing the bookmark information. The microprocessor must be - Pioneer AVH-X2500BT | Owner's Manual - Page 45
capacity of the cable is limited. - Use a fuse of the rating prescribed. - Never wire the negative speaker cable directly to ground. - Never band together negative cables of multiple speakers. ! When this unit is on, control signals are sent through the blue/white cable. Connect this cable to the - Pioneer AVH-X2500BT | Owner's Manual - Page 46
En Connection 4 m (13 ft. 1 in.) Microphone (Function of AVH-X5500BHS/AVH-X4500BT/AVH-X3500BHS/AVH-X2500BT) Microphone input (Function of AVH-X5500BHS/AVH-X4500BT/AVH-X3500BHS/AVH-X2500BT) Wired remote input Hard-wired remote control adapter can be connected (sold separately). Violet/white Of - Pioneer AVH-X2500BT | Owner's Manual - Page 47
in the system menu when connecting the external video component. Refer to Setting AV input on page 37. This product's rear video output is for connection of a display to enable passengers in the rear seats to watch the DVD, etc. WARNING ! Never install a rear display in a location that is visible to - Pioneer AVH-X2500BT | Owner's Manual - Page 48
(Function of AVH-X5500BHS/AVH-X3500BHS) This product When connecting with optional CD-IU201V cable USB/iPod input This product SiriusXM BUS input SiriusXM BUS cable (Supplied with SiriusXM tuner) SiriusXM tuner (sold separately) AUX input (AUX) iPod with video capabilities (sold separately - Pioneer AVH-X2500BT | Owner's Manual - Page 49
USB/iPod input This product RGB input iPod with video capabilities (sold separately) Dock connector 1.5 m (4 ft. 11 in.) USB cable (Supplied with this unit) Connect to separately sold USB of a sudden stop. ! The semiconductor laser will be damaged if it overheats. Install this unit away from - Pioneer AVH-X2500BT | Owner's Manual - Page 50
Section 26 Installation Installation Installing the microphone (Function of AVH-X5500BHS/AVH-X4500BT/AVHX3500BHS/AVH-X2500BT) 1 CAUTION It is extremely dangerous to allow the microphone lead to become wound around the steering column or shift lever. Be sure to install the unit in such a way that - Pioneer AVH-X2500BT | Owner's Manual - Page 51
disc is dirty. Clean the disc. The type of disc loaded cannot be played on this unit. Check the disc type. The disc loaded is not compatible with this video system. Change the disc to one that is compatible with your video system. There is no sound. The volume level will not rise. Cables are - Pioneer AVH-X2500BT | Owner's Manual - Page 52
in lected language guage and the selected lan- is not recorded on subtitle lan- guage. the disc. guage set- tings selected in Video Setup menu. The viewing angle cannot be switched. The DVD being The viewing angle played does not cannot be feature scenes switched if the shot from multi - Pioneer AVH-X2500BT | Owner's Manual - Page 53
receive artist name/song title information. Move to the desirable location with good reception. No Data This unit cannot Move to the desirreceive program able location with service name in- good reception. formation. Error messages When you contact your dealer or your nearest Pioneer Service - Pioneer AVH-X2500BT | Owner's Manual - Page 54
player/ Media DRM 9/10 USB memory to the USB port- are protected by able audio player/ Windows Media USB memory and DRM 9/10. connect. Incompatible USB The USB device connected to is not supported by this unit. Connect a USB portable audio player or USB memory that is USB Mass Storage Class - Pioneer AVH-X2500BT | Owner's Manual - Page 55
supported can be played. ported on this unit. Message Cause Action (Reference page) Creating the Database has failed. The mode was switched to video reconnect the iPod and reset it. Error-02-67 The iPod firmware version is old. Update the iPod version. Message Stop Not Found Cause There - Pioneer AVH-X2500BT | Owner's Manual - Page 56
of the Pandora application is not supported. Connect an iPhone that has a compatible version of the Pandora application installed. Check Device Device error message displayed in the Pandora application. Please check your iPhone. Pandora is unable to play music. Please see your Device. Unable - Pioneer AVH-X2500BT | Owner's Manual - Page 57
area. Indicates that the connected Bluetooth device only supports Bluetooth telephone. Indicates that the connected Bluetooth device only supports Bluetooth audio. Show the album title when receiving the tag information. Shows the album title of the song currently being played for MP3/ WMA/AAC/WAV - Pioneer AVH-X2500BT | Owner's Manual - Page 58
files that are stored in the USB devices cannot be played back. You cannot connect a USB portable audio player/ USB memory to this unit via USB hub. Partitioned USB memory is not compatible with this unit. Depending on the kind of USB portable audio player/USB memory you use, the device may not - Pioneer AVH-X2500BT | Owner's Manual - Page 59
Video format (video mode) cannot be played back. Playback of DVD-R/RW discs may not be possible, due to disc characteristics, scratches or dirt on the disc, or dirt, condensation, etc. on the lens of this unit. Depending on the application settings Compressed audio compatibility (disc, USB) WMA File - Pioneer AVH-X2500BT | Owner's Manual - Page 60
copyright-protected files: Not compatible Partitioned external storage device (USB): Only the first playable partition can be played. There is no compatibility for Multi Media Cards (MMC). CAUTION ! Pioneer accepts no responsibility for data lost on the USB memory/USB portable audio player even if - Pioneer AVH-X2500BT | Owner's Manual - Page 61
you make the purchase. If you cannot use this function normally, update your iPod firmware. Sequence of audio files The user cannot assign folder numbers and specify playback sequences with this unit. Example of a hierarchy 01 02 03 04 05 Level 1 Level 2 Level 3 Level 4 : Folder : Compressed - Pioneer AVH-X2500BT | Owner's Manual - Page 62
Bluetooth SIG, Inc. and any use of such marks by PIONEER CORPORATION is under license. Other trademarks and trade names are those of their respective owners. DVD video is a trademark of DVD the use of this accessory with iPod or iPhone may affect wireless performance. Androidä Android is a trademark - Pioneer AVH-X2500BT | Owner's Manual - Page 63
Pioneer Contributing Authors" is defined as the following set of individuals: Andreas Dilger Dave Martindale this source code as a component to supporting the PNG file format in commercial products. OSI Certified Open Source Software. OSI Certified Open Source is a certification mark of - Pioneer AVH-X2500BT | Owner's Manual - Page 64
information Additional information Language code chart for DVD Language (code), input code Japanese (ja), 1001 Dzongkha (dz Tsonga (ts), 2019 Tatar (tt), 2020 Twi (tw), 2023 64 En Language (code), input code Bengali (bn), 0214 Inupiaq (ik), 0911 Navajo, Navaho (nv), 1422 Tibetan (bo), - Pioneer AVH-X2500BT | Owner's Manual - Page 65
44 000 Hz (with DVD, at sampling frequency 96 kHz) Signal-to-noise ratio ......... 96 dB (1 kHz) (IHF-A network) (RCA level) (AVH-X5500BHS/AVH-X4500BT) Signal-to-noise ratio ......... 91 dB (1 kHz) (IHF-A network) (RCA level) (AVH-X3500BHS/AVH-X2500BT/AVH-X1500DVD) Output level: Video 1.0 Vp-p/75 - Pioneer AVH-X2500BT | Owner's Manual - Page 66
de commencer La protection de votre ouïe est entre vos mains 69 Quelques mots sur cet appareil 69 Numéros de région des disques DVD vidéo 70 Quelques mots sur ce mode d'emploi 70 Service après-vente des produits Pioneer 70 Visitez notre site Web 70 Utilisation et entretien de la télécommande 70 - Pioneer AVH-X2500BT | Owner's Manual - Page 67
audio compressés compatibles (disque, USB) 130 Compatibilité iPod 131 Séquence des fichiers audio 131 Utilisation correcte de l'afficheur 131 Profils Bluetooth 132 Licence, Avis de non-responsabilité de garantie et Limites de responsabilité 132 Tableau des codes de langue pour les DVD 134 Caract - Pioneer AVH-X2500BT | Owner's Manual - Page 68
01 Précautions Précautions Nous vous remercions d'avoir acheté cet appareil PIONEER. Pour garantir une utilisation correcte, lisez bien ce mode un écran arrière qui permet aux passagers assis à l'arrière de regarder des vidéos. ATTENTION NE JAMAIS installer l'écran arrière dans un emplacement - Pioneer AVH-X2500BT | Owner's Manual - Page 69
01 ID FCC : AJDK058 MODÈLE Nº : AVH-X5500BHS, AVH-X4500BT, AVH-X3500BHS, AVH-X2500BT IC : 775E-K058 Le présent appareil est conforme aux Bluetooth ne peut pas être supprimé (ou remplacé) par l'utilisateur. Cet équipement est conforme aux limites d'exposition aux doit être installé et utilisé - Pioneer AVH-X2500BT | Owner's Manual - Page 70
ce manuel. ! Dans les instructions suivantes, les cartes mémoires USB et les lecteurs audio USB sont collectivement appelés « périphériques de stockage USB ». ! Dans ce mode d'emploi, iPod et iPhone sont désignés par le terme "iPod". Service après-vente des produits Pioneer Veuillez contacter le - Pioneer AVH-X2500BT | Owner's Manual - Page 71
ône sur l'écran de lancement pour revenir à l'affichage de l'afficheur d'accueil. 6 MODE Mise hors service de l'écran d'information. 7 c/d (TRK) 8 h (éjection) AVH-X3500BHS, AVH-X2500BT et AVH-X1500DVD 8 a 1 3 4 5 6 7 1 RESET Pour les détails, reportez-vous à la page 113, Réinitialisation du - Pioneer AVH-X2500BT | Owner's Manual - Page 72
AVH-X5500BHS/AVH-X3500BHS) ! Radio - Syntoniseur radio (AVH-X4500BT/AVH-X2500BT/AVH-X1500DVD) ! Disc - Lecteur de DVD et CD intégré ! USB/iPod - USB/iPod ! Pandora - Radio Pandoraâ sur Internet ! Bluetooth Audio - Audio Bluetooth intégré (AVH-X5500BHS/AVH-X4500BT/AVHX3500BHS/AVH-X2500BT) ! AUX - AUX - Pioneer AVH-X2500BT | Owner's Manual - Page 73
service de l'écran d'information. 3 SRC/OFF Reportez-vous à la page précédente, Source off touche. 4 Sélecteur multidirectionnel Permet de sélectionner un menu dans le menu DVD CD-EXTRA et MIXED-MODE ! Périphérique de stockage USB Données audio, données vidéo et données photo 8 MUTE Appuyez sur - Pioneer AVH-X2500BT | Owner's Manual - Page 74
Utilisation standard des éléments de menu/listes DVD-V 1 JAPNM12:43 01 01 (Fonction de AVH-X5500BHS/ AVH-X4500BT/AVH-X3500BHS/ AVH-X2500BT) Ouverture du menu du téléphone Bluetooth. Pour les détails, reportez-vous à la page 97, Téléphone Bluetooth. Affichage du menu de listes. Exécution - Pioneer AVH-X2500BT | Owner's Manual - Page 75
Video-CD, DivX, MPEG-1, MPEG-2, MPEG-4, JPEG - USB : DivX, MPEG-1, MPEG-2, MPEG-4, JPEG - iPod : Vidéo - Entrée Audio/Vidéo : Données A/V - AUX : Données A/V Opérations de base Section 04 05 Réglage de l'angle du panneau Éjection d'un disque LCD et éjection du support (Fonction de AVH-X3500BHS - Pioneer AVH-X2500BT | Owner's Manual - Page 76
AVH-X5500BHS/AVH-X3500BHS) Les stations HD Radioä offre des services Services de données Son numérique de qualité CD. La technologie HD Radio permet aux des stations, le guide des canaux HD2/HD3 mode de réception Commutation vers la diffusion analogique de la même fréquence. 4 Touche de mode - Pioneer AVH-X2500BT | Owner's Manual - Page 77
qu'aux stations de radio dont le signal reçu est suffisamment puissant pour garantir une réception de bonne qualité. FM : Hors service - - - - AM : Hors service ériques) et ALL (recherche d'accord normale). ALL-HD Changement de mode de réception Si la réception d'une émission numérique devient - Pioneer AVH-X2500BT | Owner's Manual - Page 78
Syntoniseur Syntoniseur Utilisation du syntoniseur (Fonction de AVH-X4500BT/AVH-X2500BT/AVHX1500DVD) Touches du clavier tactile 12 aux stations de radio dont le signal reçu est suffisamment puissant pour garantir une réception de bonne qualité. FM : Hors service - - - - AM : Hors service - Pioneer AVH-X2500BT | Owner's Manual - Page 79
AVH-X5500BHS/AVH-X3500BHS) Vous pouvez utiliser cet appareil pour commander un syntoniseur de véhicule SiriusXM Connect Vehicle Tuner, vendu séparément. Pour plus d'informations sur l'installation d'un syntoniseur de véhicule SiriusXM Connect Vehicle Tuner, consultez le guide d'installation service 01 - Pioneer AVH-X2500BT | Owner's Manual - Page 80
Sélection directe d'un canal. Sélection d'un canal à partir de la liste des canaux SiriusXM. 6 Touche de contrôle parental L'écran Parental Control s'affiche. 7 Touche Live Retour à l'émission en direct actuelle 8 Touche de direct Un clavier numérique s'affiche et vous permet de saisir directement - Pioneer AVH-X2500BT | Owner's Manual - Page 81
parental SiriusXM vous permet de contrôler l'accès aux canaux que vous jugez inappropriés pour les plus d'un canal verrouillé pour le déverrouiller. Clear All (suppression des verrous de tous les système pour mettre SiriusXM Tune Start en ou hors service. On : La plage musicale en cours est lue à - Pioneer AVH-X2500BT | Owner's Manual - Page 82
5 CH 888 Dolby PLII DB 6 Scan Play Scan Next Scan Esc 123 1 Touche d' DVD/DVD-R/DVD-RW/CD/CDR/CD-RW. Touches du clavier tactile DVD vidéo 1 2 DVD-V 1 JAN PM 12:43 01 01 FULL de langue des sous-titres Avec les DVD/DivX supportant des enregistrements multi-sous-titres, vous pouvez - Pioneer AVH-X2500BT | Owner's Manual - Page 83
mode d'écran Changement du mode écran. Reportez-vous à la page 75, Changer le mode écran large. a Touche de pause et lecture Pause de la lecture. Retour en mode . i Touche de support Commutation entre les types de fichiers média pour lire les informations des supports DVD/CD/USB. d Touche fléch - Pioneer AVH-X2500BT | Owner's Manual - Page 84
icône d'angle en service ou hors service. Pour les détails, reportez-vous à la page 103, Réglage de l'affichage des DVD sous plusieurs angles. lectionner les fichiers. 3 Touche de support Commutation entre les types de fichiers média pour lire les informations des supports DVD ou CD. 4 Touche Sound - Pioneer AVH-X2500BT | Owner's Manual - Page 85
répétition est mise automatiquement hors service. ! Si pendant la tre utilisée pen- dant la lecture de vidéo DVD ou CD vidéo disposant de la fonction PBC ( aux instructions fournies avec le disque. ! La lecture PBC d'un CD Vidéo ne peut pas être annulée. ! Pendant la lecture de CD vidéo supportant - Pioneer AVH-X2500BT | Owner's Manual - Page 86
/DVD) iPod 10 La sauter au fichier suivant, touchez Next Play. # Si vous ne voulez pas jouer le contenu VOD DivX, touchez Stop. Lecture du contenu VOD d'un DivX en mode de lecture normal pendant une lecture en pause, au ralenti ou image par image. Opérations de base 7 02'35'' FULL 1 AAppppr - Pioneer AVH-X2500BT | Owner's Manual - Page 87
du clavier tactile Audio iPod (contrôle de l'audio) 12 34 5 iPod Abcdefghi Abcdefghi Abcdefghi Abcdefghi 01'17'' d cb 1 JAPNM12:43 1/9 x 12 All S.Rtrv AAppppr -05'29'' a98 7 6 Audio iPod (App Mode) FULL fe 1 Titre de la plage musicale Affichage de la liste Morceaux sur l'iPod. 2 Nom de - Pioneer AVH-X2500BT | Owner's Manual - Page 88
Section 10 iPod iPod ! Albums - Lecture dans l'ordre de vidéos/plages musicales à de l'iPod. ROOT VideoPlaylists Movies Music Videos VideoPodcasts TVShows Rentals # Si vous voulez afficher le mode musique de l'iPod, touchez l'icône. Commutation vers le mode musique de l'iPod. Recherche d'une vid - Pioneer AVH-X2500BT | Owner's Manual - Page 89
ration - Seules les applications compatibles avec le mode App avancée fonctionnement par commutation de ce système en mode App avancée. - Veuillez vérifier les applications iPhone prises en charge en mode App avancée à l'adresse : http://www.pioneerelectronics.com/ AppRadio Important ! Utilisez le - Pioneer AVH-X2500BT | Owner's Manual - Page 90
Mode Advanced App Mode Advanced App ! Seule l'entrée USB prend en charge le mode Advanced App Installez l'application AppRadio sur votre iPhone. 2 Réglez Entrée RVB sur iPhone dans les param 3 Touchez App sound mixing sur le menu Système pour sélectionner le réglage désiré. off (hors service)-Bas ( - Pioneer AVH-X2500BT | Owner's Manual - Page 91
rique de stockage USB. Touches du clavier tactile 1 2 USB 1 JAPNM12:43 01 01 FULL 00'20'' supports Musique/Vidéo/Photo. 9 Touche de mode d'écran Changement du mode écran. Reportez-vous à la page 75, Changer le mode écran large. a Touche de pause et lecture Pause de la lecture. Retour en mode - Pioneer AVH-X2500BT | Owner's Manual - Page 92
fichiers. 4 Touche de support Commutation entre les types de fichiers média pour lire les informations des supports USB. 5 Touche Sound Retriever Reportez l'enregistrement est terminé, "Database save to memory was completed." s'affiche. Le mode de navigation Musique démarre. 3 Affichez une liste et - Pioneer AVH-X2500BT | Owner's Manual - Page 93
sur c ou d (TRK). ! Vous pouvez rechercher 10 fichiers JPEG à la fois. S'il y a moins de 10 fichiers, la recherche couvrira le premier ou le dernier parcourir. ! Cette fonction est disponible avec les périphériques USB en mode de navigation Musique. Lecture du contenu VOD d'un DivXâ L'opération est - Pioneer AVH-X2500BT | Owner's Manual - Page 94
audio (Fonction de AVH-X5500BHS/AVH-X4500BT/ AVH-X3500BHS/AVH-X2500BT) Vous pouvez utiliser cet appareil pour écouter des fichiers audio Bluetooth. Remarques ! Selon le lecteur audio Bluetooth connecté à cet appareil, les opérations disponibles sont limitées aux deux niveaux suivants : - Profil - Pioneer AVH-X2500BT | Owner's Manual - Page 95
USB ou une plage musicale sur un iPod est en cours de lecture. ! Cette fonction n'est pas disponible lorsque le mode de commande est défini sur App Mode. du type de musique. ! Effet coupure - Lorsque Effet coupure est en service, des effets sonores sont lus entre les plages musicales. ! Réglages - Pioneer AVH-X2500BT | Owner's Manual - Page 96
/vidéo pour véhicule Pioneer : Connectez un iPod à l'entrée USB ou un périphérique Android ou BlackBerry via la technologie Bluetooth pour écouter Pandora sur cet appareil. ! Compatibilité iPod et iPhone Apple iPhone (première génération), iPhone 3G, iPhone 3GS, iPhone 4, iPhone 4S, iPod touch 1G - Pioneer AVH-X2500BT | Owner's Manual - Page 97
USB à l'aide d'un câble USB et d'un connecteur Dock iPod ou iPhone, ou un périphérique Android ou BlackBerry via la technologie Bluetooth és sur son service. Si vous Le mode alé Bluetooth (Fonction de AVH-X5500BHS/AVH-X4500BT/ AVH-X3500BHS/AVH-X2500BT) Vous pouvez utiliser le téléphone Bluetooth - Pioneer AVH-X2500BT | Owner's Manual - Page 98
Réglage du volume d'écoute du destinataire. b Touche de mode privé Mise en ou hors service du mode privé. c Touche décroché Acceptation d'un appel entrant. Vous devez, tout d'abord, connecter un téléphone Bluetooth à cet appareil. Pour des instructions détaillées sur la connexion de votre téléphone - Pioneer AVH-X2500BT | Owner's Manual - Page 99
la touche d'annuaire pour activer le mode d'annuaire téléphonique. 2 Inversez les pas les données contenues sur votre appareil Bluetooth. Utilisation des listes des appels reçus, manqu saisie d'un numéro de téléphone Mise en service ou hors service de la sonnerie Vous pouvez choisir d'utiliser ou - Pioneer AVH-X2500BT | Owner's Manual - Page 100
silencieux est en service ou lors de la lecture d'un fichier JPEG. 1 Appuyez sur la touche accueil pour passer à l'écran d'accueil. 2 Touchez n'importe quelle touche du clavier tactile pour sélectionner le menu à régler. Video Audio Settings System Theme Favorite Bluetooth 1 Touche de - Pioneer AVH-X2500BT | Owner's Manual - Page 101
galisation créée par EQ auto (reportez-vous à la page 108, EQ auto (égalisation automatique)). Vous pouvez mettre l'égalisation automatique en service ou hors service. Si vous connectez un microphone en option à cet appareil, vous pouvez utiliser cette fonction. 1 Appuyez sur la touche accueil pour - Pioneer AVH-X2500BT | Owner's Manual - Page 102
Utilisation de la sortie hautparleur d'extrêmes graves Cet appareil est équipé d'une sortie haut-parleur d'extrêmes graves qui peut être mise en service ou hors service. ! La fréquence de coupure et le niveau de sor- tie peuvent être réglés lorsque la sortie hautparleur d'extrêmes graves est activ - Pioneer AVH-X2500BT | Owner's Manual - Page 103
la langue spécifiée sur le disque est affichée. Réglage de l'affichage des DVD sous plusieurs angles L'icône d'angle peut être définie pour apparaître sur glage vidéo pour mettre l'affichage de l'icône d'angle en ou hors service. 1 Appuyez sur la touche accueil pour passer à l'écran d'accueil. 2 - Pioneer AVH-X2500BT | Owner's Manual - Page 104
tails, reportez-vous aux instructions du disque. Réglage changent avec un intervalle de 10 secondes ! 15sec - Les verrouillage parental Certains disques DVD vidéo vous permettent détails, reportez-vous au mode d'emploi fourni avec le disque votre code % Appuyez sur RESET. Paramétrage du fichier de - Pioneer AVH-X2500BT | Owner's Manual - Page 105
20 Mise en service ou hors service de l'entrée auxiliaire Activez ce réglage lorsque vous utilisez un appareil auxiliaire connecté à cet appareil. 3 Touchez Entrée RVB sur le menu système pour définir iPhone ou NAVI. Remarque Si vous utilisez le mode Advanced App, réglez sur iPhone. 1 Appuyez sur - Pioneer AVH-X2500BT | Owner's Manual - Page 106
Apps Exécution de Ajustment image pour le système de navigation lorsque le réglage de l'entrée RGB est défini sur NAVI. Exécution de Ajustment image pour le mode d'application avancée lorsque le réglage de l'entrée RGB est défini sur iPhone Bluetooth ! off - Met hors service la coupure/atténuation du - Pioneer AVH-X2500BT | Owner's Manual - Page 107
uniquement disponible en mode App avancée. Reportez- service. Réglage du mode de connexion Pandora Reportez-vous à la page 96, Réglage du mode de connexion Pandora. Réglage de l'audio Bluetooth (Fonction de AVH-X5500BHS/AVH-X4500BT/ AVH-X3500BHS/AVH-X2500BT) Pour utiliser un lecteur audio Bluetooth - Pioneer AVH-X2500BT | Owner's Manual - Page 108
service de la source. 2 Appuyez sur la touche accueil pour passer à l'écran d'accueil. 3 Touchez la touche système pour ouvrir le menu système. 4 Touchez Version logicielle Bluetooth pour afficher la version du module Bluetooth recul) PRÉCAUTION Pioneer recommande d'utiliser une re est installée sur - Pioneer AVH-X2500BT | Owner's Manual - Page 109
le réglage EQ auto. AVH-X3500BHS, AVH-X2500BT et AVH- X1500DVD Câble d'extension Microphone auto EQ (Vendu séparément) Entrée AUX (AUX) (Panneau arrière) 3 Placez le contact d'allumage sur ON ou ACC. Si la climatisation ou le chauffage de la voiture sont en service, coupez-les. Le bruit - Pioneer AVH-X2500BT | Owner's Manual - Page 110
Bluetooth Utilisation du menu de connexion Bluetooth (Fonction de AVH-X5500BHS/AVH-X4500BT/ AVH-X3500BHS/AVH Bluetooth. Pour de plus amples détails sur les procédures d'établissement d'une connexion sans fil Bluetooth, reportez-vous au mode rique Bluetooth. # Pour annuler la recherche, touchez Stop. - Pioneer AVH-X2500BT | Owner's Manual - Page 111
inférieure à quelques mètres l'un de l'autre. Initialement, cette fonction est en service. Saisie du code PIN pour la connexion sans fil Bluetooth Pour connecter votre périphérique Bluetooth à cet appareil via la technologie sans fil Bluetooth, vous devez entrer un code PIN sur le périphérique - Pioneer AVH-X2500BT | Owner's Manual - Page 112
cet appareil, vous ne pouvez pas sélectionner de photos. Pour enregistrer une image JPEG sur cet appareil, Pioneer. 1 Mettez la source hors service. Reportez-vous à la page 72, Mise en/hors service pour effectuer le réglage. Utilisation d'une source AUX Un appareil auxiliaire ou portable vendu séparé - Pioneer AVH-X2500BT | Owner's Manual - Page 113
AUX de cet appareil. Reportez-vous à la page 115, Connexion. Réinitialisation du microprocesseur En appuyant sur RESET respectée, et les fonctions DVD de cet appareil ne doivent de vitesse, le frein de parking ou le mécanisme de Cet appareil ne peut pas être installé dans un véhicule ne disposant - Pioneer AVH-X2500BT | Owner's Manual - Page 114
dysfonctionnement, assurez-vous de respecter les instructions suivantes. - Déconnectez la borne négative de la batterie avant l'installation. - Fixez le câblage avec é en courant du câble est limitée. - Utilisez un fusible correspondant aux caractéristiques spécifiées. - Ne câblez jamais le câble - Pioneer AVH-X2500BT | Owner's Manual - Page 115
aux conducteurs vert et vert/noir. Non utilisé. Vert Violet Vert/noir Violet/noir Caisson de grave (4 Ω) × 2 Connexion Section 25 4 m Microphone (Fonction de l'AVH-X5500BHS/AVH-X4500BT/AVH-X3500BHS/AVH-X2500BT) Entrée microphone (Fonction de l'AVH-X5500BHS/AVH-X4500BT/AVH-X3500BHS/AVH - Pioneer AVH-X2500BT | Owner's Manual - Page 116
de l'entrée AV. La sortie vidéo arrière de cet appareil est prévue pour connecter un écran afin de permettre aux passagers des sièges arrières de regarder des DVD, etc. ATTENTION ! N'installez jamais d'écran arrière dans un endroit où il est visible du conducteur lorsque le véhicule circule. Vers - Pioneer AVH-X2500BT | Owner's Manual - Page 117
déplace vers l'avant ou vers l'arrière. Connexion du syntoniseur SiriusXM en option (Fonction de AVH-X5500BHS/AVH-X3500BHS) Cet appareil Lors de la connexion avec le câble CD-IU201V en option Entrée USB/iPod Cet appareil Entrée SiriusXM BUS Câble SiriusXM BUS (fourni avec le tuner SiriusXM) Tuner - Pioneer AVH-X2500BT | Owner's Manual - Page 118
l'appareil de sorte que les trous des vis soient alignés avec les trous des vis sur le support, puis serrez les vis aux 3 emplacements de chaque côté de l'appareil. ! Lors de l'installation, pour assurer une dispersion correcte de la chaleur quand cet appareil est utilisé, assurez-vous de laisser - Pioneer AVH-X2500BT | Owner's Manual - Page 119
des vis en affleurement (5 mm × 9 mm), selon la forme des trous de vis dans le support. 4 Tableau de bord ou console Installation du microphone (Fonction de AVH-X5500BHS/AVH-X4500BT/ AVH-X3500BHS/AVH-X2500BT) PRÉCAUTION Il est extrêmement dangereux de laisser le fil du microphone s'enrouler autour - Pioneer AVH-X2500BT | Owner's Manual - Page 120
installer Appuyez sur RESET. ( Le disque est sale. Le type de compatible avec vidéo. ce système vidéo. Absence de son. Le volume ne veut pas augmenter. Les câbles ne sont pas connectés correctement. Connectez les câbles correctement. L'appareil est en Il n'y a aucun son mode de lecture en mode - Pioneer AVH-X2500BT | Owner's Manual - Page 121
RESET. (Page 113) ro de code. On ne peut pas changer la langue audio (et la langue des sous-titres). Le DVD en Vous ne pouvez cours de lecture pas choisir parmi ne supporte un signal interdisant la copie. Comme cet appareil est compatible avec le système de protection contre la copie analogique - Pioneer AVH-X2500BT | Owner's Manual - Page 122
les connexions Bluetooth et USB sont utilisées simultanément. Changez la direction de sortie audio sur l'iPod. Audio/Téléphone Bluetooth Symptô Messages d'erreur Quand vous contactez votre distributeur ou le Service d'entretien agréé par Pioneer le plus proche, n'oubliez pas de noter le message - Pioneer AVH-X2500BT | Owner's Manual - Page 123
magnétique SiriusXM est installée sur une surface mé DVD différente Le disque n'a Remplacez le pas le même DVD par un autre numéro de ré- avec le numéro gion que cet ap- de région correct. pareil. (Page de réfé- rence) Error-02-XX/ Le disque est FF-FF sale 9/10. externe (USB) Message - Pioneer AVH-X2500BT | Owner's Manual - Page 124
risé. sur OFF, puis sur ACC ou ON, puis connectez un lec- teur audio por- table USB ou la mémoire USB compatible. 124 Fr Message Causes possibles Action corrective (Page de référence) Error-02-9X/- Panne de DX communica- tion. Effectuez une des opérations suivantes. - Coupez et - Pioneer AVH-X2500BT | Owner's Manual - Page 125
donnée. Il n'est pas possible de les enregistrer plusieurs fois. Bluetooth Message Error-10 Causes possi- Action correc- bles tive Coupure de Mettez le contact courant au ni- sur OFF, puis sur veau du module ACC ou ON. Bluetooth de Si le message cet appareil. d'erreur s'affiche encore - Pioneer AVH-X2500BT | Owner's Manual - Page 126
app. Pandora sur l'appareil. Aucune station trouvée. Créez une station dans l'application Pandora sur votre iPhone Bluetooth tions qui s'affi- trouvé. chent à l'écran. BT error. Press BAND key to retry. Échec de connexion Bluetooth. Suivez les instructions connecté aux haut-parleurs Pioneer - Pioneer AVH-X2500BT | Owner's Manual - Page 127
Bluetooth connecté prend en charge uniquement le téléphone Bluetooth. Indique que l'appareil Bluetooth connecté prend en charge uniquement l'audio Bluetooth reçues. Touchez pour mettre BSM en service. Indique que EQ auto est activé. mode de navigation Musique. Indique quand enregistrer la DB base de - Pioneer AVH-X2500BT | Owner's Manual - Page 128
qu'un téléphone Bluetooth est connecté. DVD. Il n'est pas possible de lire des disques DVD-RAM. Cet appareil n'est pas compatible avec des disques enregistrés au format AVCHD (Advanced Video ou d'accélérateur. Selon les périphériques de stockage USB connectés, du bruit radio peut être généré par le - Pioneer AVH-X2500BT | Owner's Manual - Page 129
portable USB ou la mémoire USB exposé(e) DVD enregistrable pour la vidéo sur l'autre. La lecture de la face DVD est possible avec cet appareil. Cependant, comme la face CD des DualDiscs n'est pas physiquement compatible plus souvent utilisé avec les appareils photo numériques.) La lecture du format - Pioneer AVH-X2500BT | Owner's Manual - Page 130
des fichiers protégés par des droits d'auteur : incompatible Périphérique de stockage externe partitionné (USB) : seule la première partition pouvant être lue sera lue. Les cartes MMC (Multi Media Card) ne sont pas compatibles. PRÉCAUTION ! Pioneer décline toute responsabilité en cas de perte de - Pioneer AVH-X2500BT | Owner's Manual - Page 131
aux manuels de l'iPod. Livre audio, podcast : compatible PRÉCAUTION Pioneer - iPhone 4S - iPhone 4 - iPhone 3GS - iPhone 3G - iPhone Les mettez à jour le firmware de votre iPod. Sé 01 02 1 2 03 3 04 4 5 6 05 Niveau 1 Niveau 2 Niveau 3 Niveau 4 : Dossier : Fichier d'audio compressé 01 - Pioneer AVH-X2500BT | Owner's Manual - Page 132
module 10 Set Profile) ! PBAP (Phone Book Access Profile) ! A2DP (Advanced Audio Distribution Profile) ! AVRCP (Audio/Video Remote Control aux Bluetooth La marque de mot et les logos Bluetoothâ sont des marques déposées appartenant à Bluetooth SIG, Inc. et toute utilisation de ces marques par PIONEER - Pioneer AVH-X2500BT | Owner's Manual - Page 133
sans fil. Androidä Android est une marque commerciale de Google Inc. BlackBerryâ La marque commerciale de BlackBerryâ appartient à Research In Motion Limited. Elle est déposée aux États-Unis d'Amérique et peut être soit en instance soit déposée dans d'autres pays. PIONEER CORPORATION n'est - Pioneer AVH-X2500BT | Owner's Manual - Page 134
Open Source est une marque de certification de l'Open Source Initiative. Glenn Randers-Pehrson glennrp at users.sourceforge.net 6 janvier 2011 134 Fr Tableau des codes de langue pour les DVD Langue (code), code d'entrée Japonais (ja), 1001 Dzonga (dz), 0426 Anglais (en), 0514 Ewé (ee), 0505 - Pioneer AVH-X2500BT | Owner's Manual - Page 135
10,0 A Dimensions (L × H × P) : D Châssis 178 mm × 100 mm × 165 mm Panneau avant ... 171 mm × 97 mm × 18 mm (AVH-X5500BHS/AVH-X4500BT) Panneau avant ... 171 mm × 97 mm × 9 mm (AVH-X3500BHS/AVH-X2500BT/AVHX1500DVD) Poids 2,0 kg (AVH-X5500BHS/AVH-X4500BT) Poids 1,7 kg (AVH-X3500BHS/AVH-X2500BT/AVH - Pioneer AVH-X2500BT | Owner's Manual - Page 136
kHz (10 kHz) Sensibilité utile 25 µV (S/B : 20 dB) Rapport signal/bruit ......... 80 dB (diffusion numérique) (Réseau IHF-A) (AVH-X5500BHS/AVH-X3500BHS) Rapport signal/bruit ......... 62 dB (diffusion analogique) (Réseau IHF-A) Bluetooth (AVH-X5500BHS/AVH-X4500BT/AVH-X3500BHS/AVHX2500BT) Version - Pioneer AVH-X2500BT | Owner's Manual - Page 137
Fr 137 Français - Pioneer AVH-X2500BT | Owner's Manual - Page 138
discos DVD vídeo 141 Acerca de este manual 141 Servicio posventa para productos Pioneer 141 app avanzado 160 Procedimiento de inicio 161 Configuración del teclado 161 Configuración de la mezcla de sonido de la aplicación 161 USB 168 Teléfono Bluetooth Funciones del teléfono Bluetooth 168 Llamada a - Pioneer AVH-X2500BT | Owner's Manual - Page 139
del modo privado 171 Control de voz 171 USB) 201 Compatibilidad con iPod 202 Secuencia de archivos de audio 202 Uso correcto del display 203 Perfiles Bluetooth 203 Licencia, exención de responsabilidad sobre la garantía y limitación de responsabilidad 203 Tabla de códigos de idioma para el DVD - Pioneer AVH-X2500BT | Owner's Manual - Page 140
01 Precauciones Precauciones Gracias por haber adquirido este producto PIONEER. Lea con detenimiento este manual "Queda estrictamente prohibido ver la fuente de video del asiento delantero al conducir." en el de los asientos traseros. ADVERTENCIA NUNCA instale el display trasero en un lugar en - Pioneer AVH-X2500BT | Owner's Manual - Page 141
Sección 01 02 Acerca de esta unidad Acerca de este manual Las frecuencias USB". ! En este manual, se utiliza el término "iPod" para denominar tanto a iPod como a iPhone. Números de región de discos DVD vídeo Este reproductor sólo admite discos DVD vídeo con números de región compatibles - Pioneer AVH-X2500BT | Owner's Manual - Page 142
Pioneer Electronics (USA) Inc. CUSTOMER SUPPORT DIVISION P.O. Box 1760 Long Beach, CA 90801-1760 800-421-1404 CANADÁ Pioneer productos y tecnologías. 3 Descargue manuales de instrucciones, solicite catálogos de limpie completamente el mando a distancia e instale una pila nueva. ! Para desechar las - Pioneer AVH-X2500BT | Owner's Manual - Page 143
manual de instrucciones respectivo. ! Cuando haya conectado un iPhone que esté ejecutando una aplicación compatible con Advanced App Mode, pulse MODE Disc USB/iPod1 Pandora Bluetooth Audio AUX AV SiriusXM Video Audio Apps RearView ON OFF Settings System Theme Favorite Bluetooth 76 - Pioneer AVH-X2500BT | Owner's Manual - Page 144
AVH-X3500BHS) ! Radio - Sintonizador de radio (AVH-X4500BT/AVH-X2500BT/AVH-X1500DVD) ! Disc - Reproductor de DVD y CD incorporado ! USB/iPod - USB/iPod ! Pandora - Pandoraâ internet radio ! Bluetooth Audio - Audio Bluetooth incorpo- rado (AVH-X5500BHS/AVH-X4500BT/AVHX3500BHS/AVH-X2500BT) ! AUX - AUX - Pioneer AVH-X2500BT | Owner's Manual - Page 145
SUBTITLE Operaciones comunes para listas o ajustes de menú. 04 DVD-V 1 JAPNM12:43 01 01 (Función de AVH-X5500BHS/ AVH-X4500BT/AVH-X3500BHS/ AVH-X2500BT) Inicio del menú del teléfono Bluetooth. Para obtener más información, consulte Teléfono Bluetooth en la página 168. Visualización del menú de - Pioneer AVH-X2500BT | Owner's Manual - Page 146
) en la página 179. DVD-V 1 JAPNM12:43 01 01 Uso de la tecla que muestra la vista trasera FULL 00'20'' MENU DMoullbtiycDh 48DkoHlzby16Dbit ) se apaga si se utiliza la función MIXTRAX en el modo de fuente USB. Cambio del modo panorámico Selección de la relación de pantalla adecuada para - Pioneer AVH-X2500BT | Owner's Manual - Page 147
) para visualizar el menú de expulsión. 2 Expulse el disco. Expulsión de un disco. 06 Acerca de las emisoras HD Radioä (Función de AVH-X5500BHS/AVH-X3500BHS) Las emisoras de HD Radio ä ofrecen servicios de audio y datos de alta calidad que las emisoras de FM/AM locales ponen a su disposición. Las - Pioneer AVH-X2500BT | Owner's Manual - Page 148
squeda normal. 5 Tecla local Ajuste del nivel de búsqueda local. 6 Tecla de sintonía Sintonización en sentido ascendente o descendente de forma manual. Mantenga la tecla pulsada durante más de dos segundos para saltarse emisoras. La sintonización por búsqueda comienza en cuanto se suelta la tecla - Pioneer AVH-X2500BT | Owner's Manual - Page 149
normal). ALL-HD 07 Funciones del sintonizador (Función de AVH-X4500BT/AVH-X2500BT/AVHX1500DVD) 5 Tecla de lista Visualización de la Tecla de sintonía Sintonización en sentido ascendente o descendente de forma manual. Mantenga la tecla pulsada durante más de dos segundos para saltarse emisoras - Pioneer AVH-X2500BT | Owner's Manual - Page 150
Sección 07 Sintonizador Sintonizador 2 Mantenga pulsada una de las teclas de ajuste de presintonías para almacenar la frecuencia seleccionada en la memoria. La frecuencia de la emisora de radio seleccionada se ha almacenado en la memoria. 3 Toque la tecla apropiada de ajuste de presintonías para - Pioneer AVH-X2500BT | Owner's Manual - Page 151
AVH-X5500BHS/AVH-X3500BHS) sintonización suele llevar entre 10 y 15 minutos, pero 888 Dolby PLII DB 6 Live -01' 00" c ba 9 87 control de padres Aparece la pantalla Parental Control. 7 Tecla de emisión en directo Volviendo a la emisión en directo actual Funcionamiento básico Sintonización manual - Pioneer AVH-X2500BT | Owner's Manual - Page 152
ón etiquetada se almacena en su iPod. Configuración del control de padres La función Control de padres de SiriusXM le permite controlar el acceso a de un canal bloqueado una segunda vez para desbloquear el canal. Clear All (eliminación de los bloqueos de todos los canales) Puede eliminar a la - Pioneer AVH-X2500BT | Owner's Manual - Page 153
Sintonizador SiriusXM % Toque Clear All para desbloquear todos Una vez establecida la nueva contraseña, se abre la pantalla Control de padres. Nota Si se muestra Revise el sintonizador en su 4 Scanning 5 CH 888 Dolby PLII DB 6 Scan Play Scan Next Scan Esc 123 1 Tecla de reproducción con - Pioneer AVH-X2500BT | Owner's Manual - Page 154
puede utilizar para ver archivos de película DVD/DVD-R/DVD-RW/CD/CD-R/CDRW. Teclas del teclado táctil DVD vídeo 1 2 DVD-V 1 JAN PM 12:43 01 01 FULL 00'20'' MENU DMoullbtiycDh 48DkoHlzby16Dbit TOP MENU Tecla de medio Cambio entre tipos de archivos multimedia para reproducir en DVD/CD/USB. - Pioneer AVH-X2500BT | Owner's Manual - Page 155
DVD en la página 176. ! Si no se muestra el icono de fuente, toque la pantalla para poder visualizarlo. ! Si se muestra el mensaje después de cargar un disco que tenga contenido DivX VOD, toque Play los subtítulos utilizando el menú Ajuste de Video. Para obtener más información, consulte Ajuste del - Pioneer AVH-X2500BT | Owner's Manual - Page 156
disponible una vez detenida la reproducción del disco. ! Esta función no se puede utilizar durante la reproducción de algunos DVD vídeos o vídeos CD con función PBC (control de reproducción). 1 Inicie la función de búsqueda. Consulte Introducción de funciones para películas en la página 154. 2 Toque - Pioneer AVH-X2500BT | Owner's Manual - Page 157
Cuando se reproducen discos de DVD vídeo grabados con audio LPCM ón de un vídeo CD que viene con la función PBC (control de reproducción), no se puede utilizar la función de búsqueda ni toque Play. Se iniciará la reproducción del contenido DivX VOD. # Para saltar al siguiente archivo, toque Next Play. - Pioneer AVH-X2500BT | Owner's Manual - Page 158
Sección 10 iPod iPod Funciones de imágenes en movimiento Se puede utilizar la unidad de iPod (Audio de control) 12 34 5 iPod Abcdefghi Abcdefghi Abcdefghi Abcdefghi 01'17'' d cb 1 JAN PM 12:43 1/9 x 12 All S.Rtrv AAppppr -05'29'' a98 7 6 Audio de iPod (App Mode) FULL fe 1 Título de - Pioneer AVH-X2500BT | Owner's Manual - Page 159
10 el iPod. 1 Cambie el modo de control a App Mode. Consulte Funciones de imágenes en movimiento de 2ª generación - iPhone 4S - iPhone 4 - iPhone 3GS - iPhone 3G - iPhone Tecla de selección aleatoria en el iPod. ROOT VideoPlaylists Movies Music Videos VideoPodcasts TVShows Rentals # Toque el icono si - Pioneer AVH-X2500BT | Owner's Manual - Page 160
app avanzado. - Compruebe las aplicaciones de iPhone compatibles con el Modo app avanzado en http://www.pioneerelectronics.com/ AppRadio Importante ! Cuando utilice esta función, utilice el CD-IU201S (se vende por separado). ! El único puerto compatible con el Modo app avanzado es la entrada USB - Pioneer AVH-X2500BT | Owner's Manual - Page 161
el iPod conectado para abrir una aplica- ción. Procedimiento de inicio 1 Instale la app AppRadio en su iPhone. 2 Ajuste Entrada RGB en iPhone bajo Ajustes del sistema. Cuanto utilice esta función, ajuste la entrada RGB a iPhone. Para más información, consulte Configuración de la entrada RGB en la - Pioneer AVH-X2500BT | Owner's Manual - Page 162
USB FULL 00'20'' a 987 2 6 Tecla de repetición Selección de gama de repetición. 1 JAPNM12:43 01 01 de audio utilizando el menú Ajuste de Video. Para obtener más información, consulte Ajuste del Si los caracteres grabados en el disco no son compatibles con esta unidad, no aparecerán en el display - Pioneer AVH-X2500BT | Owner's Manual - Page 163
la unidad; podría provocar la pérdida de datos de su dispositivo de almacenamiento USB. ! Si cambia a visualización de imagen JPEG o vídeo mientras se está pulse "No". Cuando se termine de guardar, aparecerá "Database save to memory was completed.". Se iniciará el modo Búsqueda de música. 3 Visualice - Pioneer AVH-X2500BT | Owner's Manual - Page 164
1 Mantenga presionado c o d (TRK). ! Puede buscar 10 archivos JPEG a la vez. Si hay menos de 10 archivos, la búsqueda cubrirá el primer o el último archivo puede reproducir una subcarpeta de esa carpeta. ! Si se selecciona una fuente USB, la gama de repetición cambia a All. Selección de ficheros de - Pioneer AVH-X2500BT | Owner's Manual - Page 165
Video Remote Control Profile): puede reproducir, detener la reproducción, seleccionar canciones, etc. ! Como hay diversos reproductores de audio Bluetooth . Consulte el manual de instrucciones de su reproductor, así como este manual, mientras utilice un reproductor de audio Bluetooth con esta unidad - Pioneer AVH-X2500BT | Owner's Manual - Page 166
función solo está disponible si se está reproduciendo un archivo en un dispositivo de almacenamiento USB o una canción en un iPod. ! Esta función no está disponible cuando el modo de control se ajusta a App Mode. ! Según el archivo/canción, es posible que los efectos de sonido no estén disponibles - Pioneer AVH-X2500BT | Owner's Manual - Page 167
deo para automóvil de Pioneer: Conecte un iPod a la entrada USB o un dispositivo Android o BlackBerry que utilice Bluetooth para reproducir Pandora en esta unidad. ! Compatibilidad con iPod y iPhone iPhone de Apple (primera generación), iPhone 3G, iPhone 3GS, iPhone 4, iPhone 4S, iPod touch 1G, iPod - Pioneer AVH-X2500BT | Owner's Manual - Page 168
iPod a la entrada USB con un cable USB utilizando un conector del Dock de iPod o iPhone, o un dispositivo Android o BlackBerry mediante Bluetooth. 2 Cambie la Bluetooth Funciones del teléfono Bluetooth (Función de AVH-X5500BHS/AVH-X4500BT/AVHX3500BHS/AVH-X2500BT) Se puede usar un teléfono Bluetooth. - Pioneer AVH-X2500BT | Owner's Manual - Page 169
éfono. Cambio entre los interlocutores de llamadas en espera. d Tecla de control de voz Notas ! El modo privado sólo se puede utilizar mien- tras con el teléfono móvil. Esto conlleva establecer una conexión inalámbrica Bluetooth entre esta unidad y su teléfono, registrar su teléfono con esta unidad - Pioneer AVH-X2500BT | Owner's Manual - Page 170
Mientras se invierten los nombres, aparece . # Si la inversión, aparece "Error al invertir nombre.". En tal caso, vuelva a intentarlo desde el principio. contactos desde esta unidad no afecta a los datos de su dispositivo Bluetooth. Uso de las listas de llamadas perdidas, recibidas y marcadas Las 80 - Pioneer AVH-X2500BT | Owner's Manual - Page 171
manual de su teléfono móvil para ver más instrucciones. ! Para obtener más detalles sobre los modelos de teléfono móvil que son compatibles que desea ajustar. Video Audio Settings System Theme Favorite Bluetooth 1 Tecla de configuraci Video al seleccionar la fuente Disc o USB. Es 171 Español - Pioneer AVH-X2500BT | Owner's Manual - Page 172
auto. para activar o desactivar el autoecualizador. # No se puede usar esta función si no se ha realizado el ajuste EQ automático. Uso del control central de sonido Mediante esta función se puede crear fácilmente el sonido adecuado para la posición del oyente. 1 Pulse el botón de inicio para cambiar - Pioneer AVH-X2500BT | Owner's Manual - Page 173
Ajustes de audio Ajustes de audio Sección 18 Español 3 Toque Control de Centro Sónico en el menú de funciones de audio. 4 Toque o para seleccionar una posición del oyente. Gama: Left 7 a Right 7 Ajuste de la sonoridad La - Pioneer AVH-X2500BT | Owner's Manual - Page 174
idioma al seleccionar Otros. Consulte Tabla de códigos de idioma para el DVD en la página 206. Ajuste del idioma del audio Se puede definir de configuración de vídeo. 3 Toque Menú de Lenguaje en el menú Ajuste de Video. Se visualiza un menú de idiomas de menús. 4 Toque el idioma deseado. El idioma - Pioneer AVH-X2500BT | Owner's Manual - Page 175
10 segundos ! 15sec - Las imágenes JPEG cambian en intervalos de 15 segundos ! Manual - Las imágenes JPEG pueden cambiarse manualmente Ajuste del control de padres Algunos discos de DVD vídeo permiten utilizar el control control de padres está definido. En caso de olvidar el código % Pulse RESET Video - Pioneer AVH-X2500BT | Owner's Manual - Page 176
Video. Aparece Código de Registro y Código de Desactivación. 5 Toque OK. La cancelación se completa. Reproducción automática de DVD Cuando se introduce un disco DVD que viene con un menú DVD para activar iPhone o NAV. Nota Si está utilizando el modo App avanzado, seleccione iPhone. Configuración de - Pioneer AVH-X2500BT | Owner's Manual - Page 177
ón de Ajuste de Imagen para el Modo App avanzado cuando la configuración de la entrada RGB se ajusta a iPhone. 5 Toque c o d para ajustar el - Menú del sistema - Menú de configuración de vídeo - Menú de Bluetooth - Visualización en pantalla (Solo inglés y ruso) - Configuración de idiomas múltiples - Pioneer AVH-X2500BT | Owner's Manual - Page 178
disponible en el Modo app avanzado. Consulte Configuración Bluetooth (Función de AVH-X5500BHS/AVH-X4500BT/AVHX3500BHS/AVH-X2500BT) Es necesario activar la fuente Bluetooth Audio para utilizar un reproductor de audio Bluetooth la actualización del software de bluetooth, siga las instrucciones en - Pioneer AVH-X2500BT | Owner's Manual - Page 179
Bluetooth de esta unidad. Ajuste de la cámara retrovisora (cámara posterior) PRECAUCIÓN Pioneer genes de la cámara retrovisora por error mientras está avanzando. ! Para un amplificador de potencia con control de nivel de entrada, es Para los modelos AVH-X3500BHS, AVHX2500BT o AVH-X1500DVD, conecte - Pioneer AVH-X2500BT | Owner's Manual - Page 180
ajuste. AVH-X3500BHS, AVH-X2500BT y AVH- X1500DVD AUX (AUX) (Panel posterior) error (consulte Comprensión de los mensajes de error Camera - Ajusta la señal de vídeo de la cámara retrovisora 4 Toque c o d para seleccionar la señal de vídeo deseada. Automático-PAL-NTSC-PAL-M-PAL-N- SECAM 10 - Pioneer AVH-X2500BT | Owner's Manual - Page 181
el menú Ajuste de Video. 2 Toque el icono Bluetooth Sección 21 22 Funciones del menú de conexión Bluetooth (Función de AVH-X5500BHS/AVH-X4500BT/AVHX3500BHS/AVH Bluetooth. # Para cancelar la búsqueda, toque Stop su dispositivo es compatible con SSP ( la conexión falla, aparece Error. En tal caso, - Pioneer AVH-X2500BT | Owner's Manual - Page 182
de unos metros de distancia entre sí. El ajuste inicial de esta función es activado. Para conectar su dispositivo Bluetooth a esta unidad a través de tecnología inalámbrica Bluetooth, debe introducir el código PIN en su teléfono para verificar la conexión. El código predefinido es 0000, aunque - Pioneer AVH-X2500BT | Owner's Manual - Page 183
Si el panel táctil no puede ajustarse correctamente, consulte a su concesionario local Pioneer. 4 Pulse el botón de inicio para completar el ajuste de 4 desactivación de la fuente en la página 144. Uso de una fuente AUX En esta unidad se puede conectar un dispositivo auxiliar o un dispositivo port - Pioneer AVH-X2500BT | Owner's Manual - Page 184
AUX en esta unidad. Consulte Conexión en la página 186. Reinicio del microprocesador Al pulsar RESET deben respetarse y no deben usarse las funciones de DVD de esta unidad. PRECAUCIÓN ! No haya un El cable negro es el cable a tierra. Cuando instale esta unidad o el amplificador de potencia (vendido - Pioneer AVH-X2500BT | Owner's Manual - Page 185
los altavoces directamente a tierra. - Nunca empalme los cables negativos de varios altavoces. ! Cuando se enciende esta unidad, se emite una señal de control a través del cable azul/ blanco. Conecte este cable al mando a distancia del sistema de un amplificador de potencia externo o al terminal de - Pioneer AVH-X2500BT | Owner's Manual - Page 186
Fusible (10 A) Toma AUX (3,5 ø) AVH-X5500BHS/AVH-X4500BT/AVH-X3500BHS/AVH-X2500BT) Entrada micrófono (Función de AVH-X5500BHS/AVH-X4500BT/AVH-X3500BHS/AVH-X2500BT) Entrada remota cableada Se puede conectar el adaptador de control Para conocer detalles, consulte el manual del propietario del vehículo - Pioneer AVH-X2500BT | Owner's Manual - Page 187
de control de sistema del amplificador de potencia o al terminal de control de relé de antena automática (máx. 300 mA 12 V cc). Control display que permita a los pasajeros de los asientos traseros ver un DVD, etc. ADVERTENCIA ! No instale jamás un display trasero en una ubi- cación que sea visible - Pioneer AVH-X2500BT | Owner's Manual - Page 188
á se moviendo hacia delante o hacia atrás. Conexión Conexión del sintonizador opcional SiriusXM (Función de AVH-X5500BHS/AVH-X3500BHS) Este producto Conexión con un cable CDIU201V opcional Entrada USB/iPod Este producto Entrada SiriusXM BUS Cable SiriusXM BUS (suministrado con el sintonizador de - Pioneer AVH-X2500BT | Owner's Manual - Page 189
Conector del Dock 1,5 m Cable USB (Suministrado con esta unidad) Se conecta a dispositivos USB vendidos por separado. Cable de un frenazo brusco. ! El láser semiconductor se dañará si se sobrecalienta. Instale esta unidad alejada de zonas que alcancen altas temperaturas, como cerca de la salida - Pioneer AVH-X2500BT | Owner's Manual - Page 190
-X4500BT/AVHX3500BHS/AVH-X2500BT) PRECAUCIÓN Es muy peligroso que el cable del micrófono se enrolle alrededor de la columna de dirección o la palanca de cambios. Asegúrese de instalar la unidad de tal forma que no dificulte la conducción. Nota Instale el micrófono en una posición y orientación que - Pioneer AVH-X2500BT | Owner's Manual - Page 191
un fusible del mismo régimen. El microproce- Pulse RESET. (Pásador incorpora- gina 184) do funciona de manera del mando a dis- tancia. Instale una batería nueva. Intente utilizar La operación no Esta operación no nar la unidad. es compatible es posible. con la configu- ración del disco. La - Pioneer AVH-X2500BT | Owner's Manual - Page 192
en el menú Ajuste de Video. 192 Es Síntoma Causa Resolución (Página de referencia) El ángulo de visión no se puede cambiar. El DVD que se está reproduciendo no automáticamente cuando las conexiones de Bluetooth y USB se utilicen a la vez. Utilice el iPod para cambiar la dirección de salida de - Pioneer AVH-X2500BT | Owner's Manual - Page 193
Bluetooth entre móvil conec- esta unidad y el tado por teléfono móvil. Bluetooth error Anote el mensaje de error antes de contactar con su concesionario o con el servicio técnico oficial de Pioneer más cercano. Comunes Mensaje Error emisotrol de padres. ras. DVD Mensaje Causa Resolución (Pá - Pioneer AVH-X2500BT | Owner's Manual - Page 194
Pulse RESET. (Páun error el este video ha sido USB incompatible Causa Resolución (Pá USB/ Windows Media memoria USB DRM 9/10 al re- conectado productor de están protegi- audio portátil dos con USB/memoria Windows Media USB y conéctelo. DRM 9/10. El dispositivo USB conectado no es compatible - Pioneer AVH-X2500BT | Owner's Manual - Page 195
reproductor de audio portátil USB/memoria USB compatible. Mensaje Causa Resolución (Página de referencia) Error-02-9X/- Error de comu- DX nicación. - nido. ducción y la emisión del sonido. Tasa de cuadros de video no es soportada La velocidad de cuadros del archivo DivX es superior a 30 - Pioneer AVH-X2500BT | Owner's Manual - Page 196
Ya ha sido guardado. Bluetooth Mensaje Error-10 Causa Resolución Esta Pioneer. Pandoraâ Mensaje Causa Resolución Error-19 Error compatible. tible. Conecte un iPhone que tenga instalada una versión compatible de Pandora. Mensaje Causa Resolución Revisar dispositivo Mensaje de error - Pioneer AVH-X2500BT | Owner's Manual - Page 197
ha perdido la conexión Bluetooth. Siga las instrucciones que aparecen en la pantalla. Comprensión de los mensajes de error del ajuste EQ automático indicadores Mensajes Imagen en pantalla puede aparecer al revés Traducción Pioneer recomienda utilizar una cámara que genere imágenes invertidas de - Pioneer AVH-X2500BT | Owner's Manual - Page 198
de potencia de la batería. Información adicional Indica que el dispositivo Bluetooth conectado solo es compatible con teléfonos Bluetooth. Indica que el dispositivo Bluetooth conectado solo es compatible con audio Bluetooth. Muestra el título del álbum cuando se recibe información de etiqueta - Pioneer AVH-X2500BT | Owner's Manual - Page 199
hay un teléfono Bluetooth conectado. Utilice discos de DVD vídeo. Es posible que no se puedan reproducir algunos discos DVD vídeo. No se pueden reproducir discos DVD-RAM. Esta unidad no es compatible USB) Se pueden producir los siguientes problemas según el dispositivo de almacenamiento externo (USB - Pioneer AVH-X2500BT | Owner's Manual - Page 200
el reproductor de audio portátil USB/memoria USB expuestos a la luz solar directa el texto incompatible guardado en el iPod. Discos DVD-R/RW No se pueden reproducir discos DVD-R/-RW grabados compresión de imágenes fijas. Los archivos son compatibles con Baseline JPEG y EXIF 2.1, resolución de imagen - Pioneer AVH-X2500BT | Owner's Manual - Page 201
), 22,05 kHz y 44,1 kHz (MS ADPCM) Compatibilidad con audio comprimido (disco, USB) WMA Extensión de archivo: .wma Velocidad de grabación: 48 kbps a 320 kbps ( 1.02 (DVD-R/RW) Reproducción multisesión: compatible Transferencia de datos en formato Packet Write: no compatible Independientemente de la - Pioneer AVH-X2500BT | Owner's Manual - Page 202
para el cable USB. Consulte con su concesionario antes de usar el cable de interfaz Pioneer CD-IU51V/CD-IU201V. Si desea más información sobre la compatibilidad de archivos y formatos, consulte los manuales del iPod. Audiolibro, podcast: compatible PRECAUCIÓN Pioneer no asume ninguna responsabilidad - Pioneer AVH-X2500BT | Owner's Manual - Page 203
de PIONEER más 10 Bluetooth Para utilizar la tecnología inalámbrica Bluetooth, los dispositivos deben ser capaces de interpretar ciertos perfiles. Esta unidad es compatible Set Profile) ! PBAP (Phone Book Access Profile) ! A2DP (Advanced Audio Distribution Profile) ! AVRCP (Audio/Video Remote Control - Pioneer AVH-X2500BT | Owner's Manual - Page 204
La marca literal y los logotipos Bluetoothâ son marcas registradas propiedad de Bluetooth SIG, Inc., y cualquier uso de dichas marcas por PIONEER CORPORATION se hace bajo licencia. Otras marcas y nombres comerciales son propiedad de sus respectivos propietarios. DVD vídeo es una marca comercial de - Pioneer AVH-X2500BT | Owner's Manual - Page 205
formato PNG, por supuesto) se incluye en los archivos "pngbar.png" y "pngbar.jpg" (88 × 31) y en el archivo "pngnow.png" (98 × 31). Libpng es software de código abierto certificado por OSI. La certificación OSI Certified Open Source la concede Open Source Initiative. Glenn Randers-Pehrson glennrp at - Pioneer AVH-X2500BT | Owner's Manual - Page 206
Apéndice Información adicional Información adicional Tabla de códigos de idioma para el DVD Idioma (código), código de entrada Japonés (ja), 1001 Dzongkha (dz), 0426 Inglés (en), 0514 Ewe (ee), 0505 Francés (fr), 0618 Esperanto (eo), 0515 Español ( - Pioneer AVH-X2500BT | Owner's Manual - Page 207
ancho/16:9 (área efectiva de visualización: 136,2 mm × 72,0 mm) (AVH-X3500BHS/AVH-X2500BT/AVH-X1500DVD) Píxeles 1 152 000 (2 400 × 480) Método de visualización ... Matriz activa TFT, tipo transmi- sivo Sistema de color Compatible con NTSC/PAL/ PAL-M/PAL-N/SECAM Gama de temperatura de resistencia - Pioneer AVH-X2500BT | Owner's Manual - Page 208
señal a ruido 80 dB (emisión digital) (red IHF-A) (AVH-X5500BHS/AVH-X3500BHS) Relación de señal a ruido 62 dB (emisión analógica) (red IHF-A) Bluetooth (AVH-X5500BHS/AVH-X4500BT/AVH-X3500BHS/AVHX2500BT) Versión Certificada para Bluetooth 3.0 Potencia de salida Máxima +4 dBm (Clase de potencia - Pioneer AVH-X2500BT | Owner's Manual - Page 209
Es 209 Español - Pioneer AVH-X2500BT | Owner's Manual - Page 210
210 Es - Pioneer AVH-X2500BT | Owner's Manual - Page 211
Es 211 Español - Pioneer AVH-X2500BT | Owner's Manual - Page 212
570.05.11 PIONEER ELECTRONICS ASIACENTRE PTE. LTD. 253 Alexandra Road, #04-01, Singapore 159936 TEL: 65-6472-7555 PIONEER ELECTRONICS AUSTRALIA PTY 1-877-283-5901 TEL: 905-479-4411 PIONEER ELECTRONICS DE MEXICO, S.A. de C.V. Blvd.Manuel Avila Camacho 138 10 piso Col.Lomas de Chapultepec, Mexico, D.F.
-
 1
1 -
 2
2 -
 3
3 -
 4
4 -
 5
5 -
 6
6 -
 7
7 -
8
-
9
-
10
-
11
-
12
-
13
-
14
-
15
-
16
-
17
-
18
-
19
-
20
-
21
-
22
-
23
-
24
-
25
-
26
-
27
-
28
-
29
-
30
-
31
-
32
-
33
-
34
-
35
-
36
-
37
-
38
-
39
-
40
-
41
-
42
-
43
-
44
-
45
-
46
-
47
-
48
-
49
-
50
-
51
-
52
-
53
-
54
-
55
-
56
-
57
-
58
-
59
-
60
-
61
-
62
-
63
-
64
-
65
-
66
-
67
-
68
-
69
-
70
-
71
-
72
-
73
-
74
-
75
-
76
-
77
-
78
-
79
-
80
-
81
-
82
-
83
-
84
-
85
-
86
-
87
-
88
-
89
-
90
-
91
-
92
-
93
-
94
-
95
-
96
-
97
-
98
-
99
-
100
-
101
-
102
-
103
-
104
-
105
-
106
-
107
-
108
-
109
-
110
-
111
-
112
-
113
-
114
-
115
-
116
-
117
-
118
-
119
-
120
-
121
-
122
-
123
-
124
-
125
-
126
-
127
-
128
-
129
-
130
-
131
-
132
-
133
-
134
-
135
-
136
-
137
-
138
-
139
-
140
-
141
-
142
-
143
-
144
-
145
-
146
-
147
-
148
-
149
-
150
-
151
-
152
-
153
-
154
-
155
-
156
-
157
-
158
-
159
-
160
-
161
-
162
-
163
-
164
-
165
-
166
-
167
-
168
-
169
-
170
-
171
-
172
-
173
-
174
-
175
-
176
-
177
-
178
-
179
-
180
-
181
-
182
-
183
-
184
-
185
-
186
-
187
-
188
-
189
-
190
-
191
-
192
-
193
-
194
-
195
-
196
-
197
-
198
-
199
-
200
-
201
-
202
-
203
-
204
-
205
-
206
-
207
-
208
-
209
-
210
-
211
-
212
 |
 |

Owner
’
s Manual
Mode d
’
emploi
Manual de instrucciones
DVD RDS AV RECEIVER
AUTORADIO AV RDS LECTEUR DE DVD
RADIO AV RDS CON DVD
AVH-X5500BHS
AVH-X4500BT
AVH-X3500BHS
AVH-X2500BT
AVH-X1500DVD
English
Español
Français