Pioneer BDP-94HD Owner's Manual - Page 11
Connecting up - manual
 |
View all Pioneer BDP-94HD manuals
Add to My Manuals
Save this manual to your list of manuals |
Page 11 highlights
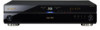
Connecting up 02 Chapter 2 Connecting up Rear panel 1 23 4 5 6 7 89 AC IN CONTROL IN IR IN SETTING 2 SETTING 1 IR RECEIVER HDMI OUT LAN(10/100) VIDEO OUT S Y PB PR COMPONENT VIDEO OUT DIGITAL AUDIO OUT COAXIAL OPTICAL AUDIO OUT (5.1ch) CENTER SURROUND FRONT L AUDIO OUT (2ch) L R R SUB WOOFER 10 11 1 AC IN Connect the supplied power cord here, then plug into a power outlet. 2 CONTROL IN Use to control this player from the remote sensor of another Pioneer component with a CONTROL OUT terminal and bearing the mark. Connect the CONTROL OUT of the other component to the CONTROL IN of this player using a mini-plug cord (page 16). 3 HDMI OUT HDMI output providing a high quality interface for digital audio and video (page 13). 4 LAN (10/100) Ethernet port for 10BASE-T (10 Mbps) or 100BASE-TX (100 Mbps) network connection (page 16). 5 VIDEO OUT and S-VIDEO OUT Video output (composite) that you can connect to your TV or AV receiver using the supplied video cable (page 12). S-Video output that you can use instead of the VIDEO OUT jacks (page 15). 6 COMPONENT VIDEO OUT High quality video output for connection to a TV, monitor or AV receiver that has component video inputs. Connect using a commercially available three-way component video cable (page 14). 7 DIGITAL AUDIO OUT - COAXIAL/OPTICAL Digital audio outputs for connection to a PCM, Dolby Digital, and/or DTS-compatible AV receiver (page 15). 8 AUDIO OUT (5.1ch) Multi-channel (5.1ch) analog audio outputs for connection to an AV receiver with multi-channel analog audio inputs (page 15). 9 AUDIO OUT (2ch) Stereo analog audio outputs for connection to your TV, AV receiver or stereo system (page 12). 10 IR IN Jack for an external IR (infrared) remote control receiver (page 16). 11 IR RECEIVER switch Switch to the setting compatible with your external IR remote control receiver (page 16). Tip • When connecting this player to your TV, AV receiver or other equipment, make sure that all components are switched off and unplugged. • You may find it useful to have the manuals supplied with your other components handy when connecting this player. 11 En
-
 1
1 -
2
-
3
-
4
-
5
-
 6
6 -
 7
7 -
 8
8 -
 9
9 -
 10
10 -
 11
11 -
 12
12 -
 13
13 -
 14
14 -
 15
15 -
 16
16 -
17
-
18
-
19
-
20
-
21
-
22
-
23
-
24
-
25
-
26
-
27
-
28
-
29
-
30
-
31
-
32
-
33
-
34
-
35
-
36
-
37
-
38
-
39
-
40
-
41
-
42
-
43
-
44
-
45
-
46
-
47
-
48
-
49
-
50
-
51
-
52
-
53
-
54
-
55
-
56
-
57
-
58
-
59
-
60
-
61
-
62
-
63
-
64
-
65
-
66
-
67
 |
 |
