Pioneer DEH 1900MP Owner's Manual - Page 7
Operating this unit - remote
 |
UPC - 012562840390
View all Pioneer DEH 1900MP manuals
Add to My Manuals
Save this manual to your list of manuals |
Page 7 highlights
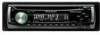
Operating this unit Section 02 English Remote control LCD display f 1 2 e g 6 7 5 1 i h Operation is the same as when using the buttons on the head unit. See the explanation of the head unit about the operation of each button with the exception of ATT, which is explained below. f VOLUME button Press to increase or decrease the volume. g ATT button Press to quickly lower the volume level, by about 90%. Press once more to return to the original volume level. h PAUSE button Press to turn pause on or off. i DISPLAY button Not used. 3 4 5 67 1 Main display section Shows the various information such as band, play time, and other setting. ! Tuner Band and frequency are displayed. ! Built-in CD Player (Audio CD) Erapsed play time is displayed. ! Built-in CD Player (WMA/MP3/WAV disc) Folder number and erapsed play time are displayed. ! Audio and initial setup Function names and setup status are displayed. 2 Preset number/track number indicator Shows the track number or preset number. ! If a track number 100 or more is selected, d on the left of the track number indicator will light. 3 MP3/WMA indicator Shows the type of the currently playing disc. 4 RPT indicator Shows when repeat play is turned on. 5 LOUD indicator Appears in the display when loudness is turned on. 6 Stereo (5) indicator Shows when the selected frequency is being broadcast in stereo. 7 LOC indicator Shows when local seek tuning is on. En 7
-
 1
1 -
 2
2 -
 3
3 -
 4
4 -
 5
5 -
 6
6 -
 7
7 -
 8
8 -
 9
9 -
 10
10 -
 11
11 -
 12
12 -
13
-
14
-
15
-
16
-
17
-
18
-
19
-
20
-
21
-
22
-
23
-
24
-
25
-
26
-
27
-
28
-
29
-
30
-
31
-
32
-
33
-
34
-
35
-
36
-
37
-
38
-
39
-
40
-
41
-
42
-
43
-
44
-
45
-
46
-
47
-
48
-
49
-
50
-
51
-
52
 |
 |
